
Classic Double-Crust Apple Pie: No Gap Under the Top Crust
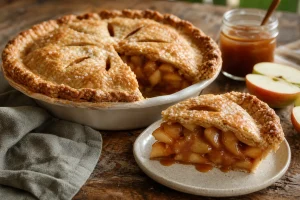
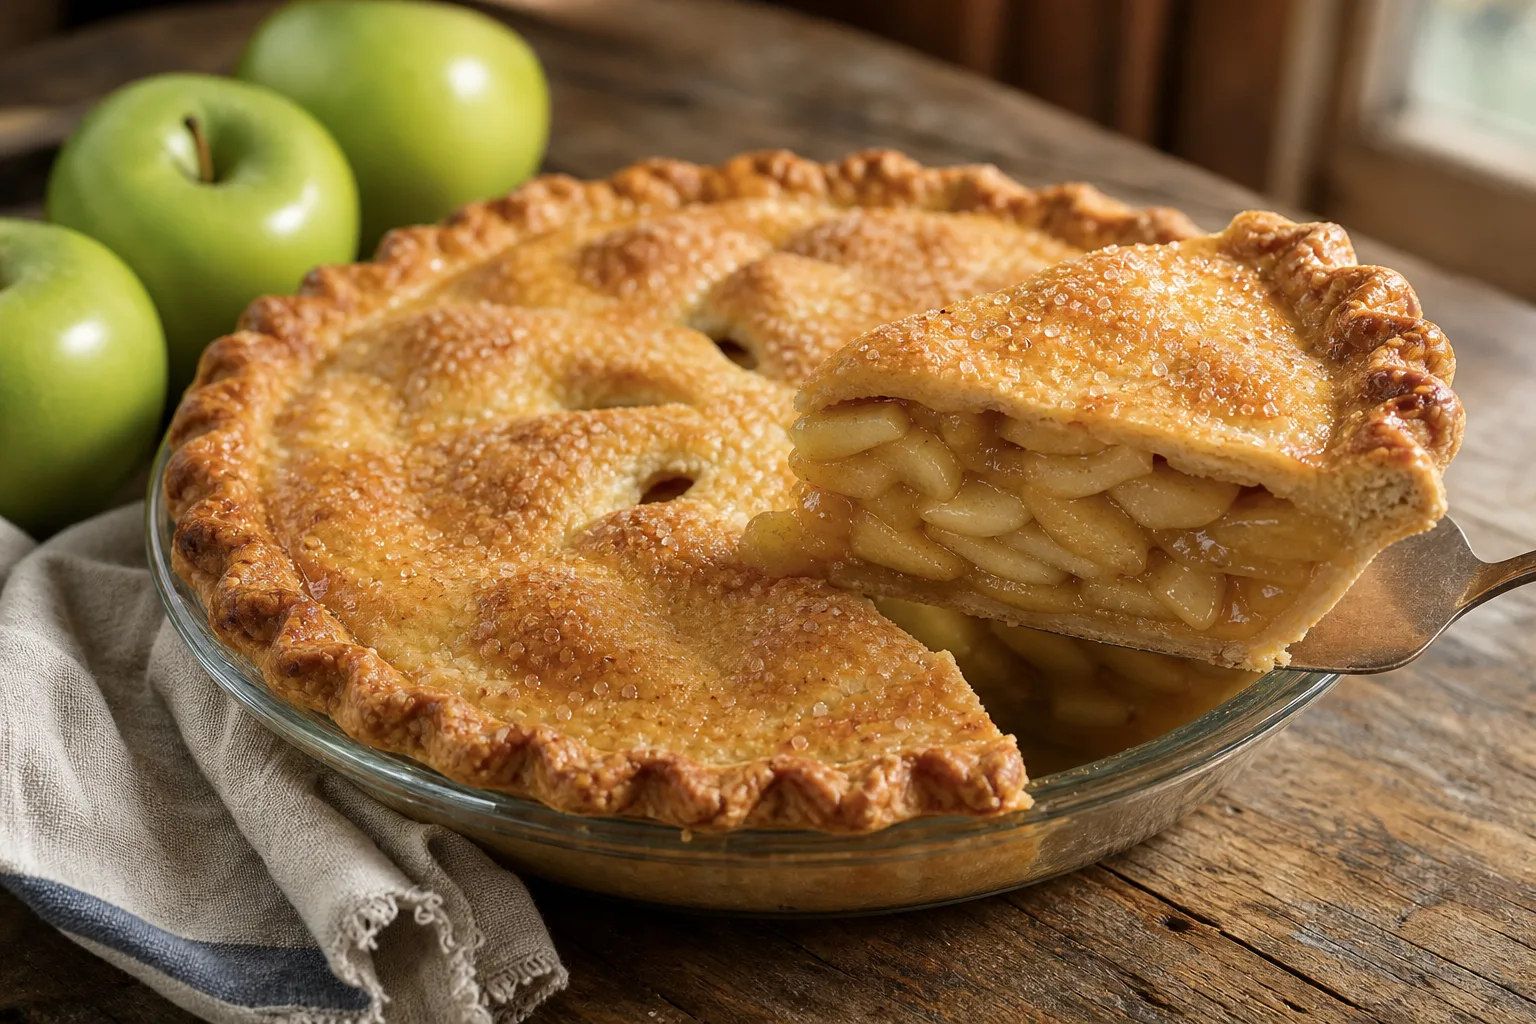
Classic double-crust apple pie where the apples are cooked down first, so the top crust sits right on the filling instead of floating over a hollow.
Ingredients
- 2 1/2 cups all-purpose flour, plus more for rolling
- 1 tablespoon granulated sugar
- 1 teaspoon fine salt
- 1 cup (2 sticks) cold unsalted butter, cut into 1/2-inch cubes
- 6 to 8 tablespoons ice water
- 3 1/2 pounds firm apples (about 8 medium), a mix of Granny Smith and Honeycrisp
- 2 tablespoons unsalted butter
- 1/2 cup granulated sugar
- 1/4 cup light brown sugar, packed
- 3 tablespoons cornstarch
- 1 1/2 teaspoons ground cinnamon
- 1/4 teaspoon freshly grated nutmeg
- 1/2 teaspoon fine salt
- 1 tablespoon fresh lemon juice
- 1 teaspoon vanilla extract
- 1 large egg beaten with 1 tablespoon milk, for egg wash
- 1 tablespoon coarse sugar
Instructions
- Make the dough. Whisk the flour, sugar and salt in a large bowl. Work in the cold butter with your fingertips or a pastry cutter until the biggest pieces are the size of peas. Sprinkle in 6 tablespoons of ice water and toss with a fork. Squeeze a handful; if it holds together, it is ready. If it crumbles, add more water 1 tablespoon at a time. Divide into two discs, wrap, and chill at least 1 hour.
- Prep the apples while the dough chills. Peel, core and slice the apples about 1/4 inch thick. Cut them as evenly as you can, because uneven slices cook unevenly in the skillet. Toss them in a large bowl with the lemon juice.
- Cook the apples down. Melt the 2 tablespoons butter in a 12-inch skillet over medium heat. Add half the apples, the granulated sugar, brown sugar, cinnamon, nutmeg and salt. Cook, stirring often, for 6 to 8 minutes. You want the slices to lose their rigidity and give off their juice but still hold their shape. They should bend without snapping, and the volume in the pan should have dropped by about a third. Add the remaining apples and cook 3 to 4 minutes more, just until they begin to soften at the edges.
- Thicken the juices. Whisk the cornstarch into 3 tablespoons of cold water and stir it into the skillet. Cook 1 to 2 minutes, until the juices turn glossy and clingy. Remove from the heat and stir in the vanilla.
- Cool completely. Spread the apples and every drop of their syrup on a rimmed baking sheet and let them cool to room temperature, about 30 minutes, or refrigerate for 15 minutes to speed it up. Do not fill the shell with warm apples; they will melt the butter in the dough and the bottom crust will turn pasty.
- Roll out the bottom crust. Heat the oven to 425°F with a rack in the lower third and a rimmed baking sheet on it. Roll one disc on a floured surface to a 13-inch round and ease it into a 9-inch pie plate. Leave the overhang. Pile in the cooled filling, mounding it a little in the center, and pour over any syrup left on the sheet.
- Add the top crust. Roll the second disc to a 12-inch round and drape it over the filling. Trim the overhang to 1 inch, fold it under the bottom crust's edge, and crimp. Brush with the egg wash, sprinkle with coarse sugar, and cut 5 or 6 slits in the top for steam.
- Bake. Set the pie on the preheated baking sheet and bake at 425°F for 20 minutes. Reduce the heat to 375°F and bake 35 to 40 minutes more, until the crust is deep golden brown and the juices are bubbling thickly through the slits. If the edge browns too fast, tent it with foil.
- Cool for 3 to 4 hours before slicing. The cornstarch finishes setting as the pie cools, and a pie cut at 30 minutes will run. Be patient, and it will hold a clean slice.
Notes
- You need about 3 1/2 pounds of whole apples, which is roughly 8 medium, to yield 8 cups of sliced fruit. The dough makes two 9-inch crusts. Use a standard 9-inch pie plate about 1 1/2 inches deep.
The first apple pie I was proud of looked spectacular coming out of the oven. The top crust was tall, golden and domed like a bakery window display. Then I cut into it and found a hollow cave, a good inch and a half of empty air between the crust and the apples, which had slumped sadly to the bottom of the pan. The crust shattered into shards over nothing.
I made that pie the same way four more times, tweaking the crust and the sugar and the oven temperature, before I finally understood that none of those were the problem. The gap is made by the apples. Raw apples are about 25 percent air by volume, and they are full of water held inside cell walls. In the oven, the crust sets within the first 20 minutes or so, long before the apples have finished collapsing. The apples keep shrinking after the lid is already rigid, and what is left behind is that cave.
The fix is almost embarrassingly simple: let the apples do their shrinking in a skillet instead of inside the pie. You cook them down for a few minutes, cool them, and then fill the shell. The top crust gets draped over filling that is already the size it is going to stay. This recipe is built entirely around that one move, and it is the reason the slice comes out of the pan standing up straight.
Why This Works
Raw apple slices hold a lot of air and a lot of water, and they release both only as they heat and their cell walls break down. A top crust sets in the first 20 minutes of baking, while the apples are still bulky, then the apples shrink away from the lid and leave a hollow. Cooking the slices briefly in a skillet collapses that structure ahead of time, so the apples are already at their final volume when you fill the shell. Whatever you pile into the pie is what you will cut.
Ingredients
You need about 3 1/2 pounds of whole apples, which is roughly 8 medium, to yield 8 cups of sliced fruit. The dough makes two 9-inch crusts. Use a standard 9-inch pie plate about 1 1/2 inches deep.
For the Crust
- 2 1/2 cups all-purpose flour, plus more for rolling
- 1 tablespoon granulated sugar
- 1 teaspoon fine salt
- 1 cup (2 sticks) cold unsalted butter, cut into 1/2-inch cubes
- 6 to 8 tablespoons ice water
For the Filling
- 3 1/2 pounds firm apples (about 8 medium), a mix of Granny Smith and Honeycrisp
- 2 tablespoons unsalted butter
- 1/2 cup granulated sugar
- 1/4 cup light brown sugar, packed
- 3 tablespoons cornstarch
- 1 1/2 teaspoons ground cinnamon
- 1/4 teaspoon freshly grated nutmeg
- 1/2 teaspoon fine salt
- 1 tablespoon fresh lemon juice
- 1 teaspoon vanilla extract
To Finish
- 1 large egg beaten with 1 tablespoon milk, for egg wash
- 1 tablespoon coarse sugar
Easy Swap
Replace the cornstarch with 1/4 cup all-purpose flour if that is what you have. The juices will be slightly more opaque and a little less glossy, but the pie will still set. Cook the flour in the skillet for a full 2 minutes so it loses its raw taste.
How to Make It
Prep: 50 minutes | Bake: 60 minutes | Cool or chill: 3 hours | Serves: 8 slices
- Make the dough. Whisk the flour, sugar and salt in a large bowl. Work in the cold butter with your fingertips or a pastry cutter until the biggest pieces are the size of peas. Sprinkle in 6 tablespoons of ice water and toss with a fork. Squeeze a handful; if it holds together, it is ready. If it crumbles, add more water 1 tablespoon at a time. Divide into two discs, wrap, and chill at least 1 hour.
- Prep the apples while the dough chills. Peel, core and slice the apples about 1/4 inch thick. Cut them as evenly as you can, because uneven slices cook unevenly in the skillet. Toss them in a large bowl with the lemon juice.
- Cook the apples down. Melt the 2 tablespoons butter in a 12-inch skillet over medium heat. Add half the apples, the granulated sugar, brown sugar, cinnamon, nutmeg and salt. Cook, stirring often, for 6 to 8 minutes. You want the slices to lose their rigidity and give off their juice but still hold their shape. They should bend without snapping, and the volume in the pan should have dropped by about a third. Add the remaining apples and cook 3 to 4 minutes more, just until they begin to soften at the edges.
- Thicken the juices. Whisk the cornstarch into 3 tablespoons of cold water and stir it into the skillet. Cook 1 to 2 minutes, until the juices turn glossy and clingy. Remove from the heat and stir in the vanilla.
- Cool completely. Spread the apples and every drop of their syrup on a rimmed baking sheet and let them cool to room temperature, about 30 minutes, or refrigerate for 15 minutes to speed it up. Do not fill the shell with warm apples; they will melt the butter in the dough and the bottom crust will turn pasty.
- Roll out the bottom crust. Heat the oven to 425°F with a rack in the lower third and a rimmed baking sheet on it. Roll one disc on a floured surface to a 13-inch round and ease it into a 9-inch pie plate. Leave the overhang. Pile in the cooled filling, mounding it a little in the center, and pour over any syrup left on the sheet.
- Add the top crust. Roll the second disc to a 12-inch round and drape it over the filling. Trim the overhang to 1 inch, fold it under the bottom crust’s edge, and crimp. Brush with the egg wash, sprinkle with coarse sugar, and cut 5 or 6 slits in the top for steam.
- Bake. Set the pie on the preheated baking sheet and bake at 425°F for 20 minutes. Reduce the heat to 375°F and bake 35 to 40 minutes more, until the crust is deep golden brown and the juices are bubbling thickly through the slits. If the edge browns too fast, tent it with foil.
- Cool for 3 to 4 hours before slicing. The cornstarch finishes setting as the pie cools, and a pie cut at 30 minutes will run. Be patient, and it will hold a clean slice.
Don’t Do This
Do not skip the cooling step. Hot apples poured into a cold shell melt the butter in the bottom crust and steam it from underneath, so you end up with a pale, gummy base. Wait until the filling is at room temperature, even if it takes 30 minutes.
Can You Make This Pie Ahead?
Not Fully — Here Is What You Can Prep
The whole pie does not do well assembled and then waited on, but every component stages beautifully. Make the dough up to 3 days ahead, cook and cool the apples a day ahead, and bake the pie the day you want to serve it.
The dough keeps well in the refrigerator for 3 days, wrapped tightly, or in the freezer for 2 months. Thaw frozen dough overnight in the refrigerator before rolling. The cooked apple filling holds in an airtight container in the refrigerator for up to 2 days. Because it is already cooked and thickened, it does not get watery sitting overnight, which is one of the quiet benefits of this method.
Do not assemble the pie and refrigerate it unbaked for more than an hour or two. The moist filling soaks into the bottom crust and you lose the crispness you worked for. Assemble just before baking, with the filling fully chilled.
Baked pie keeps at room temperature, loosely covered, for the first day and in the refrigerator for up to 3 more. Reheat slices or the whole pie at 350°F for 15 to 20 minutes to bring back the crust. Freezing the baked pie works but softens the crust noticeably, so I only do it when I have to.
Why the Gap Appears (and Why Crust Tweaks Don’t Fix It)
When I started chasing this problem, I did what everyone does: I blamed the crust. I made it thicker, then thinner. I brushed the filling with egg white, lowered the oven, raised the oven. The gap shrank by a quarter inch or grew by a quarter inch, but it never went away, because I was adjusting the wrong half of the pie.
Here is the timeline of what happens in a raw-apple pie. Within the first 15 to 20 minutes at 425°F, the top crust loses its water to the oven and sets into a rigid dome, and the dome is shaped around apples that are still at full volume. From there, the apples begin to heat through, release their juices, and compact. Over the next 30 or 40 minutes, a pile that reached the crust loses a third of its height. The lid does not follow it down, because it is already baked hard. That space is air.
This also explains why the gap gets worse when you pack the pie with more apples. A bigger raw pile means a bigger collapse. People often respond by adding even more fruit in the next attempt, and the pie looks taller but hollower.
Don’t Do This
Don’t try to solve the gap by piling in extra raw apples. A taller pile means a bigger collapse and a deeper cave. Cook them down and then fill the shell as full as you like.
How to Pre-Cook the Apples So They Hold Their Shape
The goal of pre-cooking is narrow. You are not making pie filling in the skillet, you are only taking out the air and the first wave of juice. The apples should leave the pan about two-thirds of their raw volume, still firm in the middle, with every slice recognizably a slice.
Use a wide skillet rather than a saucepan. Wide means the slices cook in a shallow layer and stay whole, while in a deep pot the ones on the bottom turn to sauce before the ones on top soften. I cook in two stages, half the apples first and the rest added partway through, so the fruit at the bottom of the pan is not overcooked by the time the last slices are tender.
The cue is the bend test. Lift a slice with a fork. If it snaps, it needs another minute. If it droops over the tines like a wet noodle, you have gone too far. The right slice flexes, resists a little, and tastes of apple with just a trace of crunch. Add the cornstarch slurry only after this stage, so the starch thickens the juices once, in the skillet, rather than clumping against raw fruit.
Cooling matters as much as cooking. Spread the filling on a baking sheet so the steam escapes and the apples do not continue to cook in their own heat. A deep bowl of hot apples keeps cooking for 15 minutes after you take it off the stove, and you lose your texture.
Margaret’s Tip
Pour any syrup that pooled on the sheet back over the apples when you fill the shell. That liquid is already thickened and carries most of the flavor. Pouring it away is the fastest way to a bland pie.
Margaret’s Tip
Pull the apples off the heat sooner than you think you should. They should still taste distinctly of apple, with a little resistance when you bite a slice. They keep softening in the oven, and apples cooked to mush in the skillet turn into applesauce by the time the pie is done.
Questions People Ask
Why is there a gap between my apple pie filling and the top crust?
The top crust sets in the first 20 minutes, while raw apples are still bulky. As the apples heat, they lose air and release liquid, shrinking by about a third, and the rigid crust stays where it is. Cooking the apples in a skillet before filling means they are already at their final volume when the lid goes on.
How long should I cook the apples before putting them in the pie?
About 9 to 12 minutes total in a 12-inch skillet over medium heat, working in two batches of fruit. The slices should bend without snapping, give off their juice, and still taste like apple. If they look like applesauce, you have cooked them too far.
Do I have to cool the filling before using it?
Yes. Warm filling melts the butter in the bottom crust and steams it into a pale, gummy layer. Spread the apples on a baking sheet and let them reach room temperature, about 30 minutes, or chill them 15 minutes in the refrigerator.
About This Article

Written by Margaret Chen. Margaret Chen is a home baker and recipe developer with over 15 years of experience perfecting cookie recipes through rigorous testing and detailed experimentation. She tests every recipe multiple times, documents every variable, and applies the same rigor professional bakers use, with the warmth and accessibility of home baking. More about this site.
Scope and limits. Margaret is a home baker and recipe developer with no formal culinary training. Follow current food safety guidance for egg handling, storage, and anything you are serving to other people.
Verify this against a primary source
Specifics change, and your situation may differ from the one described here. These are the authorities worth checking directly:
- USDA FoodData Central — ingredient composition and nutrition data
- FoodSafety.gov — safe handling, storage and egg safety