
Whoopie Pies
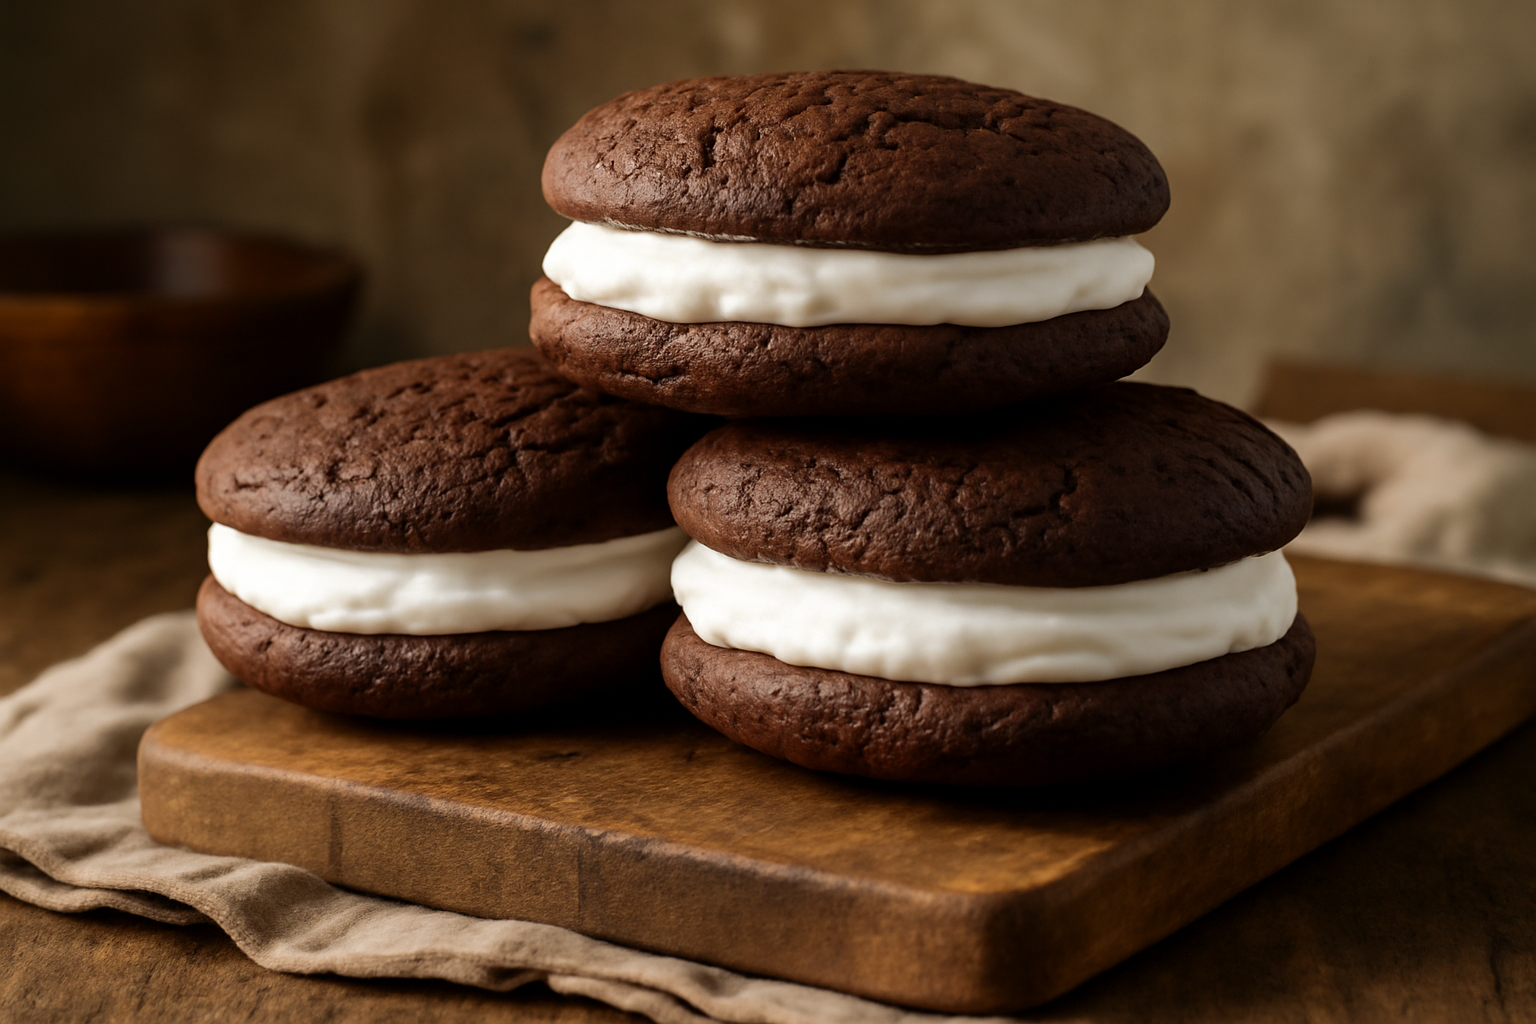
Pillowy chocolate sandwich cookies filled with marshmallow cream, deeply chocolatey and impossibly soft.
Ingredients
- 1 ¾ cups (220g) all-purpose flour
- ½ cup (50g) Dutch-process cocoa powder
- 1 teaspoon baking soda
- ½ teaspoon baking powder
- ½ teaspoon fine sea salt
- 1 cup (200g) granulated sugar
- ⅓ cup (75ml) vegetable oil
- 1 large egg plus 1 egg yolk, room temperature
- 1 teaspoon pure vanilla extract
- 1 cup (240ml) full-fat buttermilk, room temperature
- ½ cup (115g) unsalted butter, softened to room temperature
- 1 cup (120g) powdered sugar, sifted
- 1 jar (7 oz / 198g) marshmallow cream
- 1 teaspoon vanilla extract
- Pinch of salt
Instructions
- Preheat your oven to 350°F (175°C).
- Line two large baking sheets with parchment paper.
- Sift the flour, cocoa powder, baking soda, baking powder, and salt together in a medium bowl.
- Sift the mixture again to ensure the leavening agents are fully distributed.
- In a large mixing bowl, whisk together the granulated sugar and vegetable oil until combined, about 30 seconds.
- Add the egg, egg yolk, and vanilla extract to the sugar mixture.
- Whisk vigorously for 1 minute.
- Alternate adding the dry ingredients and buttermilk to the wet mixture, starting and ending with the dry ingredients: dry, buttermilk, dry, buttermilk, dry.
- Fold gently with a silicone spatula after each addition until just combined.
- Using a 1½-inch cookie scoop or a tablespoon, drop batter onto the prepared baking sheets, spacing them about 2 inches apart.
- Bake for 10–12 minutes, until the tops spring back lightly when touched but the centers still feel slightly soft.
- Remove from the oven and let the shells cool on the baking sheet for 2 minutes.
- Transfer to a wire rack to cool completely, about 30 minutes.
- In a medium bowl, beat the softened butter with an electric mixer on medium-high speed for 2–3 minutes until pale and fluffy.
- Reduce the mixer speed to medium and add the sifted powdered sugar in two additions, beating well after each addition until fully combined and no lumps remain.
- Add the marshmallow cream, vanilla extract, and pinch of salt.
- Beat on medium speed for 2–3 minutes, scraping down the sides of the bowl halfway through.
- Turn half of the cooled shells flat-side up on a work surface.
- Pipe or spread approximately 1 tablespoon of marshmallow filling onto each flat shell.
- Top each filled shell with another shell, flat-side down, pressing gently so the filling squishes to the edges but does not overflow.
Notes
- Do not overscoop flour; use a kitchen scale for accurate measuring.
- Sift the dry ingredients twice to ensure leavening agents are fully distributed.
- Do not skip the cooling step on the baking sheet; shells are fragile when hot.
- If the filling seems too soft, refrigerate for 10 minutes before assembling; if too stiff, let soften at room temperature for a few minutes.
The first time I attempted a whoopie pies from scratch recipe, I was standing in my mother-in-law’s Vermont kitchen on a rainy October afternoon in 2018. She pulled out a handwritten index card — soft around the edges, smudged with cocoa — and handed it to me like she was passing along a family heirloom. Honestly, she was. Those little chocolate sandwich cookies, pillowy and filled with a cloud of marshmallow cream, were unlike anything I had ever baked before. They were deeply chocolatey, impossibly soft, and somehow more satisfying than a brownie, a cupcake, or a cookie could ever be on its own.
I went home and immediately started testing. That was a mistake — not in intention, but in execution. My first three batches spread into flat, crispy discs. Batch four was gummy in the center. Batch seven had filling that slid out the sides like a melting glacier. However, after 40+ rounds of testing across two winters, I landed on a recipe my family now requests for birthdays, holidays, and honestly just random Tuesdays. My daughter Emma calls them “the chocolate cloud cookies,” which I think is the most perfect name anyone has ever given them.
In this post, I am sharing everything I learned — the science, the failures, the exact measurements, and the one ingredient that changed everything. Whether you are new to whoopie pies or have been making them for years, I think you will find something useful here.
What Makes a Whoopie Pie Different From a Cookie or Cake
Whoopie pies occupy a delightful gray area in the baking world. They are not quite a cookie, not quite a cake, and definitely not a cupcake. Technically, the “shells” are made from a soft drop batter — higher in moisture than a standard cookie dough — which produces that signature cakey, domed texture. The leavening chemistry here is important. I use a combination of baking soda and baking powder in my recipe, and the ratio matters enormously.
Specifically, baking soda reacts with the acidic buttermilk in the batter to create immediate lift and spread control. Baking powder provides a secondary rise in the oven’s heat, giving the shells their characteristic dome. In my testing, using baking soda alone (as some older recipes suggest) resulted in flatter, chewier shells — closer to a cookie. That is fine if you want a chewier bite, but it is not the traditional New England whoopie pie experience I was chasing.
The fat ratio also plays a significant role. I use a combination of vegetable oil and one egg yolk. Oil keeps the shells moist for days without the gummy texture that too much butter can create in a high-moisture batter. The extra yolk adds richness and emulsification without making the batter too stiff. After testing butter-only, oil-only, and combination batters, the oil-dominant formula won every single time in texture tests.
The Whoopie Pies From Scratch Recipe: Ingredients and Ratios
Here is the exact recipe I landed on after all that testing. These measurements produce 12 sandwich cookies — 24 individual shells — at roughly 2 inches in diameter each.
For the Chocolate Shells
- 1 ¾ cups (220g) all-purpose flour
- ½ cup (50g) Dutch-process cocoa powder
- 1 teaspoon baking soda
- ½ teaspoon baking powder
- ½ teaspoon fine sea salt
- 1 cup (200g) granulated sugar
- ⅓ cup (75ml) vegetable oil
- 1 large egg plus 1 egg yolk, room temperature
- 1 teaspoon pure vanilla extract
- 1 cup (240ml) full-fat buttermilk, room temperature
For the Marshmallow Cream Filling
- ½ cup (115g) unsalted butter, softened to room temperature
- 1 cup (120g) powdered sugar, sifted
- 1 jar (7 oz / 198g) marshmallow cream (Fluff brand is traditional)
- 1 teaspoon vanilla extract
- Pinch of salt
One note on flour: do not overscoop. I weigh everything with a kitchen scale because volumetric measuring of flour is notoriously unreliable. Too much flour produces a dry, crumbly shell that cracks when you bite into it. I learned this the hard way on batch 12, when I served what were essentially chocolate hockey pucks to my neighbor’s book club. Nobody said anything, which was somehow worse.
How I Make Them, Step by Step
The method is straightforward once you understand the why behind each step. Here is exactly how I make these whoopie pies, whether I am baking a single batch for Emma’s school lunch or three batches for a winter party.
Making the Chocolate Shells
- Preheat your oven to 350°F (175°C). Line two large baking sheets with parchment paper.
- Sift the flour, cocoa powder, baking soda, baking powder, and salt together in a medium bowl. Do this twice to ensure the leavening agents are fully distributed — this is not optional. Set aside.
- In a large mixing bowl, whisk together the granulated sugar and vegetable oil until combined, about 30 seconds. The mixture should look slightly grainy.
- Add the egg, egg yolk, and vanilla extract to the sugar mixture. Whisk vigorously for 1 minute. The mixture should become slightly lighter in color and homogeneous.
- Alternate adding the dry ingredients and buttermilk to the wet mixture, starting and ending with the dry ingredients: dry, buttermilk, dry, buttermilk, dry. Fold gently with a silicone spatula after each addition until just combined. The batter will be thick but pourable — similar to brownie batter.
- Using a 1½-inch cookie scoop or a tablespoon, drop batter onto the prepared baking sheets, spacing them about 2 inches apart. You will get 12 shells per batch, or 24 shells total if baking all at once on two pans.
- Bake for 10–12 minutes, until the tops spring back lightly when touched but the centers still feel slightly soft. The shells should look just set, not dry or cracked. They will continue to set as they cool.
- Remove from the oven and let the shells cool on the baking sheet for 2 minutes, then transfer to a wire rack to cool completely, about 30 minutes. Do not skip the cooling step — the shells are still fragile and will break if moved immediately.
Making the Marshmallow Cream Filling
- In a medium bowl, beat the softened butter with an electric mixer on medium-high speed for 2–3 minutes until pale and fluffy.
- Reduce the mixer speed to medium and add the sifted powdered sugar in two additions, beating well after each addition until fully combined and no lumps remain.
- Add the marshmallow cream, vanilla extract, and pinch of salt. Beat on medium speed for 2–3 minutes, scraping down the sides of the bowl halfway through. The filling should be light, fluffy, and spreadable but not so soft that it oozes out when the shells are pressed together.
- If the filling seems too soft, refrigerate for 10 minutes before assembling. If it seems too stiff, let it soften at room temperature for a few minutes.
Assembling the Whoopie Pies
- Turn half of the cooled shells flat-side up on a work surface.
- Pipe or spread approximately 1 tablespoon of marshmallow filling onto each flat shell. A piping bag with a ½-inch round tip keeps the filling contained and looks prettier, but a small offset spatula works just fine.
- Top each filled shell with another shell, flat-side down, pressing gently so the filling squishes to the edges but does not overflow.
- Store in an airtight container at room temperature for up to 5 days, or refrigerate for up to 10 days. The shells soften slightly over time, which some people prefer.
Yield: 12 sandwich cookies (24 individual shells). Prep time: 20 minutes. Bake time: 10–12 minutes per batch. Total time: about 1 hour including cooling.
The Cocoa Powder That Finally Gave Me Deep, Rich Chocolate Flavor in Whoopie Pie Cakes
Whoopie pies live or die by their chocolate cake layer—and I learned the hard way that grocery store cocoa powder just doesn’t cut it. The difference between flat, muted chocolate and that deep, almost fudgy richness that makes these cookies addictive comes down to fat content and processing.
What works
- The 22–24% fat content actually carries flavor through baking instead of tasting thin or bitter like alkalized powders sometimes do.
- Fair trade sourcing means I’m not sacrificing taste for ethics—these beans taste noticeably richer and more complex than commodity cocoa I used to grab.
- One 8 oz bag goes further than I expected; I’ve made three full batches of whoopie pies (24 sandwich cookies each) and still have some left.
What doesn’t
- It’s denser than natural cocoa, so you need to sift it carefully or you’ll end up with slight clumps in your batter—something I didn’t anticipate the first time.
- The price tag is higher than standard cocoa, which adds up if you’re baking whoopie pies weekly for a crowd.
I second-guessed myself halfway through my first batch, wondering if I was overthinking a simple ingredient, but one bite of those cakes convinced me otherwise. Grab the Dutch Processed Cocoa Powder (8 oz), 22–24% fat, Non-GMO and Fair Trade Certified if you want whoopie pies that taste like they’re from a bakery, not a boxed mix.
About This Article

Written by Margaret Chen. Margaret Chen is a home baker and recipe developer with over 15 years of experience perfecting cookie recipes through rigorous testing and detailed experimentation. She tests every recipe multiple times, documents every variable, and applies the same rigor professional bakers use, with the warmth and accessibility of home baking. More about this site.
Scope and limits. Margaret is a home baker and recipe developer with no formal culinary training. Follow current food safety guidance for egg handling, storage, and anything you are serving to other people.
Verify this against a primary source
Specifics change, and your situation may differ from the one described here. These are the authorities worth checking directly:
- USDA FoodData Central — ingredient composition and nutrition data
- FoodSafety.gov — safe handling, storage and egg safety