
Old-Fashioned Coconut Custard Pie: The Knife Test
Coconut custard pie that slices clean, never weeps or curdles. Learn the jiggle test, where to insert the knife, and why this pie bakes low.
Ingredients
- 1 single 9-inch pie crust, homemade or store-bought, fitted into the plate and crimped
- Pie weights or dried beans, plus parchment, for blind baking
- 1 egg yolk, lightly beaten (for sealing the baked shell)
- 4 large eggs, at room temperature
- 3/4 cup granulated sugar
- 1/4 teaspoon fine salt
- 2 cups whole milk, warmed until steaming but not simmering
- 1/2 cup heavy cream
- 2 teaspoons pure vanilla extract
- 1/4 teaspoon coconut extract (optional)
- 1 1/3 cups sweetened shredded coconut, divided
- 1/4 teaspoon freshly grated nutmeg, for the top
Instructions
- Heat the oven to 400°F with a rack in the lower third. Blind bake the crust: line it with parchment, fill with pie weights, and bake 15 minutes. Remove the weights and bake 5 to 7 minutes more, until the bottom looks dry and pale gold.
- While the shell is still hot, brush the inside with the beaten egg yolk and return it to the oven for 1 minute. This thin seal keeps the liquid filling from soaking into the crust. Lower the oven temperature to 325°F.
- Scatter 2/3 cup of the coconut on a small tray and toast it in the oven for 4 to 6 minutes, stirring once, until light gold. Set aside for the top. Leave the remaining coconut untoasted for the filling.
- In a large bowl, whisk the eggs, sugar, and salt just until combined and no streaks of white remain. Do not whip air into it. Foam on a custard bakes into bubbles and a pitted surface.
- Warm the milk and cream together in a saucepan until steaming, with small bubbles at the edge but no boil. Pour about a quarter of it into the eggs in a thin stream while whisking constantly, then whisk in the rest. This tempers the eggs gently so they do not scramble.
- Stir in the vanilla, the coconut extract if using, and the untoasted 2/3 cup of coconut. Pour the filling through a fine-mesh strainer into a measuring cup with a spout. Skim off any foam with a spoon.
- Set the warm pie shell on a rimmed baking sheet on the oven rack. Pull the rack out slightly and pour the filling in, filling the shell to about 1/4 inch below the rim. Sprinkle the toasted coconut and nutmeg over the top. Slide the rack in gently so the filling does not slosh.
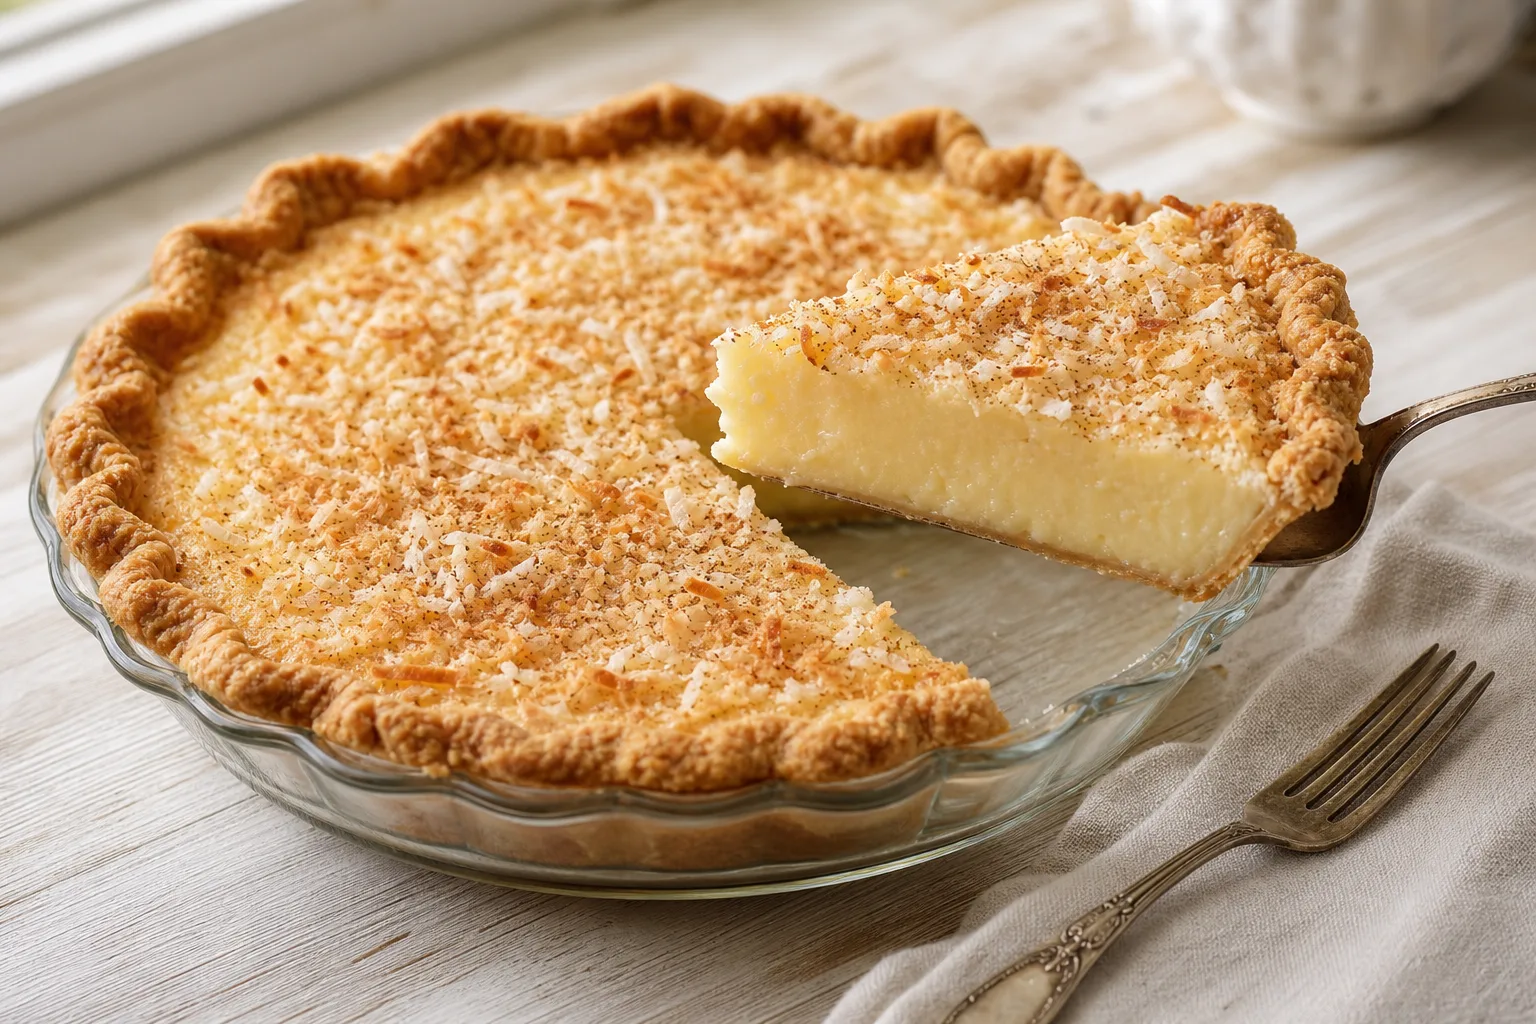
- Bake at 325°F for 40 to 50 minutes. Start checking at 35. The edge, about 2 inches in, should look set and matte, while the center should wobble as a single unit when you nudge the pan, like a gelatin dessert, not slosh like liquid. Insert a thin knife halfway between the center and the edge. It should come out clean, or with just a faint film. If you test dead center, a clean knife there means the pie is already slightly overbaked, because the center holds its heat longest.
- Turn off the oven, prop the door open, and leave the pie inside for 15 minutes. It will finish setting gently on the residual heat. Move it to a wire rack and cool completely, about 2 hours.
- Refrigerate at least 3 hours before slicing, ideally 4. Cut with a thin, sharp knife wiped clean between slices.
Notes
- Fits a standard 9-inch pie plate, about 1 1/2 inches deep. Use whole milk and sweetened shredded coconut.
The first coconut custard pie I ever made looked perfect when it came out of the oven. Then I cut into it. The center ran across the plate like soup, and the slice that did come out had a layer of watery liquid pooled under the crust. The second one I overcorrected on, left it in until the top puffed like a soufflé, and got a filling that was grainy and full of tiny holes, with a sweaty puddle on top by the next morning.
Those two pies were the same recipe. The only thing that changed was how long I left them in the oven, and my ability to read a pie I wasn’t yet sure how to read. A baked custard has a very narrow window between underdone and overdone, and the recipe’s time range is only a rough guide to where that window sits. Your oven, your pie plate, and the temperature of your filling when it goes in all move it.
Why This Works
A custard pie is held together entirely by egg protein, and egg proteins set across a narrow temperature band. Pull the pie when the center reaches roughly 170–175°F and the proteins have just linked up into a soft, sliceable gel. Go past about 185°F and they tighten, squeeze out the liquid they were holding, and turn the filling grainy and weepy. A low oven (325°F) is what makes that window wide enough to hit by eye, because the edge and the center finish within minutes of each other rather than an inch apart.
Ingredients
Fits a standard 9-inch pie plate, about 1 1/2 inches deep. Use whole milk and sweetened shredded coconut.
For the Crust
- 1 single 9-inch pie crust, homemade or store-bought, fitted into the plate and crimped
- Pie weights or dried beans, plus parchment, for blind baking
- 1 egg yolk, lightly beaten (for sealing the baked shell)
For the Filling
- 4 large eggs, at room temperature
- 3/4 cup granulated sugar
- 1/4 teaspoon fine salt
- 2 cups whole milk, warmed until steaming but not simmering
- 1/2 cup heavy cream
- 2 teaspoons pure vanilla extract
- 1/4 teaspoon coconut extract (optional)
- 1 1/3 cups sweetened shredded coconut, divided
- 1/4 teaspoon freshly grated nutmeg, for the top
Easy Swap
Replace the heavy cream with an extra 1/2 cup of whole milk if that is what you have. The pie will be a touch lighter and a little less rich, and it will set the same way. Do not use skim milk, as the lower fat and protein make a looser, more watery custard.
How to Make It
Prep: 25 minutes | Bake: 50 minutes | Cool or chill: 3 hours | Serves: 8 slices
- Heat the oven to 400°F with a rack in the lower third. Blind bake the crust: line it with parchment, fill with pie weights, and bake 15 minutes. Remove the weights and bake 5 to 7 minutes more, until the bottom looks dry and pale gold.
- While the shell is still hot, brush the inside with the beaten egg yolk and return it to the oven for 1 minute. This thin seal keeps the liquid filling from soaking into the crust. Lower the oven temperature to 325°F.
- Scatter 2/3 cup of the coconut on a small tray and toast it in the oven for 4 to 6 minutes, stirring once, until light gold. Set aside for the top. Leave the remaining coconut untoasted for the filling.
- In a large bowl, whisk the eggs, sugar, and salt just until combined and no streaks of white remain. Do not whip air into it. Foam on a custard bakes into bubbles and a pitted surface.
- Warm the milk and cream together in a saucepan until steaming, with small bubbles at the edge but no boil. Pour about a quarter of it into the eggs in a thin stream while whisking constantly, then whisk in the rest. This tempers the eggs gently so they do not scramble.
- Stir in the vanilla, the coconut extract if using, and the untoasted 2/3 cup of coconut. Pour the filling through a fine-mesh strainer into a measuring cup with a spout. Skim off any foam with a spoon.
- Set the warm pie shell on a rimmed baking sheet on the oven rack. Pull the rack out slightly and pour the filling in, filling the shell to about 1/4 inch below the rim. Sprinkle the toasted coconut and nutmeg over the top. Slide the rack in gently so the filling does not slosh.
- Bake at 325°F for 40 to 50 minutes. Start checking at 35. The edge, about 2 inches in, should look set and matte, while the center should wobble as a single unit when you nudge the pan, like a gelatin dessert, not slosh like liquid. Insert a thin knife halfway between the center and the edge. It should come out clean, or with just a faint film. If you test dead center, a clean knife there means the pie is already slightly overbaked, because the center holds its heat longest.
- Turn off the oven, prop the door open, and leave the pie inside for 15 minutes. It will finish setting gently on the residual heat. Move it to a wire rack and cool completely, about 2 hours.
- Refrigerate at least 3 hours before slicing, ideally 4. Cut with a thin, sharp knife wiped clean between slices.
Don’t Do This
Do not bake the pie until the center looks firm. A center that no longer moves at all has already passed the set point, and it will keep cooking on the hot pie plate after you take it out. Pull it while the very middle still trembles.
Can You Make This Pie Ahead?
Yes — Here Is the Timeline
You can bake the whole pie a day ahead, and it is actually better for it. It needs to chill at least 3 hours anyway, and overnight is fine. Hold the toasted coconut garnish back and sprinkle it on just before serving.
Bake and cool the pie as written, then cover it loosely once it is fully cold and refrigerate for up to 2 days. Covering a warm pie traps steam, which drips back onto the surface as water. Wait until it is cold to the touch.
The crust is the part that suffers with time, softening a little each day as the custard sits against it. The egg yolk seal buys you a day or two. If you want a very crisp bottom, blind bake the shell up to a day ahead and fill it the next day.
I don’t recommend freezing a baked custard pie. Egg gels break when they freeze and thaw, and the filling turns spongy and leaks liquid as it thaws. Unbaked filling does not freeze well either, so make this one fresh.
Reading the Jiggle: What Set Actually Looks Like
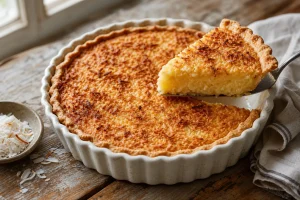
The most useful skill in baking custard is learning to read the surface. Take the pie to the oven door at 35 minutes, grab the plate with an oven mitt, and give it one gentle nudge. A filling that is not ready moves as a wave. Liquid ripples out from the middle to the edge and sloshes back. A filling that is ready moves as a block. The outer ring is solid, and only a circle about the size of a half dollar in the center trembles, all in one piece, like set gelatin.
This is the signal that matters, and it is the one most recipes describe as just “until set”. The reason for stopping with a small wobble in the middle is carryover heat. The pie plate and the hot edge of the filling keep cooking the center after the pie leaves the oven. In my kitchen the center keeps rising in temperature by several degrees over the next 10 minutes. A center that is perfectly firm at the oven door ends up overcooked on the counter.
Look at the Edge First
If the outer inch of the filling still looks glossy and wet at 35 minutes, leave the pie alone. If the ring is set but the middle is a puddle, rotate the plate and give it another 5 minutes. Opening the oven door over and over drops the temperature, so make each check count.
The Knife Test, and Where to Put the Knife
The knife test is the second check, and it only works if you do it the right way. Use a thin, clean knife, such as a paring knife or a butter knife with a thin blade. Insert it straight down about halfway between the center and the edge, push it in until the tip touches the bottom crust, and pull it out. A clean blade, or one with just a thin, translucent film, means the pie is set. A blade coated in thick, creamy custard means it needs more time.
Where you put the knife matters as much as how it comes out. It is a common instruction to test the center, and it is the wrong place. The center of a custard is the last part to set, so a knife that comes out clean from the dead center tells you the middle is done, which means the edges have been cooking longer and have already gone past the set point. Testing halfway between the center and the edge catches the pie at the moment the middle is just catching up with the rest.
Margaret’s Tip
Put the knife in at the halfway point between the center and the edge, not in the middle. It is the most reliable spot, because the edge sets first and the center last, and halfway reads as done just as the center is catching up.
Questions People Ask
How do I know when coconut custard pie is done?
Look for a set, matte edge and a center that moves as one small trembling circle, about the size of a half dollar, when you nudge the pan. A thin knife inserted halfway between the center and the edge should come out clean or with a faint film. Pull the pie then, and let carryover heat finish the middle over the next 15 minutes.
Why did my custard pie come out watery?
Usually the pie was overbaked. When egg proteins pass their set point, they tighten and push out the liquid they were holding, which collects as a watery layer on top or under the filling. A pie that was cut before it fully chilled can also look watery, because the filling is still soft. Bake it just until the center trembles, then chill at least 3 hours.
Why did my custard pie crack on top?
Cracks come from the filling puffing up in the oven and then collapsing as it cools, which means it baked too long or too hot. Leaving the pie in the turned-off oven with the door ajar for 15 minutes and cooling it slowly on a rack both help. A small crack does not change the flavor, and the toasted coconut hides it well.
About This Article

Written by Margaret Chen. Margaret Chen is a home baker and recipe developer with over 15 years of experience perfecting cookie recipes through rigorous testing and detailed experimentation. She tests every recipe multiple times, documents every variable, and applies the same rigor professional bakers use, with the warmth and accessibility of home baking. More about this site.
Scope and limits. Margaret is a home baker and recipe developer with no formal culinary training. Follow current food safety guidance for egg handling, storage, and anything you are serving to other people.
Verify this against a primary source
Specifics change, and your situation may differ from the one described here. These are the authorities worth checking directly:
- USDA FoodData Central — ingredient composition and nutrition data
- FoodSafety.gov — safe handling, storage and egg safety