
Coconut Cream Pie: A Pastry Cream That Slices Clean
Coconut cream pie with a pastry cream that sets firm and slices clean. Learn the full-boil step that keeps the filling from turning to soup overnight.
Ingredients
- 1 single 9-inch pie crust, homemade or your favorite all-butter recipe, fitted into a 9-inch pie plate
- Pie weights or dried beans for blind baking
- 1 can (13.5 ounces) full-fat coconut milk, shaken well
- 1 cup whole milk
- 2/3 cup granulated sugar, divided
- 1/3 cup cornstarch
- 1/4 teaspoon fine salt
- 5 large egg yolks
- 2 tablespoons unsalted butter, cut into pieces
- 1 1/2 teaspoons pure vanilla extract
- 1 cup sweetened shredded coconut, toasted
- 1 1/2 cups cold heavy cream
- 3 tablespoons powdered sugar
- 1/2 teaspoon pure vanilla extract
- 1/2 cup sweetened flaked coconut, toasted, for garnish
Instructions
- Blind bake the crust fully, until deep golden all over, and let it cool completely on a rack. If you need a refresher on keeping the bottom crisp, my soggy-bottom guide covers the method. A shell that is still warm will soften as soon as the cold cream touches it.
- Spread the shredded coconut on a rimmed baking sheet and toast it in a 350°F oven for 6 to 8 minutes, stirring once, until it smells nutty and the edges are golden. Set it aside to cool.
- In a medium saucepan, whisk the coconut milk and whole milk with 1/3 cup of the sugar. Warm over medium heat until steaming and small bubbles form at the edges, about 5 minutes. Do not let it boil yet.
- While the milk warms, whisk the remaining 1/3 cup sugar with the cornstarch and salt in a large heatproof bowl. Add the egg yolks and whisk hard for about a minute until the mixture is pale, thick and completely smooth, with no dry lumps of cornstarch.
- Temper the yolks: pour about 1 cup of the hot milk into the yolk mixture in a slow, thin stream while whisking constantly. Then pour that warmed mixture back into the saucepan, again whisking the whole time. Adding the hot liquid gradually keeps the yolks from scrambling.
- Return the pan to medium heat and whisk constantly, reaching into the corners. The cream will thicken suddenly at about 2 to 3 minutes and look finished. Keep going. Within another minute it will start to bubble with large, slow, glossy blurps that break the surface.
- Once those bubbles are coming up across the whole surface, keep whisking and let it boil for a full 60 seconds, then up to 90 if you want extra insurance. The cream should feel noticeably heavier on the whisk and look glossy. This is the step that sets the starch and shuts down the yolk enzyme.
- Take the pan off the heat and whisk in the butter until melted, then the vanilla. Fold in the toasted shredded coconut. Press the filling through a fine-mesh sieve if you see any specks of cooked egg.
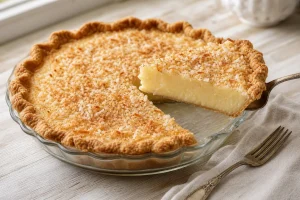
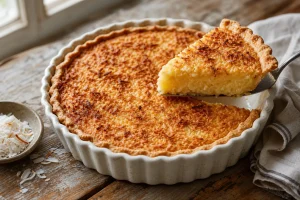
- Pour the hot filling into the cooled shell and smooth the top. Press a piece of plastic wrap directly onto the surface so no skin forms. Cool for 30 minutes on the counter, then refrigerate for at least 6 hours, ideally overnight, until completely firm.
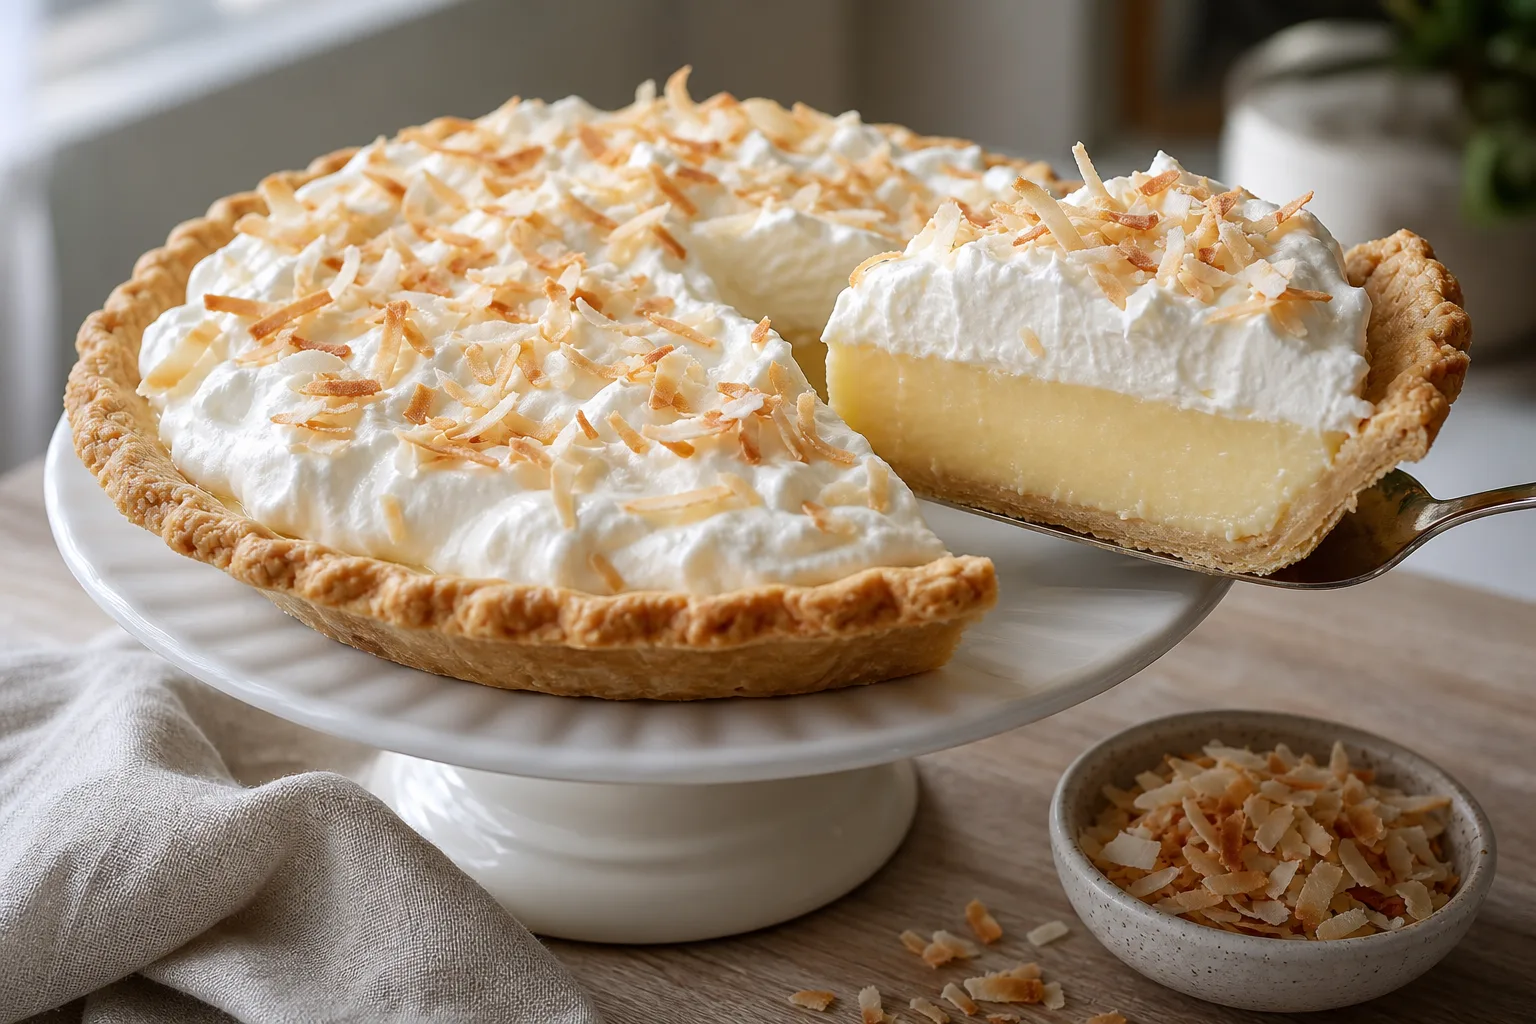
- Just before serving, whip the cold cream with the powdered sugar and vanilla to medium-stiff peaks. Pile it over the chilled filling, scatter the toasted flaked coconut on top, and slice with a sharp knife wiped clean between cuts.
Notes
- Makes enough filling for a 9-inch pie shell, about 4 cups. Use full-fat canned coconut milk, not the carton kind sold as a drink.
The first coconut cream pie I made looked perfect at nine at night. By morning, the filling had slid out of the shell like a slow avalanche, and every slice landed on the plate as a puddle with a crust floating in it. I remember being more annoyed than sad, because I had followed the recipe exactly.
The recipe was not wrong, but it was vague. It said to cook the custard until thick, and my custard was thick. What it did not say is that thick and cooked are two different things for a starch-set cream, and the gap between them is exactly where a pie goes to die overnight.
This pie is built around fixing that gap. The filling is a stovetop pastry cream thickened with cornstarch, flavored with coconut milk and toasted coconut, poured into a blind-baked shell and chilled until it slices with a clean edge. The method is simple, but one step, a real boil, cannot be skipped.
Why This Works
Pastry cream sets because cornstarch granules swell and burst in hot liquid, releasing starch that forms a gel. That only happens fully at a full boil, around 203°F, which is also hot enough to destroy an enzyme in the egg yolks that otherwise breaks the starch gel back down into liquid as it sits. Pull the cream off the heat when it merely looks thick and you leave both jobs half-done: the gel is weak and the enzyme is still active, which is why a filling can seem fine at night and be soup by morning.
Ingredients
Makes enough filling for a 9-inch pie shell, about 4 cups. Use full-fat canned coconut milk, not the carton kind sold as a drink.
For the Crust
- 1 single 9-inch pie crust, homemade or your favorite all-butter recipe, fitted into a 9-inch pie plate
- Pie weights or dried beans for blind baking
For the Pastry Cream
- 1 can (13.5 ounces) full-fat coconut milk, shaken well
- 1 cup whole milk
- 2/3 cup granulated sugar, divided
- 1/3 cup cornstarch
- 1/4 teaspoon fine salt
- 5 large egg yolks
- 2 tablespoons unsalted butter, cut into pieces
- 1 1/2 teaspoons pure vanilla extract
- 1 cup sweetened shredded coconut, toasted
For the Topping
- 1 1/2 cups cold heavy cream
- 3 tablespoons powdered sugar
- 1/2 teaspoon pure vanilla extract
- 1/2 cup sweetened flaked coconut, toasted, for garnish
Easy Swap
For a lighter coconut flavor, replace the shredded coconut inside the filling with 1/2 cup of unsweetened unsweetened shredded coconut and add 1 extra tablespoon of sugar. For a dairy-lighter version, use all coconut milk, 2 cans total, in place of the whole milk. The filling will be richer and a touch softer.
How to Make It
Prep: 45 minutes | Bake: 40 minutes | Cool or chill: 6.5 hours | Serves: 8 slices
- Blind bake the crust fully, until deep golden all over, and let it cool completely on a rack. If you need a refresher on keeping the bottom crisp, my soggy-bottom guide covers the method. A shell that is still warm will soften as soon as the cold cream touches it.
- Spread the shredded coconut on a rimmed baking sheet and toast it in a 350°F oven for 6 to 8 minutes, stirring once, until it smells nutty and the edges are golden. Set it aside to cool.
- In a medium saucepan, whisk the coconut milk and whole milk with 1/3 cup of the sugar. Warm over medium heat until steaming and small bubbles form at the edges, about 5 minutes. Do not let it boil yet.
- While the milk warms, whisk the remaining 1/3 cup sugar with the cornstarch and salt in a large heatproof bowl. Add the egg yolks and whisk hard for about a minute until the mixture is pale, thick and completely smooth, with no dry lumps of cornstarch.
- Temper the yolks: pour about 1 cup of the hot milk into the yolk mixture in a slow, thin stream while whisking constantly. Then pour that warmed mixture back into the saucepan, again whisking the whole time. Adding the hot liquid gradually keeps the yolks from scrambling.
- Return the pan to medium heat and whisk constantly, reaching into the corners. The cream will thicken suddenly at about 2 to 3 minutes and look finished. Keep going. Within another minute it will start to bubble with large, slow, glossy blurps that break the surface.
- Once those bubbles are coming up across the whole surface, keep whisking and let it boil for a full 60 seconds, then up to 90 if you want extra insurance. The cream should feel noticeably heavier on the whisk and look glossy. This is the step that sets the starch and shuts down the yolk enzyme.
- Take the pan off the heat and whisk in the butter until melted, then the vanilla. Fold in the toasted shredded coconut. Press the filling through a fine-mesh sieve if you see any specks of cooked egg.
- Pour the hot filling into the cooled shell and smooth the top. Press a piece of plastic wrap directly onto the surface so no skin forms. Cool for 30 minutes on the counter, then refrigerate for at least 6 hours, ideally overnight, until completely firm.
- Just before serving, whip the cold cream with the powdered sugar and vanilla to medium-stiff peaks. Pile it over the chilled filling, scatter the toasted flaked coconut on top, and slice with a sharp knife wiped clean between cuts.
Don’t Do This
Do not pull the pastry cream off the heat the moment it thickens. It will look done, and it will be edible, but the starch is only partly set and the yolk enzyme is still active. This is how a pie that looked perfect at night ends up as a puddle in the morning.
Can You Make This Pie Ahead?
Not Fully — Here Is What You Can Prep
The finished pie is best made the day before it is served, but the whipped topping should wait until the last couple of hours. Blind bake the shell up to a day ahead and make the pastry cream the evening before.
The shell can be baked a day ahead and kept at room temperature, loosely covered. The pastry cream needs at least 6 hours to set fully, so the usual rhythm is to fill the pie the night before and let it chill overnight. That overnight rest is also the best test of a properly boiled cream: if it was cooked right, it will slice cleanly in the morning.
Hold back the whipped cream and the garnish. Whipped cream on a cold custard weeps a little over time and the toasted coconut turns soft within hours, so top the pie within about 2 hours of serving.
I do not freeze this pie. Starch-set creams break down when thawed and turn grainy and watery, which undoes exactly what the full boil was meant to prevent. A day in the refrigerator, covered, is the limit I trust. After that, the shell starts to give up its crispness.
Why Pastry Cream Needs a Full Boil
Most custards you learned to cook gently. A baked custard pie or a stirred crème anglaise is cooked low and slow, taken off the heat the moment it coats a spoon, because boiling would curdle the eggs. Pastry cream breaks that rule on purpose, and it is the one place a lot of home bakers get nervous.
The reason it can handle the heat is the cornstarch. Starch in the mix coats and shields the egg proteins, so the cream can bubble without scrambling as long as you whisk constantly. And the reason it must boil is that cornstarch does not finish its job until it reaches roughly 203°F. Below that, the granules are only partly swollen. The cream thickens, looks right and tastes fine, but the gel is weak.
The second reason is hidden in the yolks. Egg yolks contain an enzyme called amylase, which breaks starch down into sugars. In a cream that has only been warmed, the amylase is alive and working, slowly chewing through the starch gel while the pie sits in the refrigerator. Boiling for a full minute is enough to deactivate it. That is the whole difference between a filling that holds and one that liquefies.
How to Check Without a Thermometer
A thermometer is not required. The cream will thicken suddenly, then thicken again and turn glossy, then start to blurp with slow, heavy bubbles. Boil it for a full minute past that point. Those three visual stages track the temperature well enough that I have not needed to check it.
Tempering Without Scrambling
Tempering means raising the temperature of the yolks slowly so they do not cook into little curds the moment they meet hot liquid. In this recipe, the first cup of hot milk goes into the yolks in a thin stream, with the whisk moving the entire time. By the end, the yolk mixture is warm and fluid, and it can go back into the pan without any shock.
Whisking the sugar and cornstarch into the yolks first does two jobs. The sugar protects the yolks from clumping, and the cornstarch is already dispersed, so it does not form lumps when it meets hot liquid. A lumpy cornstarch is hard to rescue, because the dry center of each lump never hydrates.
Once the cream is back on the heat, the whisk should be in constant contact with the bottom and corners of the pan. Starch settles and scorches in a pan corner faster than you would think, and one scorched fleck gives the whole filling a faint burnt note. Keep the heat at medium, not high, and use a whisk rather than a spoon. If you find a few lumps after cooking, the sieve step takes care of them.
Margaret’s Tip
Watch the bubbles, not the clock. When large, slow bubbles break the surface in the center of the pan, not just around the edge, the cream has truly boiled. Whisk it for another full minute from that point and you are safe.
Questions People Ask
Why did my coconut cream pie filling turn runny overnight?
Almost always, the pastry cream was taken off the heat before it truly boiled. Starch needs to reach about 203°F to gel fully, and the same heat deactivates an enzyme in the egg yolks that otherwise breaks the gel down as the pie sits. Bring the cream to a full bubbling boil and keep whisking for a full minute, and the filling will hold.
Can I use cream of coconut or coconut cream instead of coconut milk?
I would not swap either in. Cream of coconut, the sweetened cocktail product, makes the filling far too sweet and can interfere with the set. Unsweetened coconut cream is fatter than coconut milk and gives a heavier, softer filling. Full-fat canned coconut milk gives the best balance of flavor and set.
How long does coconut cream pie keep in the refrigerator?
Covered, it holds well for 2 days, with the best texture on the first day. The shell softens gradually as it absorbs moisture from the filling, and the whipped topping loses volume. If you want to serve it over two days, store it without the topping and whip fresh cream when you are ready.
About This Article

Written by Margaret Chen. Margaret Chen is a home baker and recipe developer with over 15 years of experience perfecting cookie recipes through rigorous testing and detailed experimentation. She tests every recipe multiple times, documents every variable, and applies the same rigor professional bakers use, with the warmth and accessibility of home baking. More about this site.
Scope and limits. Margaret is a home baker and recipe developer with no formal culinary training. Follow current food safety guidance for egg handling, storage, and anything you are serving to other people.
Verify this against a primary source
Specifics change, and your situation may differ from the one described here. These are the authorities worth checking directly:
- USDA FoodData Central — ingredient composition and nutrition data
- FoodSafety.gov — safe handling, storage and egg safety