
Classic Sugar Cookies
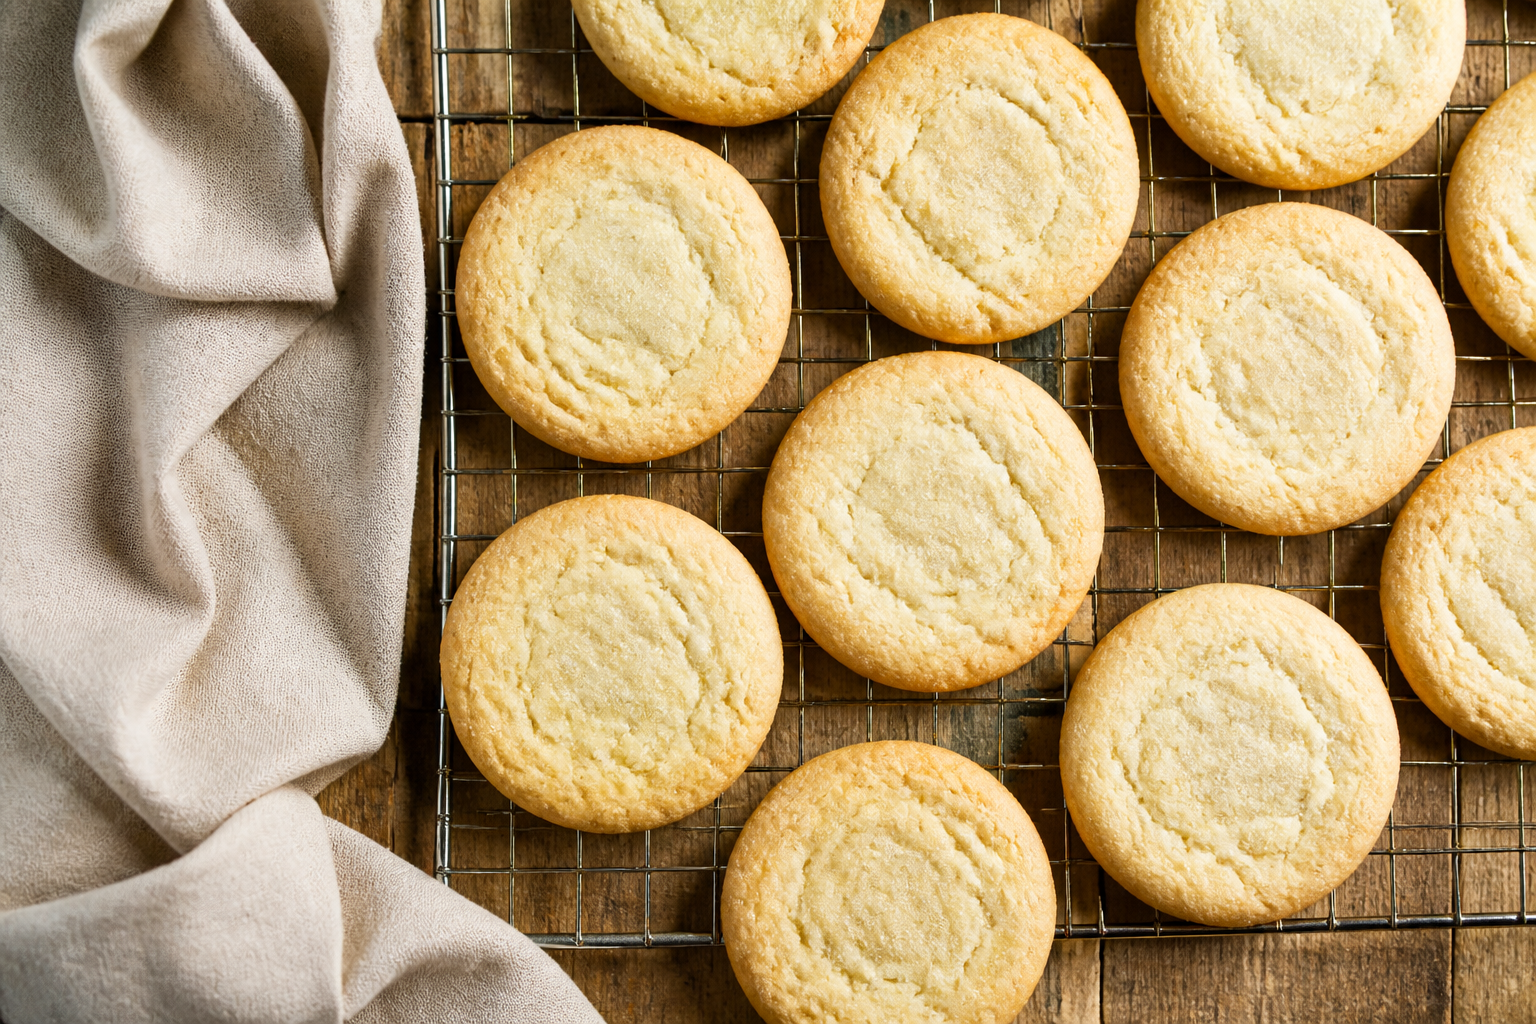
Soft, buttery sugar cookies with crisp edges that hold their shape under a cutter and stay tender throughout.
Ingredients
- 1 cup (2 sticks or 226 grams) unsalted butter, softened to room temperature
- ¾ cup (150 grams) granulated sugar
- 1 large egg
- 1½ teaspoons vanilla extract
- ¼ teaspoon salt
- 2 cups (240 grams) all-purpose flour
Instructions
- In a stand mixer (or large bowl with a hand mixer), cream together the softened butter and granulated sugar on medium speed for 3 to 5 minutes, until the mixture is pale and fluffy and has nearly doubled in volume.
- Add the egg and vanilla extract. Mix on medium speed until fully combined, about 1 minute. Scrape the sides of the bowl with a spatula to ensure everything is incorporated.
- In a separate bowl, whisk together the salt and all-purpose flour.
- Add the flour mixture to the butter mixture. Mix on low speed just until the dough comes together. Do not overmix; you want a smooth dough, not a tough one.
- Wrap the dough in plastic wrap and refrigerate for at least 30 minutes.
- Preheat your oven to 350°F. Line baking sheets with parchment paper.
- Remove the dough from the refrigerator. If it's very firm, let it sit at room temperature for 5 to 10 minutes until it's pliable but still cold.
- Lightly flour a clean work surface. Roll the dough to one-eighth of an inch thick, rotating and flipping occasionally to ensure even thickness.
- Cut shapes using sharp cookie cutters. Place the cut cookies on the prepared baking sheets.
- Freeze the baking sheets with the cut cookies for 15 to 20 minutes.
- Bake at 350°F for 8 to 10 minutes, until the edges are pale and just set but the centers still look very slightly underbaked. The bottoms should be light golden, not brown.
- Remove from the oven and let the cookies cool on the baking sheet for 2 to 3 minutes before transferring to a wire rack to cool completely.
Notes
- Measure flour by weight (240 grams) if possible. If scooping, spoon into measuring cup and level with a knife; do not scoop directly into the bag.
- Gather and reroll scraps only once or twice to avoid tough cookies.
- For best results with defined shapes, do not skip the 15- to 20-minute freeze after cutting.
I’ve published dozens of sugar cookie recipes on this site—from my Moroccan orange-zest ghriba to my cream-cheese-stuffed pillows—yet I realized I never wrote down the one dough I return to most often. That feels like a strange gap.
For fifteen years, I’ve been testing cookie recipes in my home kitchen, and this classic sugar cookie recipe is the foundation every variation has sprung from. It’s the dough I use when I want soft, buttery cookies that hold their shape under a cutter but stay tender all the way through. It’s what I bake on ordinary Tuesdays and what I’ve made by the hundred-batch for the holidays.
This post is my attempt to finally do it justice.
What Makes a Sugar Cookie “Classic”
A classic sugar cookie recipe sits in a specific tradition. It starts with butter—real butter, creamed with granulated sugar until light and fluffy. It contains no cream cheese, no sour cream, no extra egg yolk for richness. That distinction matters more than you might think.
When I developed the cream-cheese-stuffed version, I changed the fat ratio entirely. Cream cheese adds moisture, tang, and a denser crumb. That’s wonderful for a filled cookie. However, a butter-based dough is leaner, more forgiving when decorated, and cleaner on the palate. It lets frosting or a simple sugar glaze be the star.
Classic means something else too: texture. I’m aiming for soft sugar cookies with a slight crisp at the very edge, not all the way through. They should bend slightly when warm, not snap like a shortbread. The sugar is moderate—enough to add tenderness and flavor, but not so much that the cookie becomes cloying under a layer of royal icing.
This is the workhorse dough. Versatile. Reliable. The one you reach for when you’re not sure what you want, and somehow it’s exactly right.
The Dough Science: Why Chilling Matters Twice
I learned this the hard way, in batch number fourteen of an early testing round.
I creamed my butter and sugar, mixed in my eggs and vanilla, added my flour, rolled everything out hot and sticky, cut shapes, and baked. The cookies spread into shapeless blobs. Their edges browned while their middles stayed pale. They tasted good but looked nothing like the precise stars and hearts I’d cut.
The problem: I skipped the second chill—the one after cutting.
Here’s why chilling matters in a buttery sugar cookie dough: Butter is plastic. At room temperature, it’s soft and moveable. When dough gets warm during rolling and handling, the butter gets warmer too. As soon as it hits the hot oven, it melts and spreads before the protein network (flour and eggs) has time to set. The cookies flow outward like warm wax.
Chilling the raw dough before rolling makes it workable. Flour becomes hydrated. The dough stops sticking and tearing. You can roll it to an even thickness without fighting it.
Chilling the cut shapes is the step most home bakers skip. It’s also the one that separates cookies with crisp, defined edges from a plate of shapeless melts. After you cut your shapes, place them on a baking sheet and slide it into the freezer for 15 to 20 minutes. The butter becomes firm again. When the dough enters the oven, it holds its shape long enough for the edges to set before spread happens.
My Method Step by Step
Creaming butter and sugar: Use a stand mixer on medium speed for 3 to 5 minutes. You’re looking for the mixture to go pale, almost white, and nearly double in volume. This incorporates air into the butter, which creates lift in the oven and gives you that tender, soft crumb instead of a dense, heavy cookie.
I learned to watch for visual cues instead of timing alone. When the mixture looks like wet sand and then like fluffy frosting, you’re there. Under-creamed butter produces pale, dense cookies. Over-creaming (rare in a home kitchen) is less of a concern, but it can make the dough slightly grainy.
Rolling and thickness: I always chill the raw dough for at least 30 minutes before rolling. Then I flour my surface lightly and roll to one-eighth of an inch thick. That’s thin enough to bake through in 8 to 10 minutes without drying out, but thick enough to stay tender and not become a crisp wafer.
A wooden rolling pin helps you feel the thickness. Mine is worn smooth from years of use, and I wouldn’t trade it. As you work, rotate the dough and flip it occasionally so it rolls evenly without sticking.
Cutting and chilling again: Use sharp cutters—they give you clean edges. I favor a versatile set with multiple shapes and sizes. After cutting, place your baking sheet in the freezer for 15 to 20 minutes. This is non-negotiable if you want defined shapes.
Baking: Bake at 350°F for 8 to 10 minutes. The time depends on your oven’s personality and the thickness of your dough. Pull the cookies when the edges are just barely set and still pale. The very bottom should be light golden, not brown. They’ll firm up as they cool.
The Classic Sugar Cookie Recipe
Yield: About 48 cookies (depending on cutter size)
Prep time: 20 minutes
Chill time: 30 minutes (plus 15–20 minutes after cutting)
Bake time: 8–10 minutes
Notes
Measuring flour: Weigh your flour if possible (240 grams for 2 cups). If you must scoop, spoon the flour into your measuring cup and level it off with a knife. Do not scoop the cup directly into the flour bag; this compacts the flour and gives you too much.
Sugar cookies without cream cheese: This recipe is deliberately formulated without cream cheese or any additional fat. It produces soft sugar cookies that are lighter in richness than cream-cheese-based versions, making them ideal for decorating with frosting or royal icing.
Scraps: Gather and reroll scraps only once or twice. Each time you reroll, you work the dough a bit more, and the cookies can turn tough. Scraps from the second reroll sometimes don’t rise quite as much, but they still taste good.
Troubleshooting: Spreading, Toughness, and Dry Dough
Cookies spread into shapeless blobs: You almost certainly skipped the second chill—the 15- to 20-minute freeze after cutting your shapes. That’s the most common culprit. Second possibility: your oven runs hot. Try lowering the temperature to 325°F and baking a minute or two longer. Third: your dough might have been too warm when you cut it. Make sure it’s cold enough to cut cleanly without sticking.
Cookies are tough and chewy instead of soft: This happens when you overmix the dough after adding flour. Once the flour is mixed in, stop. Do not beat it. Gluten develops with agitation, and gluten is the enemy of tender cookies. Also avoid rerolling scraps more than twice; each pass makes the dough tougher.
Dough is dry and crumbly: Most likely, you measured your flour by scooping the measuring cup directly into the bag. As I mentioned, this compacts flour. Use a kitchen scale (grams are your friend), or spoon and level. If your dough is already mixed and too dry, add a teaspoon of milk or water at a time until it comes together.
Cookies brown too fast: Your oven might run hot, or you might be baking larger cookies than intended. Rotate your baking sheet halfway through the bake time. If edges brown before the centers set, lower the oven temperature and extend the time slightly.
How My Other Sugar Cookie Recipes Build From This Base
This classic sugar cookie recipe is the reference point for every sugar cookie variation I’ve published here. My Moroccan orange-zest ghriba takes this dough and adds orange zest, cinnamon, and a touch of almond extract. Different flavoring, same butter foundation. The structure stays familiar, which is why the technique—the creaming, the chilling, the careful rolling—transfers directly.
My cream-cheese-stuffed sugar cookie is a different story. That version swaps butter for a blend of butter and cream cheese. Cream cheese changes everything: the dough becomes richer, tangier, denser. It handles differently. It requires less chilling. That’s a different recipe for a different purpose.
When readers ask me which sugar cookie to make, I always recommend they start here. This buttery sugar cookie dough teaches you the fundamentals. Once you understand why the second chill matters and what “soft” really means, you can adapt with confidence. You can add spices, citrus, almond extract. You can use sugar cookies without cream cheese as your baseline and customize from there.
That’s the whole point of a classic.
Equipment That Makes a Difference
You don’t need fancy tools to make a classic sugar cookie recipe well. However, a few things do help. A stand mixer takes the guesswork out of creaming and makes light, fluffy butter-and-sugar practically inevitable. A wooden rolling pin gives you tactile feedback so you know when you’ve hit one-eighth of an inch. Sharp cookie cutters make clean cuts; dull cutters compress the edges and inhibit rise.
For my everyday baking, I use a versatile multi-shape cutter set. The YomiFamily 30-piece mini cutter set has proven its worth in my kitchen. It includes multiple sizes of stars, hearts, flowers, and rounds—enough variety that you’re never bored, and the smaller sizes mean you get more cookies per batch. If you prefer to start simple, the metal stainless steel 12-piece set with hearts, stars, flowers, and rounds is a solid budget option that lasts for years.
Why I Still Bake This Every Season
There’s no trick to this recipe. No secret ingredient or unexpected technique. It’s a classic sugar cookie recipe because it works, because it’s been refined over decades of home baking, and because it doesn’t ask for anything more than attention and patience.
I make it in December for holiday gifts. I make it in February for Valentine’s Day. I make it in June for no reason at all except that I want something tender and slightly sweet while I’m working. After fifteen years of testing hundreds of cookie recipes, this is the one I reach for when I want to relax.
That’s what a true classic does. It earns your trust.