
Classic Peanut Butter Cookies
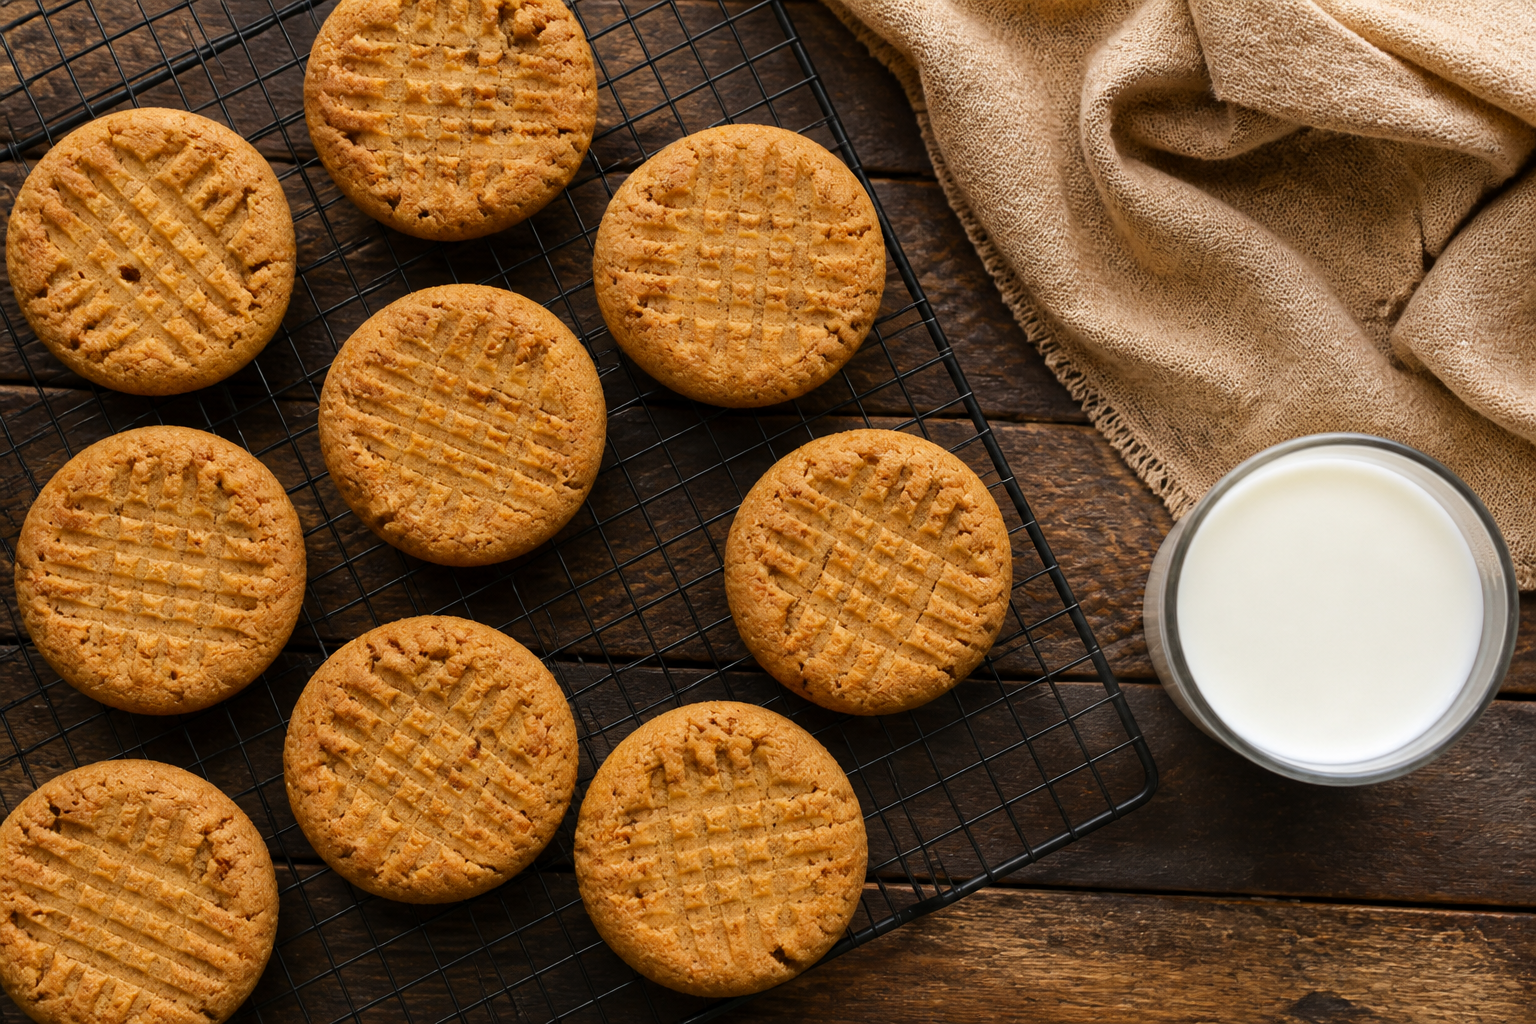
Dense, tender peanut butter cookies with a crispy edge and classic crosshatch fork marks.
Ingredients
- ½ cup unsalted butter, softened
- 1 cup creamy peanut butter (shelf-stable, not natural)
- ½ cup granulated sugar
- ½ cup packed brown sugar
- 1 large egg
- 1 teaspoon vanilla extract
- 1¼ cups all-purpose flour
- 1 teaspoon baking soda
- ½ teaspoon salt
- Granulated sugar (for fork dipping)
Instructions
- Preheat your oven to 350°F.
- In a large bowl, cream together the softened butter and peanut butter until pale and fluffy, about 2 minutes.
- Add the granulated sugar and brown sugar to the butter mixture. Beat until light and well combined, about 1 minute.
- Add the egg and vanilla extract. Beat until fully incorporated.
- In a separate small bowl, whisk together the flour, baking soda, and salt.
- Add the dry ingredients to the wet mixture. Stir until just combined. Do not overmix.
- Scoop the dough into balls approximately 1 tablespoon in size. Place them about 2 inches apart on parchment-lined baking sheets.
- Dip a dinner fork into granulated sugar to prevent sticking. Press each dough ball firmly with the fork to flatten it to roughly ¼ inch thick, creating a crosshatch pattern. Press in one direction, then rotate and press perpendicular to create the classic design.
- Bake for 9 to 11 minutes, until the edges are set and lightly golden but the centers still appear very slightly soft.
- Let the cookies cool on the baking sheet for 5 minutes, then transfer to a wire rack to cool completely.
Notes
- Use shelf-stable creamy peanut butter, not natural peanut butter.
- Dip fork in sugar before pressing each cookie to prevent sticking.
- Check cookies at 9 minutes; do not overbake past 11 minutes or they will become dry and crumbly.
My grandmother’s peanut butter cookie recipe lives on a stained, dog-eared index card in a plastic recipe box—the same one she’s kept since 1978. The handwriting is hers: crisp, practical, unadorned. Butter. Peanut butter. Sugar. Brown sugar. Egg. Vanilla. Flour. Baking soda. Salt. Fourteen words of ingredients, and a set of instructions so spare they read almost like shorthand. “Press with fork,” she’d written, with a small asterisk and a note: “This is how you know they’re done right.”
I watched her make these cookies dozens of times growing up. There was no fussing. No fancy equipment. No tweaking. She’d cream the butter and peanut butter together until pale, mix in the sugars, add the egg and vanilla, stir in the dry ingredients, then form small balls and flatten each one with the tines of a dinner fork, making that perfect crosshatch pattern everyone recognizes. Those cookies came out of the oven—always at 350°F, always for about 10 minutes—looking exactly the way a classic peanut butter cookie should look: dense, tender, with slightly crisp edges and that unmistakable fork-marked top.
Over my 15+ years as a recipe developer, I’ve created hundreds of cookie variations. I’ve published a flourless, gluten-free peanut butter cookie on this site that many of you love. But I’ve never published this one—the original classic peanut butter cookie recipe that started it all. And honestly, after decades of testing and refining recipes in my own kitchen, I’ve yet to find a single reason to improve on what my grandmother got exactly right the first time.
Why the Crosshatch Isn’t Just for Looks
Here’s what I didn’t understand until I started baking seriously: that fork crosshatch serves a real, functional purpose. It isn’t decoration.
A classic peanut butter cookie recipe produces a dough that’s fundamentally different from a butter-sugar cookie dough. Peanut butter contributes both fat and protein to the dough. That changes everything about hydration, gluten development, and how the dough behaves in the oven. The result is a dough that’s much denser and drier than what most home bakers are used to. It simply doesn’t spread on its own the way a chocolate chip cookie does. If you baked these cookies without flattening them first, you’d end up with thick, puffy, unevenly baked mounds. The centers would stay pale and soft. The edges would brown before the inside was done.
That’s where the fork comes in. Pressing the dough flat with a fork accomplishes two things at once. First, it ensures even thickness across the entire cookie—roughly a quarter-inch once flattened. This means the cookie bakes through evenly, top to bottom, in about 10 minutes at 350°F.
Second, the crosshatch pattern increases surface area dramatically. Those fork tines create ridges and valleys on the top of the cookie. More surface area means more opportunity for browning and caramelization. As a result, you get slightly crisp, golden edges while the interior stays tender and dense—exactly the texture these cookies are supposed to have.
In my experience, skipping the fork press is one of the most common mistakes home bakers make with this recipe. The cookies won’t bake properly. I learned that the hard way, actually, in my early testing. I thought I could skip the step—just let the dough spread naturally in the oven. The result was a disaster: some cookies baked through while others stayed dense and underbaked in the center. That’s when I realized my grandmother wasn’t being traditional for tradition’s sake. She was solving a real baking problem.
The Peanut Butter That Actually Works Here
This is the second place where I see home bakers go wrong with a classic peanut butter cookie recipe, and I want to be completely honest about it because I’ve made this mistake myself.
You need creamy, shelf-stable peanut butter for this recipe. The kind that doesn’t require stirring. The kind that’s been emulsified with stabilizers so the oil doesn’t separate and float to the top. Brands like Jif, Skippy, and Peter Pan are perfect here.
I learned this the hard way about eight years ago when I decided I should test whether natural peanut butter would work in my grandmother’s recipe. I had several friends asking about it, and I thought I was being thoughtful by testing the substitution myself. I used a good-quality, freshly ground natural peanut butter from our local food co-op. The oil was separated, exactly as you’d expect.
The dough came together, but immediately I noticed it felt greasy. Slick. Different. When I baked them, those cookies spread far more than they should have. They came out thin, pale, and almost too delicate—nothing like the dense, tender classic version. The texture was off. The flavor was good, sure, but the cookie itself wasn’t what it should be.
Why? Natural peanut butter has a higher oil content and no stabilizers. When you cream it with butter and sugar, you’re essentially creating an overly rich, overly oily dough. That excess fat causes spreading. Thin cookies overbake easily. You lose that tender crumb entirely.
Could you make a natural peanut butter version work? Technically, yes—but you’d need to reduce the added fat, adjust the flour, and potentially change the hydration significantly. That’s a different recipe entirely, and it’s outside the scope of what I’m sharing here. This old fashioned peanut butter cookie recipe is built specifically for the shelf-stable peanut butter my grandmother used, and that’s what I recommend.
My Method Step by Step
The technique for crosshatch peanut butter cookies is straightforward, but the details matter. Here’s exactly how I make them.
Start by creaming one-half cup of softened butter with one cup of creamy peanut butter. Beat them together for about two minutes until the mixture is pale and fluffy. Specifically, this creaming step matters because it aerates the dough slightly and helps the butter and peanut butter combine smoothly.
Add one-half cup of granulated sugar and one-half cup of packed brown sugar. Beat until the mixture is light and well combined, about another minute. Add one large egg and one teaspoon of vanilla extract, then beat until fully incorporated.
In a separate bowl, whisk together one and one-quarter cups of all-purpose flour, one teaspoon of baking soda, and one-half teaspoon of salt. Pour the dry ingredients into the wet mixture and stir until just combined. Don’t overmix. The dough should be thick and slightly stiff.
Here’s where the magic happens: scoop the dough into balls roughly one tablespoon in size. A standard cookie scoop (the kind that holds about 1 tablespoon per scoop) is invaluable here. Place the balls about two inches apart on parchment-lined baking sheets. They won’t spread much, but you want room to work.
Dip a dinner fork into granulated sugar—this prevents sticking—and press down firmly on each ball, creating a crosshatch pattern. Press in one direction, then rotate the fork slightly and press perpendicular to create the classic crosshatch design. The cookies should flatten to roughly one-quarter inch thick.
Bake at 350°F for nine to eleven minutes. The cookies are done when the edges are set and slightly golden but the centers still look very slightly soft and underbaked. They’ll continue to set as they cool on the baking sheet. That’s the window where they’ll be tender and dense, not dry and crumbly.
The Classic Peanut Butter Cookie Recipe
Yield: About 24 cookies | Prep Time: 15 minutes | Bake Time: 10 minutes per batch
Common Mistakes I’ve Seen (and Made)
After hundreds of batches, I’ve identified the biggest pitfalls that prevent home bakers from achieving perfect peanut butter cookies with fork marks.
Using natural peanut butter without adjusting the recipe: As I mentioned earlier, this changes everything. You’ll get greasy, overly spreading dough that bakes into thin, pale, almost crisp cookies instead of dense, tender ones. This isn’t a flaw in your technique—it’s a mismatch between ingredient and recipe.
Skipping the fork press: I understand the temptation to skip it. It feels like an extra step. But without it, the cookies won’t bake evenly. You’ll have dense, underbaked centers. The texture will be off.
Overbaking: This is the most common mistake across all cookie recipes, honestly. If you bake these past 11 minutes, they’ll turn dry and crumbly instead of dense and tender. That window between nine and eleven minutes is crucial. As a result, I recommend checking them at the nine-minute mark, especially if you’re using a newer, hotter oven.
Not using a sugar-dipped fork: If you skip the sugar dip, the fork tines will stick to the dough. You’ll tear the surface. It’s a small thing, but it matters for presentation.
A standard stainless steel dinner fork works perfectly here. I use the Oneida Flight Dinner Forks that I’ve had in my kitchen for years. They’re sturdy, easy to clean, and have just the right amount of weight. If you’re looking for a budget option, the Hiware Dinner Forks Set is a great alternative—plenty of heft, mirror polish, and they dishwash beautifully.
How This Compares to My Flourless Version
I know many of you have tried my flourless, gluten-free peanut butter cookie recipe that I’ve published here on the site. It’s a wonderful cookie. Many of you have emailed to say it was your entry into gluten-free baking, or that it’s your go-to now for dietary reasons.
That recipe exists because it solved a specific problem for a specific audience. By removing the flour entirely and leaning even harder on the peanut butter for structure, the flourless version becomes denser and more intensely peanut-flavored. It’s a different experience—not better or worse, just different.
This old fashioned peanut butter cookie recipe, however, represents a balance that my grandmother got right the first time. The flour provides structure without overwhelming the peanut butter flavor. The dough has just enough elasticity to hold together but not so much that it feels tough. The result is a classic cookie that tastes exactly the way a peanut butter cookie should taste.
If you’ve always made the flourless version, I encourage you to try this one. If you’ve never made either, start here. This is the template.
Why Some Recipes Don’t Need Reinventing
In recipe development, there’s always pressure to make something new. To improve. To innovate. That’s part of my job.
But there are certain recipes that simply don’t need fixing. They’re not outdated. They’re not lacking. They’re just right exactly as they are. A classic peanut butter cookie recipe is one of them.
My grandmother made these cookies in the same way for decades. I’ve now made them for 15+ years. The formula doesn’t change because it doesn’t need to. The technique doesn’t change because it solves real problems in the baking process. The ingredient list doesn’t change because every single component earns its place.
That’s not conservative baking. That’s wisdom. It’s the kind of wisdom that comes from repetition, attention, and the simple willingness to listen to what works.
Make these cookies. Make them exactly as written. Make them dozens of times until they feel automatic. You’ll understand then why they’ve never changed.
—