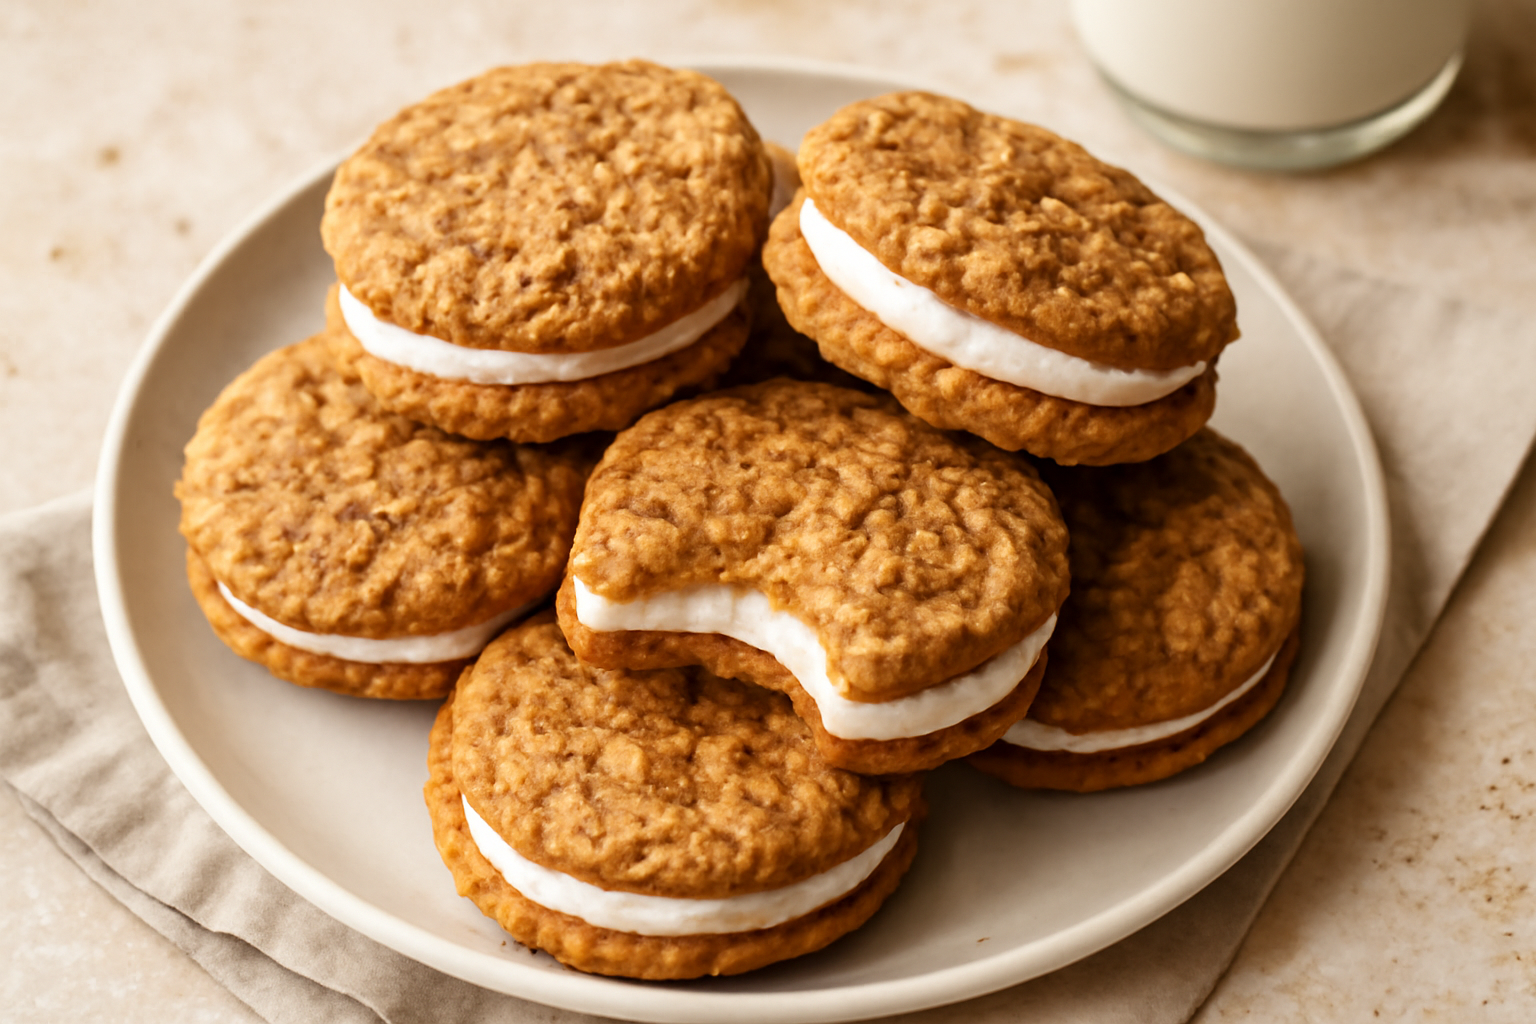

Cream-Filled Oatmeal Cookies
Soft, chewy oatmeal cookies with a generous layer of sweet cream filling.
Ingredients
- 1 cup (2 sticks / 226g) unsalted butter, softened to room temperature
- ¾ cup (150g) granulated sugar
- ¾ cup (165g) packed dark brown sugar
- 2 large eggs, room temperature
- 1 tablespoon pure vanilla extract
- 1 tablespoon molasses
- 1 ½ cups (190g) all-purpose flour
- 1 teaspoon baking soda
- 1 teaspoon baking powder
- 1 teaspoon ground cinnamon
- ¼ teaspoon ground nutmeg
- ½ teaspoon salt
- 3 cups (270g) old-fashioned rolled oats
- 1 cup (2 sticks / 226g) unsalted butter, softened
- 3 cups (360g) powdered sugar, sifted
- 2-3 tablespoons heavy cream
- 2 teaspoons pure vanilla extract
- Pinch of salt
Instructions
- Preheat your oven to 350°F (175°C) and line two baking sheets with parchment paper.
- In a large bowl, beat the softened butter with both sugars on medium-high speed for 3 to 4 minutes until the mixture is light and fluffy.
- Add the eggs one at a time, beating well after each addition.
- Mix in the vanilla and molasses.
- In a separate bowl, whisk together the flour, baking soda, baking powder, cinnamon, nutmeg, and salt.
- Add the dry ingredients to the wet ingredients and mix on low speed just until combined.
- Fold in the rolled oats by hand with a wooden spoon or rubber spatula.
- Chill the dough for at least 30 minutes before baking.
- Use a medium cookie scoop (about 1.5 tablespoons) to portion the dough onto your prepared baking sheets, spacing them about 2 inches apart.
- Gently flatten each ball slightly with the palm of your hand.
- Bake for 10 to 12 minutes, until the edges are just set and the centers still look slightly underdone.
- Let them cool on the baking sheet for 5 minutes, then transfer to a wire rack to cool completely before filling.
- Beat the butter on medium-high until pale and fluffy, about 3 minutes.
- Add the sifted powdered sugar one cup at a time, mixing on low to start.
- Add the vanilla, salt, and heavy cream one tablespoon at a time until you reach a thick, pipeable but spreadable consistency.
- Beat on high for 2 minutes until very fluffy.
- Transfer your filling to a piping bag fitted with a large round tip.
- Pipe a generous swirl of filling onto the flat side of one cookie in each pair, starting from the center and working outward.
- Place the second cookie flat-side down on top of the filling and press gently and evenly straight down.
- Let the finished cookies rest for at least 20 minutes before serving.
Notes
- Use old-fashioned rolled oats, not quick oats
- Match cookies by size before filling for best appearance
- Use about 2 tablespoons of filling per sandwich cookie
- Assembled cookies keep refrigerated for up to 7 days
Some recipes find you at exactly the right moment. For me, cream filled oatmeal cookies showed up on a rainy Tuesday afternoon when I was elbow-deep in a baking project I had absolutely no business starting. My daughter had come home from school clutching one of those Little Debbie Oatmeal Creme Pies in her backpack, the kind wrapped in that familiar crinkly cellophane, and she looked at me with those big eyes and said, “Mom, can you make these but better?” I laughed. Then I immediately started pulling oats out of the pantry.
It took me four separate test batches — and a lot of very willing taste testers in my household — to land on the recipe I’m sharing with you today. The first batch was too crispy. The second was too cakey. The third had the right texture but I’d oversalted the filling. By batch four, standing in my kitchen with flour on my shirt and a spoon covered in buttercream, I knew I had something. My daughter took one bite, looked up, and said “Okay yeah, these are better.” High praise from a nine-year-old.
This recipe lives in a very specific, very beloved category for me: nostalgic food made from scratch. There is something deeply satisfying about taking something you grew up eating from a plastic wrapper and recreating it with real butter, real vanilla, and actual love in your kitchen. These cream filled oatmeal cookies are that experience distilled into sandwich cookie form. Soft, chewy, lightly spiced oatmeal cookies hugging a generous cloud of sweet cream filling. Let’s get into it.
Why Cream Filled Oatmeal Cookies Beat Store-Bought Every Time
I want to be clear: I have nothing against Little Debbie. That little girl on the box is an American icon and her oatmeal creme pies got me through more than a few rough school lunches. But when you make cream filled oatmeal cookies at home, the gap between store-bought and homemade becomes pretty impossible to ignore.
Here’s what packaged cream filled cookies are working with: shelf-stable ingredients, preservatives, and a filling that has to survive weeks in a warehouse before it reaches your mouth. The result is a product that is engineered to taste good, but it is not engineered to taste incredible. The cookies tend to be uniform, a little waxy, and the filling — while sweet — has that faint artificial vanilla flavor that you only notice once you’ve tasted the real thing.
When you make these at home, you control everything. You’re using real rolled oats that give the cookies actual texture and a nutty depth of flavor. You’re using real butter and brown sugar that caramelize slightly in the oven and create those gorgeous chewy edges. And the filling? Made with real butter, real powdered sugar, and real vanilla extract, it tastes like something someone actually made for you on purpose. Because they did. Because you did.
The other thing homemade cream filled oatmeal cookies have going for them is customization. I’m going to give you three different filling options in this post, plus a full chocolate variation. Store-bought doesn’t do that.
The Perfect Oatmeal Cookie Base for Cream Filling
The key to a sandwich cookie base is getting that texture exactly right. You need a cookie that is soft and chewy — not crispy, not cakey — because it has to hold up to filling and to the gentle pressure of being picked up and eaten as a sandwich. After all my test batches, here is the recipe that I keep coming back to.
Oatmeal Cookie Ingredients
- 1 cup (2 sticks / 226g) unsalted butter, softened to room temperature
- ¾ cup (150g) granulated sugar
- ¾ cup (165g) packed dark brown sugar
- 2 large eggs, room temperature
- 1 tablespoon pure vanilla extract
- 1 tablespoon molasses (this is my secret — it deepens the flavor and keeps the cookies soft)
- 1 ½ cups (190g) all-purpose flour
- 1 teaspoon baking soda
- 1 teaspoon baking powder
- 1 teaspoon ground cinnamon
- ¼ teaspoon ground nutmeg
- ½ teaspoon salt
- 3 cups (270g) old-fashioned rolled oats (not quick oats)
Cookie Instructions
- Preheat your oven to 350°F (175°C) and line two baking sheets with parchment paper.
- In a large bowl, beat the softened butter with both sugars on medium-high speed for 3 to 4 minutes until the mixture is light and fluffy. Don’t rush this step — proper creaming makes a big difference in texture.
- Add the eggs one at a time, beating well after each addition. Mix in the vanilla and molasses.
- In a separate bowl, whisk together the flour, baking soda, baking powder, cinnamon, nutmeg, and salt.
- Add the dry ingredients to the wet ingredients and mix on low speed just until combined.
- Fold in the rolled oats by hand with a wooden spoon or rubber spatula — the dough will be thick and slightly sticky, which is exactly what you want.
- Chill the dough for at least 30 minutes before baking. This prevents excessive spreading and gives you a more uniform, slightly puffier cookie — ideal for sandwich assembly.
- Use a medium cookie scoop (about 1.5 tablespoons) to portion the dough onto your prepared baking sheets, spacing them about 2 inches apart. Gently flatten each ball slightly with the palm of your hand.
- Bake for 10 to 12 minutes, until the edges are just set and the centers still look slightly underdone. They will continue to firm up on the pan.
- Let them cool on the baking sheet for 5 minutes, then transfer to a wire rack to cool completely before filling.
This recipe makes approximately 36 cookies, which gives you 18 sandwich cookies.
The Oatmeal Cookie Cream Filling Recipe: Three Ways
This is where things get really fun — the filling is the soul of an oatmeal cream pie, and getting that oatmeal cream just right is what separates a good sandwich cookie from one people ask you to make again. I tested three different fillings for these cream filled cookies and honestly, I love them all for different reasons. Here’s a breakdown of each one. (And if you want to go further down the filling rabbit hole, my bakery-style cream-filled cookies guide covers six fillings that work with any cookie base, including this one.)
Option 1: Classic Vanilla Buttercream (Most Like the Original)
- 1 cup (2 sticks / 226g) unsalted butter, softened
- 3 cups (360g) powdered sugar, sifted
- 2-3 tablespoons heavy cream
- 2 teaspoons pure vanilla extract
- Pinch of salt
Beat the butter on medium-high until pale and fluffy, about 3 minutes. Add the sifted powdered sugar one cup at a time, mixing on low to start. Add the vanilla, salt, and heavy cream one tablespoon at a time until you reach a thick, pipeable but spreadable consistency. Beat on high for 2 minutes until very fluffy. This is the classic — rich, sweet, and deeply nostalgic.
Option 2: Marshmallow Fluff Filling (Crowd Favorite)
- ½ cup (1 stick / 113g) unsalted butter, softened
- 1 jar (7oz / 198g) marshmallow fluff
- 1 ½ cups (180g) powdered sugar, sifted
- 1 teaspoon vanilla extract
- Pinch of salt
Beat butter until fluffy, then beat in the marshmallow fluff until fully combined. Add the powdered sugar, vanilla, and salt and beat until light and smooth. This filling is pillowy, stretchy, and absolutely addictive. It’s the one my kids request most often.
Option 3: Whipped Cream Cheese Filling (Slightly Tangy, More Sophisticated)
- 8oz (226g) full-fat cream cheese, softened
- ½ cup (1 stick / 113g) unsalted butter, softened
- 2 cups (240g) powdered sugar, sifted
- 1 teaspoon vanilla extract
- 1 teaspoon lemon zest (optional but lovely)
Beat the cream cheese and butter together until completely smooth and fluffy, about 4 minutes. Add the powdered sugar, vanilla, and lemon zest if using, and beat until light. This filling has a slight tang that cuts through the sweetness of the oatmeal cookie beautifully. It also pairs exceptionally well with the chocolate variation below.
Assembly Tips for Perfect Sandwich Cookies
Assembly sounds simple but there are a few techniques that will make your cream filled oatmeal cookies look bakery-worthy and hold together properly.
Match your cookies by size. Before you start filling, flip all your cookies over and pair them up by similar size and shape. This is a small step that makes a big visual difference in the finished cookie.
Use a piping bag for cleaner results. Transfer your filling to a piping bag fitted with a large round tip (or just snip the corner off a zip-top bag). Pipe a generous swirl of filling onto the flat side of one cookie in each pair, starting from the center and working outward. Leave about a quarter inch of border so the filling doesn’t squeeze out too much when you press the top cookie on.
Apply even, gentle pressure when sandwiching. Place the second cookie flat-side down on top of the filling and press gently and evenly straight down — not at an angle. Press just until the filling reaches the edges but doesn’t overflow.
How much filling? I use about 2 tablespoons of filling per sandwich cookie, which gives you a generous layer without being overwhelming. If you love a thick filling (and I do), go up to 2.5 tablespoons.
Let them set up. After assembly, let the finished cookies rest for at least 20 minutes before serving. The filling firms slightly and the cookies meld together in the best way. For the cleanest bite, refrigerate assembled cookies for 30 minutes.
Cream-Filled Chocolate Cookies Variation
Once you’ve mastered the classic version, the cream-filled chocolate cookies variation is a natural and absolutely delicious next step. This is essentially the same oatmeal cookie base with cocoa added, and it pairs beautifully with any of the three fillings above — though I especially love it with the whipped cream cheese filling or a dark chocolate buttercream.
To make the chocolate base, use the same recipe above with these modifications: reduce the flour to 1 ¼ cups (160g) and add ⅓ cup (35g) of good quality unsweetened cocoa powder (or Dutch-process cocoa for a deeper, less bitter flavor) to the dry ingredients. Add ½ teaspoon of espresso powder as well if you have it — it amplifies the chocolate flavor without making the cookies taste like coffee. Everything else stays the same.
The resulting cookie is deeply chocolatey, still chewy, and has that same hearty oatmeal texture that makes the original so satisfying. Filled with the cream cheese filling, these are borderline sophisticated. Filled with the marshmallow fluff, they taste like something you’d find at a very good bakery and couldn’t stop thinking about for weeks.
Storage and Make-Ahead Tips
Good news: these cookies are very make-ahead friendly, which makes them great for gifting, parties, or just having something wonderful waiting in your refrigerator.
Storing Assembled Cookies
- Room temperature: If using the buttercream or marshmallow fluff filling, assembled cookies can be stored in an airtight container at room temperature for up to 3 days. Layer them between sheets of parchment paper.
- Refrigerator: All three filling options keep well in the refrigerator for up to 7 days in an airtight container. The cookies actually get even chewier and more flavorful after a day in the fridge — highly recommend. If using the cream cheese filling, refrigerator storage is required.
- Freezer: Assembled cookies freeze beautifully for up to 2 months. Place them on a baking sheet to freeze individually first, then transfer to a zip-top freezer bag. Thaw overnight in the refrigerator or for about an hour at room temperature.
Make-Ahead Components
- Cookie dough: The dough can be made and refrigerated for up to 3 days, or frozen in portioned balls for up to 3 months. Bake from frozen at 350°F, adding 2-3 minutes to the bake time.
- Baked unfilled cookies: Completely cooled cookies can be stored in an airtight container at room temperature for 4-5 days before filling.
- Fillings: All three fillings can be made up to 5 days ahead and stored in the refrigerator in airtight containers. Bring to room temperature and re-whip briefly before using.
One note: if you’re planning to ship these as a gift, the buttercream and marshmallow versions travel best. The cream cheese filling requires refrigeration and isn’t ideal for shipping.
I want to mention: you may also see this treat spelled as “creme filled cookies” — that’s actually the spelling Little Debbie uses on their packaging, borrowed from the French. Either way, the cookie is the same. What we’re making here is better.
Final Thoughts
If there is one recipe from The Cookie Diaries that I would press into the hands of every person I meet, it might be this one. These cream filled oatmeal cookies are nostalgic and comforting in a way that very few baked goods achieve. They taste like childhood but better — made with real ingredients, made with intention, made in your own kitchen on a rainy Tuesday or a sunny Saturday or whenever you need something that feels like a hug.
My daughter still occasionally comes home with a Little Debbie in her backpack. But now she also comes home knowing that her mom has a batch of homemade cream filled oatmeal cookies waiting in the fridge, and I can tell you with complete confidence which one she reaches for first. If you make these, I’d love to see them — tag me over on Instagram or drop a comment below and let me know which filling you tried. Happy baking, friends.
About This Article

Written by Margaret Chen. Margaret Chen is a home baker and recipe developer with over 15 years of experience perfecting cookie recipes through rigorous testing and detailed experimentation. She tests every recipe multiple times, documents every variable, and applies the same rigor professional bakers use, with the warmth and accessibility of home baking. More about this site.
Scope and limits. Margaret is a home baker and recipe developer with no formal culinary training. Follow current food safety guidance for egg handling, storage, and anything you are serving to other people.
Verify this against a primary source
Specifics change, and your situation may differ from the one described here. These are the authorities worth checking directly:
- USDA FoodData Central — ingredient composition and nutrition data
- FoodSafety.gov — safe handling, storage and egg safety