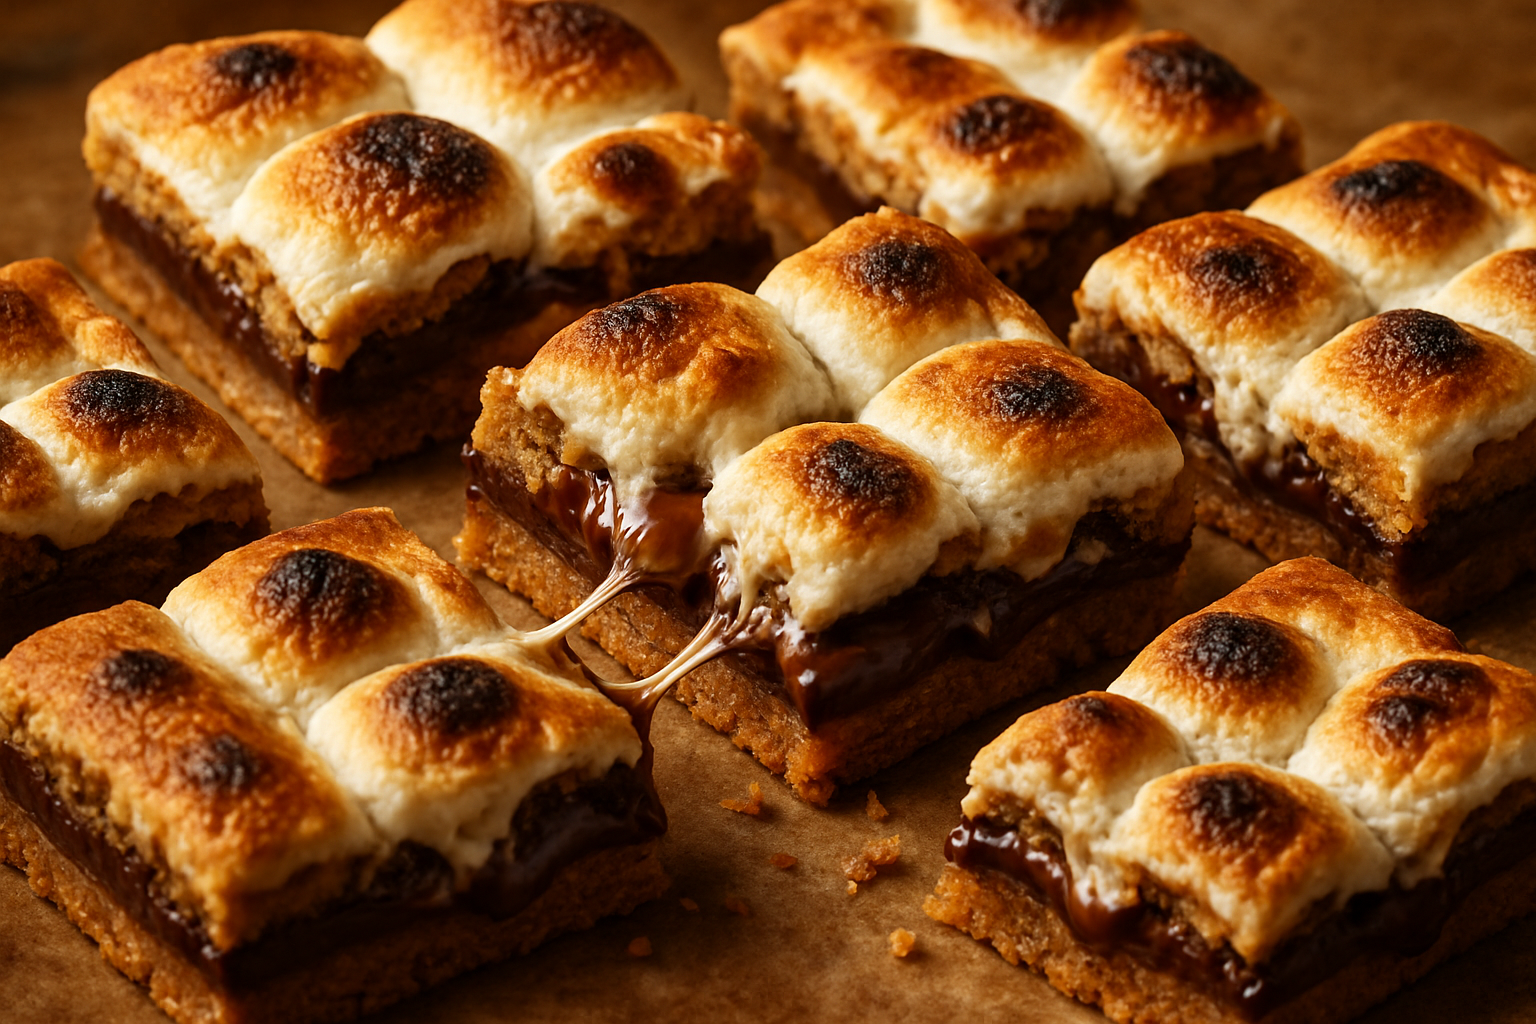
I want to tell you about the camping trip where I almost set a picnic table on fire, ruined a bag of marshmallows, and somehow — accidentally, chaotically, against all odds — invented what has become the most requested recipe on this entire blog. Yes, we’re talking about my smores cookie bars recipe, and yes, the origin story is exactly as ridiculous as that introduction suggests.
The Camping Trip That Started Everything
Two summers ago, my family talked me into a “rustic” camping weekend. I use quotation marks because my idea of rustic is a hotel without a spa. But I went, I packed my enthusiasm, and I foolishly volunteered to handle the s’mores situation for twelve people. “I bake for a living,” I told everyone confidently. “How hard can campfire s’mores be?”
Reader, it was very hard. The wind was relentless. I scorched four marshmallows in a row before they even had a chance to turn golden. My nephew dropped an entire sleeve of graham crackers directly into the dirt. Then — the grand finale — I leaned over the fire to rescue a marshmallow on a wayward stick, and my sleeve knocked our entire chocolate stash onto the ground. Twelve people. No chocolate. A pile of smoky, slightly dirt-dusted graham crackers. And one very embarrassed cookie blogger.
We ended up eating s’mores deconstructed that night, in the most improvised way imaginable. But the whole humiliating experience planted a seed. On the drive home, still smelling faintly of campfire smoke, I couldn’t stop thinking: what if I took everything I love about s’mores and baked it into a thick, fudgy, foolproof bar that required absolutely zero open flame?
What Makes This Smores Cookie Bars Recipe So Good
The magic of these bars is in the layering. You get a buttery, brown sugar cookie base packed with graham cracker crumbs so every single bite tastes like a toasted campfire treat. On top of that goes a generous layer of chocolate — I use a combination of chocolate chips and chopped dark chocolate for depth — and then a blanket of mini marshmallows that puff and toast beautifully in the oven. The result is gooey, slightly crispy at the edges, and completely over-the-top in the best possible way.
A few technique notes before you dive in. First, do not skip the graham cracker crumbs in the dough. They are not decoration — they are structural flavor. They give the base that distinct s’mores character and add a subtle sandy texture that makes these bars feel different from a standard chocolate chip blondie. Second, press your dough layer firmly and evenly into the pan. Uneven pressing leads to uneven baking, and you want those edges and center to finish at the same time. Third, add the marshmallows in the last eight to ten minutes of baking, not at the start. If you put them in too early, they melt into oblivion. Add them late, and they puff up golden and gorgeous with a lightly toasted top that looks genuinely stunning.
One more tip: line your pan with parchment paper and leave some overhang on the sides. These bars are sticky and glorious, and trying to cut them without parchment will have you questioning every decision you’ve ever made. The overhang acts as a sling so you can lift the whole slab out cleanly before slicing.
The Recipe: S’mores Cookie Bars
This recipe makes a full 9×13-inch pan of rich, layered bars — enough to feed a crowd or to have plenty stashed away for those moments when you need chocolate, marshmallow, and graham cracker all at once. The combination of brown sugar base, chocolate, and toasted marshmallows means every bar tastes like the best part of a campfire treat, without any of the mess.
What You’ll Need
- For the Cookie Base:
- 1 cup (2 sticks; 226g) unsalted butter, softened
- 1.5 cups (300g) packed brown sugar
- 2 large eggs, room temperature
- 2 teaspoons vanilla extract
- 2 cups (250g) all-purpose flour
- 1.5 to 2 cups (180–240g) graham cracker crumbs
- 1 teaspoon baking powder
- 1/2 teaspoon salt
- For the Topping:
- 2 cups (360g) semi-sweet chocolate chips
- 3 ounces chopped dark chocolate (for depth)
- 3 cups mini marshmallows
Oven Temperature: 350°F (177°C)
Prep Time: 15 minutes
Bake Time: 30–35 minutes (including marshmallow toasting)
Yield: 24–32 bars
How I Make Them, Step by Step
- Preheat your oven to 350°F (177°C). Line a 9×13-inch baking pan with parchment paper, making sure you have a couple of inches of overhang on the long sides—that’s your handle for lifting the whole slab out later.
- In a large bowl, cream together the softened butter and brown sugar. Beat for about 3 minutes until the mixture is light and fluffy. This is where the magic starts—don’t skip this step.
- Add the eggs one at a time, beating well after each addition. Pour in the vanilla extract and mix until everything is combined and smooth.
- In a separate bowl, whisk together the flour, graham cracker crumbs, baking powder, and salt. Fold this dry mixture into your wet ingredients until just combined. The dough will be thick and slightly sandy-textured from the graham crackers.
- Transfer about two-thirds of your dough to the prepared pan and press it firmly and evenly into the bottom. Use the back of a measuring cup or your hands (lightly dampened helps) to get an even, compact layer. This base layer is crucial—uneven pressing means uneven baking.
- Sprinkle the chocolate chips and chopped dark chocolate evenly over the dough base. Don’t be shy—you want that generous layer of chocolate in every bite.
- Take the remaining dough and break it into small, flat pieces, scattering them evenly over the chocolate layer. They don’t need to cover everything completely; they’ll spread slightly as they bake.
- Bake for 22–25 minutes, until the edges are light golden and the center is set but still soft. You’re not looking for the edges to be dark—just a gentle, appetizing golden color.
- Remove the pan from the oven and scatter the mini marshmallows evenly over the top. This is the crucial step I mentioned in the technique notes: adding them at the end means they puff and toast gorgeously without disappearing into the chocolate.
- Return the pan to the oven for another 8–10 minutes, until the marshmallows are puffy and lightly toasted on top. You’ll know it’s done when they have that golden, slightly crispy exterior.
- Remove from the oven and let the pan cool on a wire rack for at least 30 minutes. This cooling time matters—it helps everything set just enough so the bars hold together when you cut them.
- Once cooled, use that parchment paper overhang to carefully lift the entire slab out of the pan and onto a cutting board. Cut into 24–32 bars, depending on how generous you’re feeling. A sharp knife dipped in hot water and wiped clean between cuts helps prevent the marshmallows from sticking.
- Store the bars covered at room temperature for up to one week. (Though in my house, they rarely last that long.)
My Baking Essentials for This Recipe
The right ingredients make a noticeable difference here, and I’ve done plenty of testing so you don’t have to. Here are the products I keep stocked and genuinely reach for when I’m making these bars.
Why I Finally Stopped Crushing Graham Crackers by Hand for These Bars
The first time I made these bars at home after that camping disaster, I grabbed a food processor and made a mess trying to get uniform graham cracker crumbs—some pieces stayed chunky, others turned to powder, and the texture of my base layer suffered for it. Now I reach for pre-made crumbs every single time, and it’s transformed how consistent these bars actually turn out.
What works
- The crumb size is genuinely uniform—fine enough to pack into a tight, stable base layer but not so powdery that it becomes gummy when mixed with melted butter.
- The resealable bag actually stays fresh between baking sessions, which matters when you’re testing recipe variations across multiple days like I do.
- One bag gives you exactly enough for a full 9×13 pan without opening a second container or doing mental math on portions.
What doesn’t
- Pre-made crumbs cost more per pound than buying full crackers and processing them yourself, which adds up if you’re baking these bars weekly.
- The flavor tastes slightly less “buttery” than fresh crumbs—nothing alarming, but noticeable if you’re used to making them from scratch.
I’ll admit I was skeptical the first time I opened the bag—the crumbs looked almost too fine, and I worried they’d compress into a dense, hard layer—but they actually distributed beautifully and baked into a crispy-tender crust every time. Medley Hills Farm Graham Cracker Crumbs (1.5 lb Resealable Bag)
This post contains affiliate links. As an Amazon Associate, I earn from qualifying purchases at no extra cost to you.