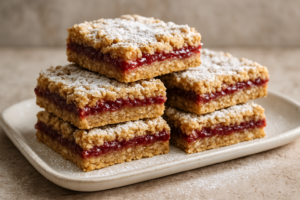
The sixth batch came out of the oven on a Tuesday afternoon, and I stood at my kitchen counter with a fork in my hand, absolutely terrified to taste it. Five previous attempts at a lemon bars recipe bakery style had ended in either a soggy crust, a rubbery filling, or something that tasted vaguely of scrambled eggs. My sister’s birthday was in three days. I had promised her lemon bars. I had a problem.
I am telling you this story not to scare you off, but to do the exact opposite. Because that sixth batch? It was the one. The crust was buttery and firm with just enough crumble. The filling was silky, tart, intensely lemony, and set perfectly — not jiggly, not rubbery, just that gorgeous, smooth, melt-on-your-tongue texture you get when you pay eight dollars for a single bar at a good bakery. And I am going to walk you through exactly how I got there so you can skip straight to batch six without living through batches one through five.
Why My First Five Batches Failed (And What I Learned the Hard Way)
My sister has always been the lemon dessert person in our family. Every birthday, every Easter, every “just because” Sunday — she wants something lemony. For years I had been buying lemon bars from a local bakery and plating them on my own fancy dish like I had something to do with it. When that bakery closed down last spring, I made a promise to myself and to her that I would finally figure this out from scratch.
Attempts one and two taught me about the crust. I was using a standard shortbread ratio and pressing it in too thin, which meant it had no structural integrity to hold up the curd layer. It turned to mush within an hour of cooling. The fix: press the crust firmly, bake it longer than you think you need to (a full 20 minutes at 350°F until it’s genuinely golden), and let it cool for at least 10 minutes before pouring anything on top.
Attempts three and four were all about the lemon curd filling. I was whisking the eggs directly with the sugar and lemon juice and pouring the whole thing in raw, trusting the oven to do the work. What came out was either underbaked and wobbly in the center or overbaked and slightly curdled at the edges. The lesson I finally internalized: the eggs need to be fully incorporated with the other ingredients before baking, and the filling should go into a hot crust in a moderate oven — not a screaming hot one.
Attempt five was actually pretty good, which made it the most heartbreaking. The flavor was there, but the filling cracked across the top during cooling because I pulled the pan out of the oven and set it directly on my cold granite countertop. Temperature shock. Rookie move after all that work. The fix: let the bars cool in the oven with the door cracked for about 10 minutes before moving them to a wire rack.
The Techniques That Make a Lemon Bars Recipe Bakery Style
Here is where I get into the actual details that separate a home-kitchen lemon bar from the kind you would happily pay full bakery price for. These are not complicated techniques, but they are specific, and the specifics matter.
Use Real Lemon Zest — A Lot of It
This is the single biggest flavor difference between a flat, generic lemon bar and one that tastes vibrant and alive. The juice alone does not get you there. The zest contains the essential oils that carry that bright, unmistakably fresh lemon aroma, and it belongs in both the crust and the filling. I use the zest of two large lemons for an 8×8 pan, and I zest directly over my mixing bowl so none of those oils escape into the air.
Strain Your Filling Before Baking
Pour your lemon curd mixture through a fine mesh strainer before it goes into the pan. This removes any bits of cooked egg white, lemon pulp, or zest that survived the mix, and the result is a filling with that smooth, glassy surface you see in bakery cases. This one step made a visible and textural difference in my final batch.
Chill Completely Before Cutting
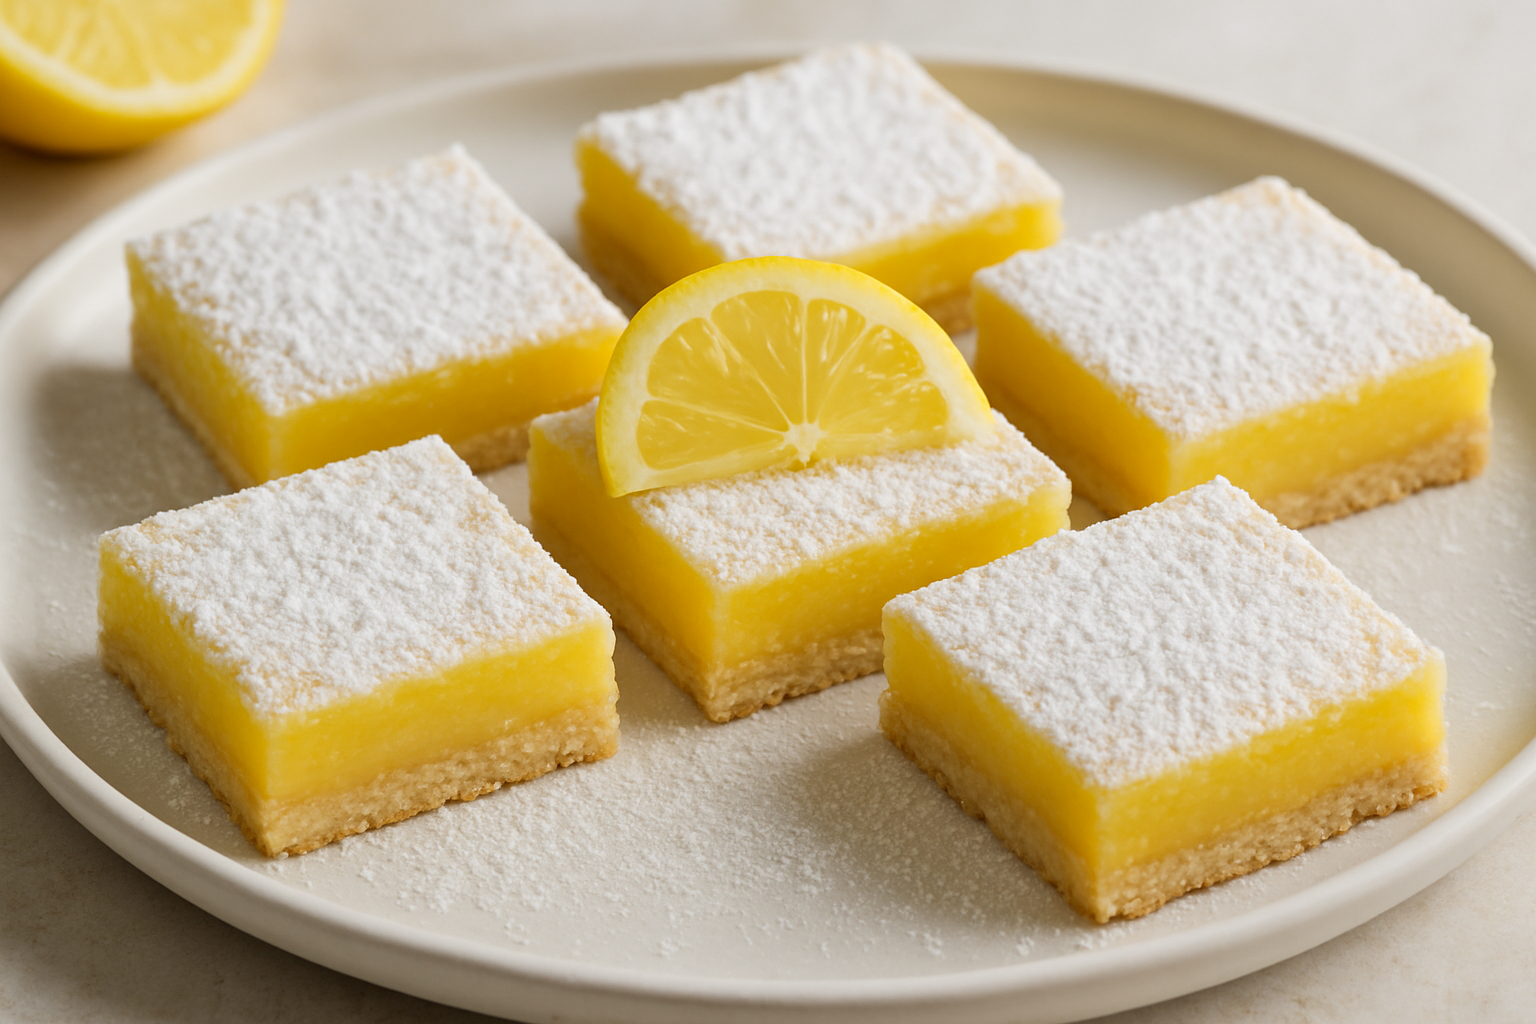
I know. Waiting is brutal. But lemon bars need at least two hours in the refrigerator before you cut them, preferably four. The filling continues to set as it cools, and cutting too early means a smeared, messy edge that would make any bakery pastry chef wince. When you are ready to cut, use a sharp knife wiped clean between every single slice. The clean edges are part of what makes these look as good as they taste.
Powdered Sugar Goes On Right Before Serving
Do not dust your bars with powdered sugar and then store them. The sugar will dissolve into the filling surface and disappear overnight. Dust generously right before you plate them, and they will have that beautiful snowy, bakery-perfect look that makes everyone reach for their phone to take a picture before they take a bite.
The Recipe: Bakery-Style Lemon Bars
After six attempts and every lesson I learned the hard way, here is exactly what goes into a pan that comes out with that silky filling and buttery, firm crust. This is the batch my sister will be eating on her birthday.
What You’ll Need
For the Shortbread Crust:
- 3/4 cup (170g) unsalted butter, melted
- 2 1/2 cups (310g) all-purpose flour
- 2/3 cup (80g) powdered sugar
- 1/2 teaspoon kosher salt
For the Lemon Curd Filling:
- 4 large eggs, room temperature
- 1 1/2 cups (300g) granulated sugar
- 3/4 cup (180ml) fresh lemon juice (about 4 lemons)
- 2 tablespoons (12g) finely grated lemon zest (from 2 large lemons)
- 1/3 cup (40g) all-purpose flour
- 1/2 teaspoon kosher salt
- 2 tablespoons powdered sugar for topping
How I Make Them, Step by Step
Prep time: 15 minutes | Bake time: 38–40 minutes | Chill time: At least 4 hours | Yield: 16–20 bars (one 8×8-inch pan)
- Preheat your oven to 350°F (175°C). Line an 8×8-inch metal baking pan with parchment paper, leaving a slight overhang on two sides so you can lift the bars out when they are done.
- Make the crust: In a medium bowl, whisk together 2 1/2 cups flour, 2/3 cup powdered sugar, and 1/2 teaspoon salt. Pour in 3/4 cup melted butter and stir until the mixture resembles coarse sand and just barely holds together when pressed.
- Press the crust firmly and evenly into the bottom of your prepared pan. Use the bottom of a measuring cup to get it flat and compact—this is not the time to be gentle. Bake for a full 20 minutes at 350°F until the crust is genuinely golden and set, not pale.
- While the crust bakes, make the filling. In a large bowl, whisk together 4 room-temperature eggs, 1 1/2 cups granulated sugar, 2 tablespoons lemon zest, and 1/2 teaspoon salt. Whisk until the mixture is pale and frothy, about 2 minutes—this helps the eggs incorporate fully and prevents scrambling during baking.
- Add 3/4 cup fresh lemon juice and 1/3 cup flour to the egg mixture and whisk until smooth and well combined. Do not overmix at this point, but do make sure there are no streaks of flour.
- Pour the filling mixture through a fine mesh strainer into a clean bowl, pressing gently with the back of a spoon to push the liquid through while catching any bits of cooked egg white or lemon pulp. This step is what gives you that glassy, bakery-quality surface.
- Remove the hot crust from the oven. Pour the strained filling directly onto the hot crust—the heat helps it set properly. Bake at 350°F for 18–20 minutes, until the filling is just barely set with a slight jiggle in the very center when you gently shake the pan.
- Turn off the oven and crack the door open about 2 inches. Let the pan sit in the cooling oven for 10 minutes. This prevents the temperature shock that cracked attempt number five.
- Remove the pan from the oven and place it on a wire rack to cool completely for about 1 hour.
- Transfer the pan to the refrigerator and chill for at least 4 hours, preferably overnight. The filling continues to set and firm up as it cools, and you need it completely solid before you cut.
- When you are ready to serve, use the parchment paper overhang to lift the whole slab onto a cutting board. Using a sharp knife wiped clean between every slice, cut the bars into squares or rectangles.
- Dust generously with powdered sugar right before plating. Do not dust them hours ahead—the sugar will disappear into the surface. Serve at room temperature or chilled, depending on your preference.
My Baking Essentials for This Recipe
Over six batches, I identified the tools that actually make a difference here. A good zester and the right pan are not optional extras — they genuinely change your results.
The Zester That Finally Gave Me Enough Lemon Zest Without Shredding My Knuckles
When you’re chasing that bright, authentic bakery lemon flavor in your bars, the difference between a box grater and a proper zester is the difference between faint citrus and pure lemon punch. After five failed batches, I realized my zest was either too chunky or I was losing half of it to my fingertips.
What works
- The micro-sharp teeth pull exactly the right amount of oil-rich zest from the lemon skin without catching the bitter white pith underneath, so you get pure flavor in every bar.
- It’s narrow and comfortable enough to control precisely—I can zest an entire lemon without white pith sneaking into my filling, which was my biggest problem with my old method.
- The collected zest stays light and fluffy in the channel, not compacted or oxidized, which means the lemon flavor stays bright even if you’re zesting 10 minutes before you mix the filling.
What doesn’t
- It requires a gentle hand and a firm grip on the lemon—if you press too hard or let your wrist get lazy, you’ll hit that pith and suddenly your filling tastes bitter.
- The channel fills up quickly with zest, so you have to stop and clear it every few passes, which feels slow if you’re zesting for a big batch or you’re impatient like I was on batch three.
On my fourth attempt, I almost gave up on this tool because I kept hitting pith and thought I was doing something wrong—but then I realized I was gripping the lemon too hard. Once I loosened my death grip and trusted the microplane’s sharpness, everything changed. You can grab the Microplane Premium Classic Series Zester and finally get the lemon flavor your bars deserve.
This post contains affiliate links. As an Amazon Associate, I earn from qualifying purchases at no extra cost to you.