
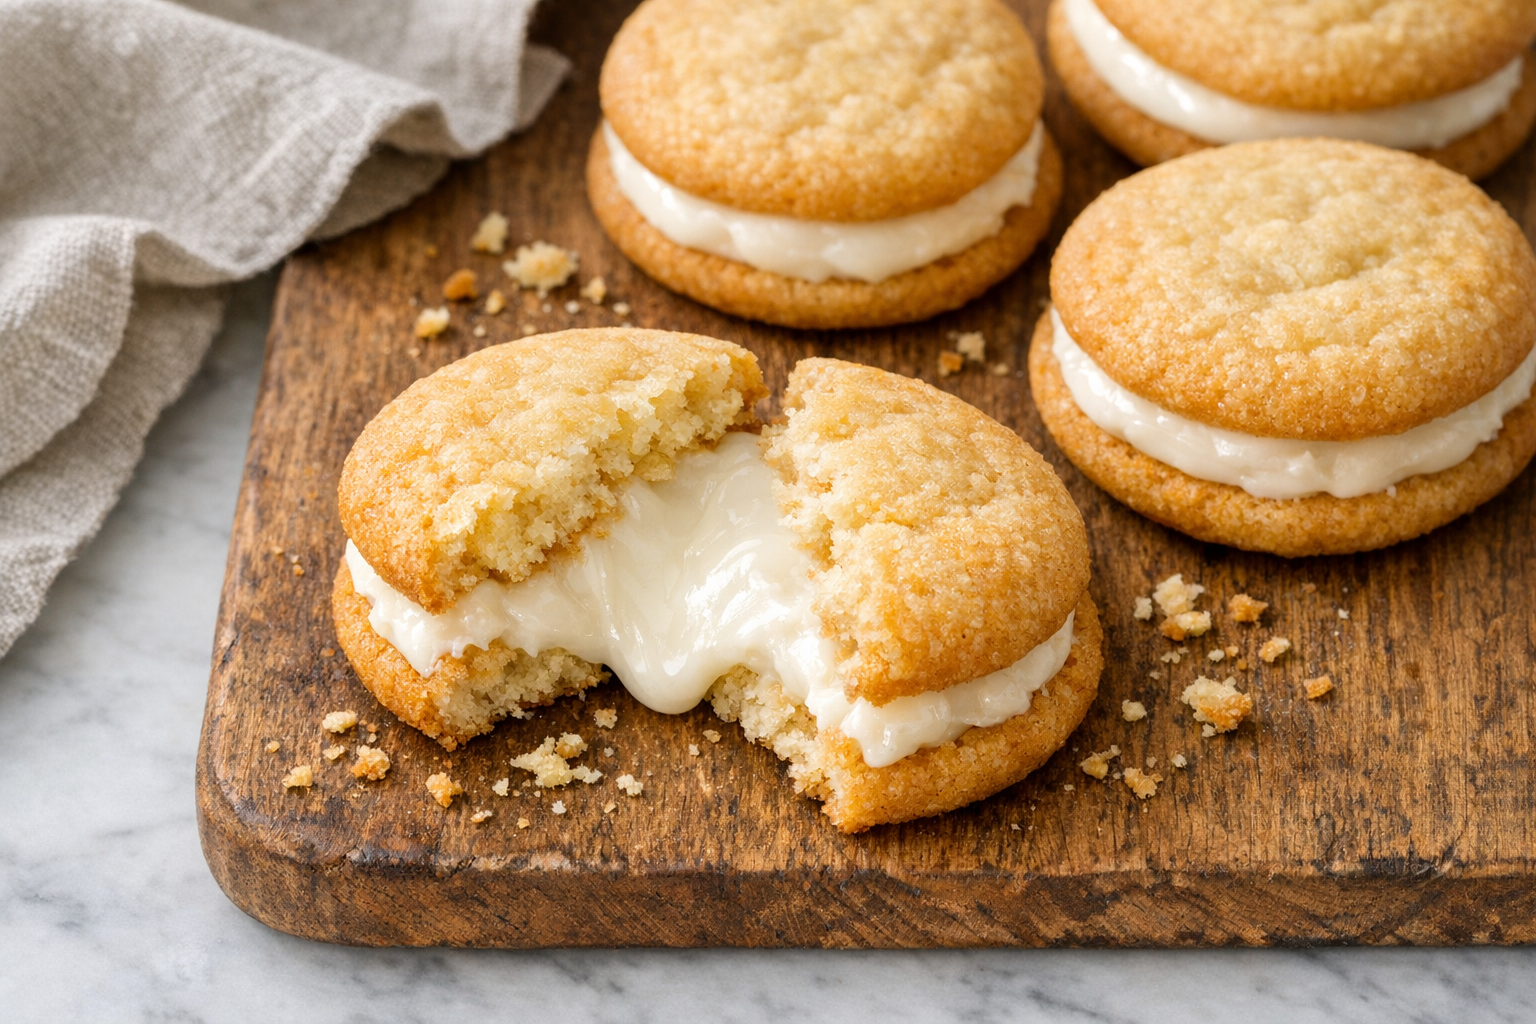
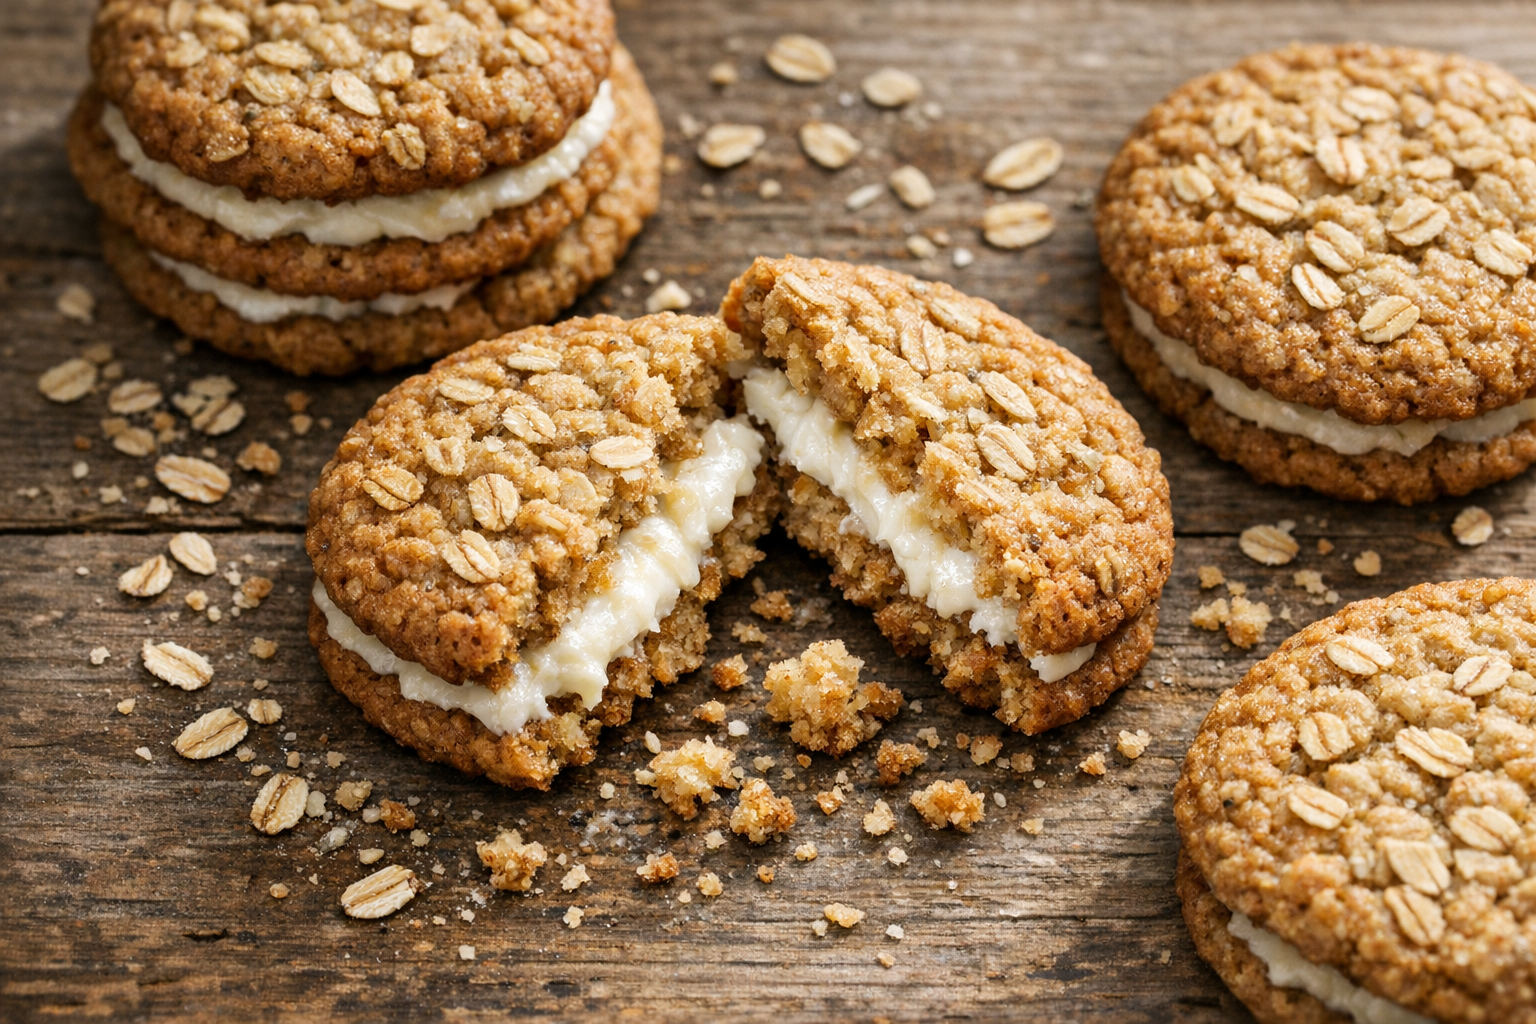
Cream filled oatmeal cookies are exactly what this recipe is all about, and if you grew up sneaking these out of a lunchbox, you already know the magic we’re talking about. Whether you’ve always called them oatmeal cream pies, creme filled cookies, or simply the greatest thing to ever come wrapped in plastic, these soft, chewy oatmeal cookies sandwiched around a cloud of sweet vanilla cream are pure childhood in every single bite. There’s something deeply comforting about that combination — the warm spice of oatmeal and cinnamon meeting that cool, fluffy filling — and once you taste a homemade version, there’s simply no going back.
This recipe is our love letter to those nostalgic Little Debbie-style treats, but made entirely from scratch in your own kitchen. Think of these as the ultimate homemade cream filled cookies — bigger, softer, and so much more flavorful than anything you’ll find on a store shelf. These cream filled oatmeal cookies strike that perfect balance between hearty and indulgent, with a marshmallow-buttercream filling that’s light enough to let the oatmeal cookies truly shine. Whether you’re baking them for a crowd, a care package, or just yourself on a quiet afternoon, these cream filled cookies are guaranteed to bring a little joy to your day.
The Magic of Homemade Cream-Filled Cookies
Bakery-style cream-filled cookies bring back childhood memories for many of us. These soft, pillowy treats combine rich oatmeal cookies with sweet, fluffy filling. Making them at home lets you control ingredients and customize flavors to your preference.
The beauty of these cookies lies in their simplicity. You don’t need professional equipment or advanced baking skills. Furthermore, homemade versions often taste fresher than store-bought alternatives. The combination of warm spices, chewy oats, and creamy filling creates an irresistible treat.
What I Recommend
When you’re making batch after batch of cream-filled cookies, a quality baking sheet set becomes your best friend. I use mine constantly—they heat evenly, don’t warp, and make it easy to rotate multiple batches without waiting around. Having at least two or three sturdy sheets means you can prep your next batch while one is in the oven.
A stand mixer is honestly a game-changer for creaming butter and sugar to that perfect fluffy consistency your cookie dough needs. I love how it frees up my hands so I can gradually add ingredients without getting tired halfway through—plus, it creams everything more evenly than hand mixing ever could.
An ice cream scoop might sound like an odd baking tool, but it’s perfect for portioning your cookie dough into uniform sizes. This means every cookie bakes at the same rate and looks beautifully consistent—which is especially important when you’re filling them and want them to look bakery-worthy.
If your cream-filled cookie recipe calls for it, quality organic rolled oats add wonderful texture and a subtle nutty flavor that pairs beautifully with creamy fillings. I always keep these on hand because they make cookies more interesting while keeping them soft and chewy.
Marshmallow fluff is one of my secret weapons for creating ultra-light, cloud-like cream fillings. A little bit mixed into your frosting or buttercream gives you that bakery-quality texture that makes people ask how you got it so fluffy.
Don’t skip on quality unsulphured molasses if your recipe includes it—this ingredient adds deep, complex flavor that you just can’t replicate with the sulfured version. It’s especially important in spiced cookies where you want that rich molasses note to really shine through.
Fresh ground cinnamon makes all the difference in spiced cookies, giving you that warm, aromatic quality that makes people’s kitchens smell absolutely incredible while baking. I replace my cinnamon every year or so to make sure it hasn’t lost its punch.
Ground ginger adds a subtle spicy warmth to cookies that pairs wonderfully with creamy fillings—it’s one of those ingredients that makes people say “I can’t quite put my finger on what makes these so special.” A little goes a long way, so quality matters.
Ground nutmeg is the secret weapon for adding depth to your baked cookies, especially when paired with cinnamon and ginger. Just a quarter teaspoon or so brings everything together and makes your cookies taste like they came from a real bakery.
For dusting and sweetening your cream fillings, good-quality powdered sugar dissolves smoothly into frostings and gives you that silky texture. I always sift mine before mixing to avoid lumps in the filling—it takes just an extra minute and makes a real difference in the final result.
Understanding the Perfect Cookie Base
The foundation of exceptional cream-filled cookies starts with the right texture. Soft, cake-like cookies work best because they complement the filling without becoming too heavy. Molasses plays a crucial role in achieving this texture while adding depth of flavor.
Oatmeal provides structure and a subtle nutty taste. Additionally, it creates a tender crumb that stays soft for days. The spices—cinnamon, ginger, and nutmeg—enhance the overall flavor profile without overwhelming the palate.
Brown sugar contributes moisture and a caramel-like sweetness. It also helps cookies retain their soft texture longer than white sugar alone. The combination of these ingredients creates a cookie that’s both flavorful and perfectly textured.
Choosing Your Filling Style
Two main filling options exist for cream-filled cookies: marshmallow fluff-based and butter-based. Source Each brings distinct characteristics to your finished cookies.
Marshmallow fluff creates an ultra-light, airy filling. It spreads easily and maintains its fluffy texture over time. However, some bakers find it too sweet or lacking in richness. The texture mimics commercial versions closely, making it nostalgic for many.
Butter-based fillings offer more complexity and richness. They typically combine butter, powdered sugar, and vanilla extract. Consequently, they provide a more sophisticated flavor profile. The texture is denser but still creamy and smooth.
Marshmallow Fluff Filling Benefits
Marshmallow fluff requires minimal preparation and mixing. You simply combine it with softened butter and powdered sugar. The result is a stable filling that doesn’t separate or weep. Moreover, it stays soft even when refrigerated.
This filling type works exceptionally well for those seeking authentic nostalgia. It captures the essence of classic cream-filled cookies perfectly. The sweetness level is high, which pairs beautifully with spiced oatmeal cookies.
Butter-Based Filling Advantages
Butter-based fillings allow greater customization. You can adjust sweetness levels easily by varying the powdered sugar amount. Additionally, you can incorporate different extracts or flavorings. Almond, maple, or even orange extract adds unique twists.
The texture is more substantial than marshmallow varieties. This filling holds up well to handling and transportation. It also provides a pleasant contrast to the soft cookie exterior.
Essential Ingredients for Success
Gathering quality ingredients ensures your cookies turn out perfectly. Old-fashioned rolled oats work better than quick oats for texture. All-purpose flour provides the right structure without making cookies tough.
Unsulfured molasses delivers the best flavor without bitterness. Dark brown sugar adds moisture and rich taste. Butter should be unsalted so you can control sodium levels precisely.
Spices should be fresh for maximum impact. Ground cinnamon, ginger, and nutmeg create warmth and complexity. Baking soda helps cookies spread properly while maintaining softness.
The Perfect Oatmeal Cookie Recipe
Soft Molasses Oatmeal Cookies
Ingredients:
- 1 cup (2 sticks) unsalted butter, softened
- 1 cup packed dark brown sugar
- 1/2 cup granulated sugar
- 2 large eggs, room temperature
- 1/4 cup unsulfured molasses
- 2 teaspoons vanilla extract
- 2 cups all-purpose flour
- 2 cups old-fashioned rolled oats
- 1 teaspoon baking soda
- 1 teaspoon ground cinnamon
- 1/2 teaspoon ground ginger
- 1/4 teaspoon ground nutmeg
- 1/2 teaspoon salt
Instructions:
- Preheat your oven to 350°F and line baking sheets with parchment paper.
- Cream together softened butter, brown sugar, and granulated sugar until light and fluffy, about 3 minutes.
- Add eggs one at a time, beating well after each addition.
- Mix in molasses and vanilla extract until fully incorporated.
- Whisk together flour, oats, baking soda, spices, and salt in a separate bowl.
- Gradually add dry ingredients to wet ingredients, mixing until just combined.
- Drop rounded tablespoons of dough onto prepared baking sheets, spacing them 2 inches apart.
- Bake for 10-12 minutes until edges are set but centers still look slightly underdone.
- Let cookies cool on baking sheets for 5 minutes before transferring to wire racks.
- Allow cookies to cool completely before filling, approximately 30 minutes.
Classic Marshmallow Fluff Filling
Fluffy Marshmallow Cream Filling
Ingredients:
- 1/2 cup (1 stick) unsalted butter, softened
- 1 cup marshmallow fluff
- 1 1/2 cups powdered sugar, sifted
- 1 teaspoon vanilla extract
- Pinch of salt
Instructions:
- Beat softened butter in a mixing bowl until creamy and smooth, about 2 minutes.
- Add marshmallow fluff and continue beating until well combined.
- Gradually add sifted powdered sugar, mixing on low speed initially.
- Increase speed to medium-high and beat until filling is light and fluffy, about 3 minutes.
- Mix in vanilla extract and salt until evenly distributed.
- Transfer filling to a piping bag fitted with a round tip for easy application.
- Pipe or spread approximately 2 tablespoons of filling onto the flat side of one cookie.
- Top with another cookie, flat side down, pressing gently to spread filling to edges.
Rich Buttercream Filling Alternative
Vanilla Buttercream Filling
Ingredients:
- 3/4 cup (1 1/2 sticks) unsalted butter, softened
- 3 cups powdered sugar, sifted
- 2 teaspoons vanilla extract
- 2-3 tablespoons heavy cream or whole milk
- 1/4 teaspoon salt
Instructions:
- Beat softened butter in a large bowl until pale and fluffy, approximately 4 minutes.
- Add half of the sifted powdered sugar and mix on low speed until incorporated.
- Pour in vanilla extract and 2 tablespoons of cream, then mix thoroughly.
- Add remaining powdered sugar gradually, beating until smooth.
- Add additional cream if needed to reach desired consistency.
- Mix in salt and beat on high speed for 2 minutes until light and airy.
- Spread or pipe approximately 2 tablespoons onto each cookie.
- Sandwich with a second cookie and press gently to seal.
Storage Techniques for Maximum Freshness
Proper storage keeps your cream-filled cookies soft and delicious for days. The filling type influences the best storage method. Understanding these differences helps maintain optimal texture.
Room temperature storage works well for short-term keeping. Place cookies in an airtight container with parchment paper between layers. This prevents sticking while maintaining softness. Cookies stay fresh this way for 3-4 days.
Maintaining Soft Cookie Texture
Adding a slice of bread to your storage container helps cookies retain moisture. The cookies absorb moisture from the bread, staying soft longer. Replace the bread slice every other day for best results.
Avoid refrigerating cream-filled cookies unless absolutely necessary. Cold temperatures can make cookies firm and less enjoyable. However, if your kitchen is very warm, refrigeration prevents filling from melting.
Long-Term Storage Options
Maximizing Freshness Through Proper Freezing
Freezing offers an exceptional solution for preserving cream-filled cookies beyond their typical shelf life. In fact, this method can extend freshness for several months. However, the key lies in following proper storage techniques. Without correct preparation, your cookies may develop freezer burn. Additionally, they could absorb unwanted odors from other frozen items.
The process begins with individual wrapping. Take each cookie and wrap it completely in plastic wrap. Moreover, ensure no gaps exist in the wrapping. Press the plastic firmly against the cookie’s surface. This creates an airtight seal around each treat. Furthermore, this initial layer protects the delicate cream filling from ice crystals.
The Double-Layer Protection Method
After wrapping, place the cookies inside heavy-duty freezer bags. Therefore, you create a double barrier against freezer conditions. Remove as much air as possible from the bags. For example, use a straw to suck out excess air. Alternatively, invest in vacuum-sealed bags for optimal results. Label each bag with the freezing date using permanent marker.
Properly frozen cookies maintain their quality for approximately three months. However, some varieties last even longer. Consequently, you can prepare batches ahead for special occasions. Meanwhile, the cream filling remains surprisingly fresh. The texture stays soft and creamy upon thawing. As a result, frozen cookies taste nearly identical to fresh ones.
Thaw frozen cookies at room temperature for about 30 minutes before serving. This method preserves both texture and flavor remarkably well. Consequently, you can make large batches and enjoy them over time.
Tips for Bakery-Quality Results
Achieving professional-looking cookies requires attention to detail. First, measure ingredients accurately using proper measuring techniques. Spoon flour into measuring cups rather than scooping directly from the bag.
The Science Behind Room Temperature Ingredients
Temperature matters significantly when preparing cream-filled cookie dough. Cold ingredients resist mixing and create uneven distribution throughout your batter. Meanwhile, room temperature components combine smoothly and incorporate air more effectively. This results in cookies with superior texture and consistency.
Consider what happens at the molecular level. Cold butter remains firm and doesn’t cream properly with sugar. As a result, you’ll struggle to achieve that light, fluffy base essential for tender cookies. Furthermore, cold eggs can cause butter to seize up and become lumpy again.
Proper Timing for Best Results
Plan ahead by removing your ingredients from refrigeration well before you begin. Butter should sit out for approximately 30-45 minutes, depending on your kitchen temperature. You’ll know it’s ready when you can press a finger into it and leave an indent. However, it shouldn’t be so soft that it melts or becomes greasy.
Eggs need roughly 30 minutes to reach optimal temperature. Additionally, you can speed this process by placing them in a bowl of lukewarm water for 10 minutes. This technique works perfectly when you’ve forgotten to prep in advance.
Impact on Your Cookie Quality
The difference in your finished product is remarkable. Therefore, cookies made with properly tempered ingredients spread more evenly during baking. Moreover, they develop better structure to hold that delicious cream filling. The texture becomes more uniform throughout each cookie. Consequently, you’ll notice improved flavor distribution and a more professional appearance in your final batch.
Don’t overbake your cookies if you want them soft. They should look slightly underdone when you remove them from the oven. The cookies continue cooking on the hot baking sheet after removal.
Achieving Uniform Cookie Sizes
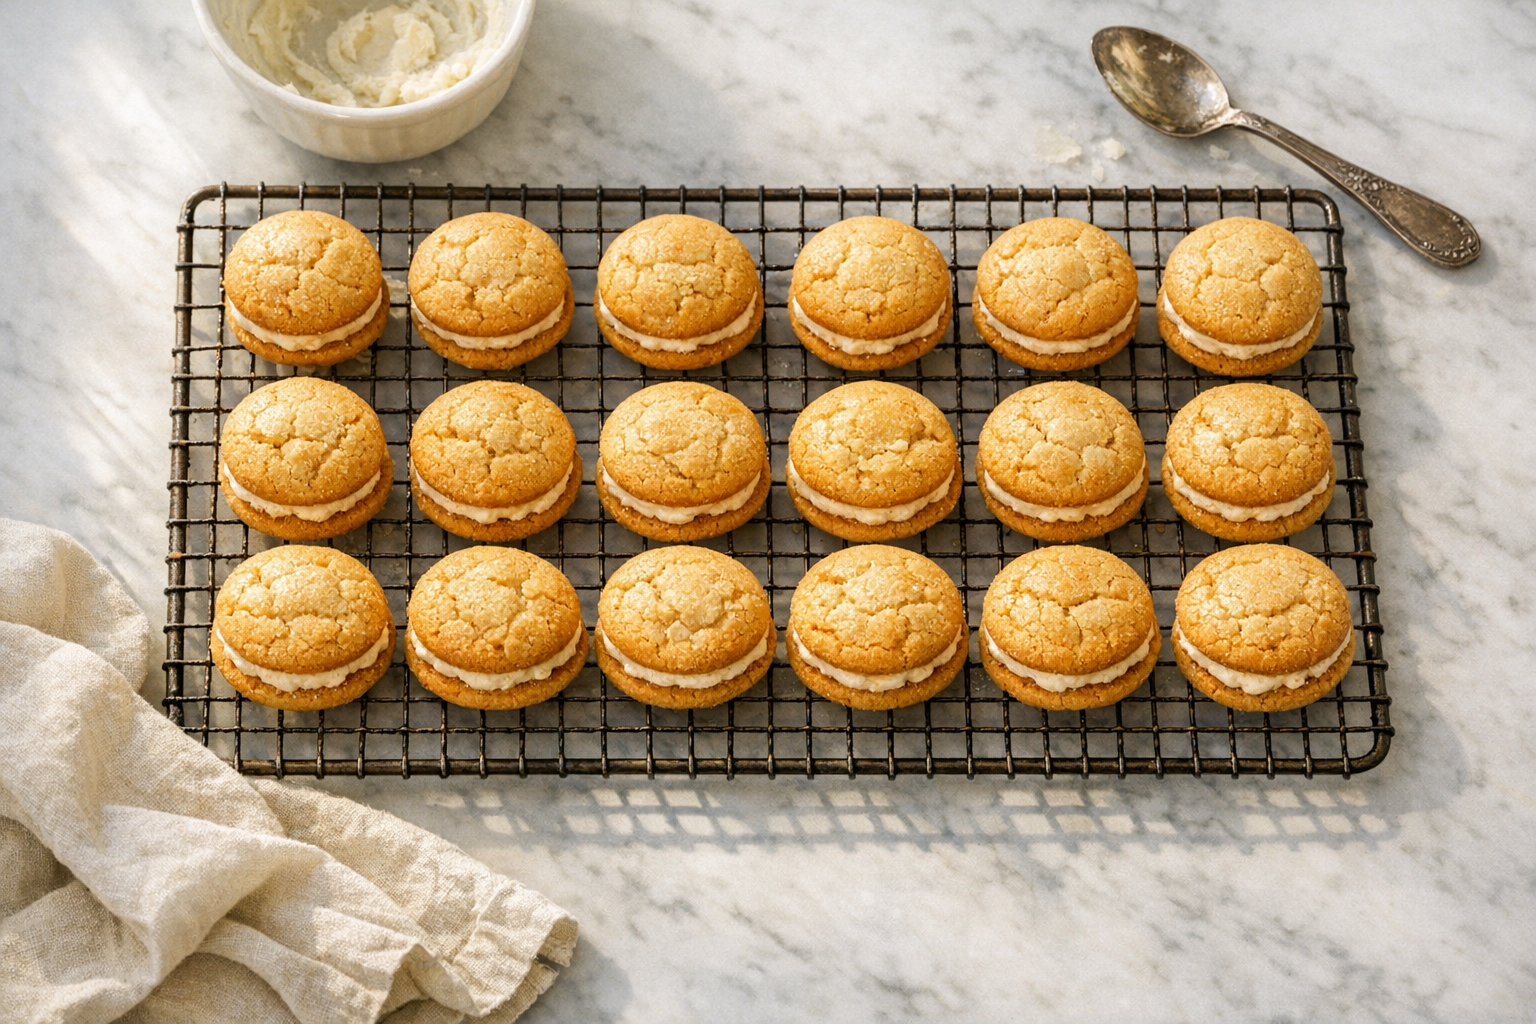
Use a cookie scoop for consistent sizing. This ensures even baking and professional appearance. A 2-tablespoon scoop creates perfectly sized cookies for sandwiching.
Achieving the perfect sandwich cookie requires precise placement on your pan. Initially, the dough needs ample space to expand outward. Most recipes rely on butter, which melts rapidly in a hot oven. Therefore, the structure relaxes before it fully sets. Consequently, a small ball of dough transforms into a wide, flat disc.
Why Airflow Matters
Proper spacing is not just about preventing cookies from touching. It also dictates how heat moves around the food. Specifically, hot air must circulate freely around every individual cookie. This airflow guarantees that the edges brown evenly.
However, overcrowding the pan blocks these essential heat channels. As a result, you may end up with steamed, soggy edges. For crème-filled treats, texture is everything. Thus, you need that sturdy edge to hold the filling.
Strategies for Success
To avoid the dreaded “unibrow” cookie, follow these simple guidelines. These steps help maintain the structural integrity required for sandwiches.
- Use the Two-Finger Test: Visually check the gaps. If you cannot fit two fingers between dough balls, they are too close.
- Stagger Your Rows: Do not place dough directly behind the one in front. Instead, offset them in a zigzag pattern.
- Bake in Batches: Never try to squeeze extra dough onto a single sheet. It is better to bake multiple small batches.
The Importance of Uniformity
Sandwich cookies require two matching halves to work correctly. If cookies merge, you lose that perfect round shape. Furthermore, separating fused cookies often breaks them. This leaves you with jagged edges that leak filling.
Ultimately, patience yields the best results. By leaving two inches of clearance, you ensure every cookie remains distinct. This discipline creates professional-looking treats every time.
Piping vs. Spreading Filling
Mastering the Piping Technique
Professional bakers consistently choose piping bags for filling their sandwich cookies. This method transforms homemade treats into bakery-quality confections. Furthermore, the technique eliminates messy smearing and uneven distribution. Your cookies will showcase clean edges and uniform appearance.
Essential Equipment for Perfect Results
To achieve optimal results, you’ll need specific tools:
- Large round piping tip (size 1A or 2A works best)
- Reusable or disposable piping bag
- Coupler for easy tip changes
- Rubber spatula for filling the bag
Additionally, consider investing in a piping bag holder. This stand keeps your bag upright during filling. As a result, you’ll avoid frustrating spills and waste.
Portion Control Benefits
The piping method delivers remarkable consistency across your entire batch. Each cookie receives exactly the same amount of filling. Therefore, your treats bake and taste identical. Moreover, this precision helps with nutritional calculations and recipe scaling.
For instance, a standard dollop should measure about one tablespoon. However, piping ensures this measurement every single time. In contrast, spreading with a knife creates unpredictable portions. Consequently, some cookies become overfilled while others lack adequate cream.
Time-Saving Advantages
Meanwhile, piping actually speeds up your production process. You can fill dozens of cookies in minutes. The controlled flow allows rapid, rhythmic assembly. Furthermore, cleanup becomes simpler with fewer utensils involved.
Spreading with an offset spatula works well for thicker fillings. It allows you to reach the edges more easily. Either method produces delicious results when done carefully.
Flavor Variations to Try
Customizing your cream-filled cookies adds excitement and variety. Spice adjustments create different flavor profiles easily. Try increasing ginger for more warmth or adding cardamom for complexity.
Chocolate chips folded into the cookie dough add richness. Mini chips work best because they distribute more evenly. Dark chocolate provides a sophisticated contrast to sweet filling.
Creative Filling Flavors
Standard vanilla buttercream is a reliable classic, yet it can sometimes feel predictable. However, swapping in maple extract creates immediate magic for your crème filled cookie recipes. This simple change brings a warm, woodsy depth to your filling. Consequently, your homemade treats will taste professionally made.
Elevating Your Flavor Profile
Fall baking relies heavily on cozy, nostalgic flavors. Therefore, maple is the ideal choice for seasonal treats. It evokes vivid memories of changing leaves and crisp mornings. Additionally, it offers a rich complexity that plain sugar lacks. You do not need fancy techniques to achieve this upgrade. Simply reach for a high-quality extract bottle.
Moreover, the aroma alone is worth the switch. As you whip the buttercream, the scent fills the kitchen. Thus, the anticipation builds before the cookies are even assembled.
Ideal Cookie Base Pairings
While oatmeal cookies are a traditional match, do not stop there. maple buttercream complements many different cookie bases. For instance, consider these delicious combinations:
- Ginger Molasses: The spicy heat balances the sweet maple cream perfectly.
- Snickerdoodles: Cinnamon and maple are a natural, warming duo.
- Dark Chocolate: The bitterness of cocoa contrasts beautifully with the sweet filling.
- Pumpkin Spice: This creates the ultimate autumn crème filled cookie experience.
Furthermore, even a simple butter cookie becomes gourmet with this filling. The maple flavor acts as the star of the show.
Tips for the Perfect Filling
Getting the texture and flavor right requires attention to detail. Specifically, you must manage the liquid content carefully. Here are three tips for success:
- Choose Quality: Always select pure maple extract over imitation versions. As a result, the flavor will be authentic rather than chemical.
- Avoid Syrup: Do not try to substitute maple syrup for extract. Unfortunately, the extra liquid can cause your buttercream to separate or break.
- Add Salt: A pinch of sea salt highlights the maple notes. Consequently, the sweetness will not be overpowering.
Finally, taste your filling as you go. You want a bold maple punch that stands out against the cookie.
Cinnamon buttercream doubles down on warm spice notes. Add 1 teaspoon of ground cinnamon to your filling recipe. This creates a cohesive flavor experience throughout the cookie.
The Science of Flavor Balance
Standard American buttercream often relies heavily on powdered sugar for stability. However, this can sometimes lead to a cloying sweetness. By introducing cream cheese, you effectively cut through that sugary intensity. The ingredient’s natural acidity provides a necessary counterpoint to the sweetener. Consequently, the filling becomes tangy rather than just sweet.
This sophisticated profile mimics the beloved taste of cheesecake. Therefore, it appeals to adult palates seeking more depth in their desserts. You are not just making a sandwich cookie; you are creating a complex treat. Additionally, the slight saltiness of cream cheese enhances other flavors. It acts as a seasoning for the sugar itself.
Achieving the Perfect Texture
Texture plays a massive role in a successful crème-filled cookie. Fortunately, cream cheese offers a dense, velvety consistency that butter alone lacks. It is slightly heavier than aerated butter. As a result, your sandwich cookies will feel more substantial in the hand. The filling is less likely to squish out messily when bitten.
Furthermore, this density creates a luxurious mouthfeel. It melts slowly on the tongue, coating the palate pleasantly. Meanwhile, the structure remains sturdy enough for stacking. This makes these cookies excellent for gift boxes or travel. Ultimately, the addition creates a professional-quality finish.
Mixing for Best Results
Getting the ratio right is crucial for both flavor and stability. Specifically, the recommended 1:1 ratio acts as a golden rule for bakers. This balance prevents the filling from becoming too runny or too stiff.
Follow these steps for the smoothest emulsion:
- Soften Ingredients: Ensure both the butter and cream cheese are at room temperature.
- Beat Thoroughly: Mix the fats together until absolutely no lumps remain.
- Add Sugar Slowly: Incorporate powdered sugar gradually to control the stiffness.
Additionally, temperature control matters greatly during storage. Because of the fresh dairy content, these cookies usually require refrigeration. However, you should let them sit out briefly before serving. This allows the filling to return to its creamy peak.
Ideal Flavor Pairings
This tangy filling pairs beautifully with robust, flavorful cookie doughs. For example, it is the classic, non-negotiable choice for red velvet cookies. Moreover, it complements spiced autumn doughs perfectly. The tanginess brightens heavy spices like cinnamon and nutmeg.
Consider these top-tier combinations:
- Carrot Cake Cookies: The filling enhances the warm spice blend.
- Dark Chocolate: The creaminess breaks up the intense richness of cocoa.
- Lemon or Citrus: The acidity amplifies the tart fruit notes.
In contrast, a plain vanilla cookie might be overpowered by the tang. Therefore, choose your cookie base wisely to match the filling’s strength.
Troubleshooting Common Issues
The Importance of Butter Consistency
Achieving the perfect structural integrity is crucial for creme-filled cookies. Without a sturdy base, the heavy filling will simply squeeze out upon the first bite. Consequently, flat cookies result in messy, unappealing sandwiches. The primary culprit for this spreading is often the temperature of your butter.
If your butter is too soft or melted, the dough loses its ability to hold air. Therefore, it melts rapidly in the oven before the cookie structure can set. For the best results, start with cool room-temperature butter. It should yield slightly to firm finger pressure but should never look greasy or shiny.
Why Chilling is Mandatory
Chilling your dough is a non-negotiable step for successful sandwich cookies. This process solidifies the fat within the dough, which drastically changes how it bakes. As a result, the fat takes longer to melt once it hits the hot oven. This delay allows the flour and eggs to set the cookie’s shape first.
Simply wrap your prepared dough tightly in plastic wrap to prevent drying. Then, place it in the refrigerator for at least 30 minutes. However, an hour is often better for optimal texture. If you are pressed for time, the freezer works too. Freezing for 15 minutes can mimic the effects of a longer refrigeration period.
Calibrating Your Oven Heat
Even with perfect dough, an inaccurate oven can ruin your batch. Furthermore, internal oven thermostats are notoriously unreliable and often display incorrect temperatures. An oven running too cool causes slow baking, which encourages excessive spreading. Conversely, extreme heat burns the edges before the center is stable.
To combat this, always use a separate oven thermometer for precision. Place it in the center of the rack to get a true reading. Adjust your dial until the internal thermometer matches your recipe’s requirement. This simple tool ensures the baking environment is perfect for your creme-filled treats.
Additional Tips for Structural Integrity
Beyond temperature control, other factors influence how much a cookie spreads. Consider these adjustments if you still face issues:
- Measure Flour Correctly: Too little flour creates a weak structure. Always spoon and level your flour.
- Use Parchment Paper: Greased pans encourage spreading. In contrast, parchment paper provides grip for the dough.
- Cool Your Baking Sheets: Never place cold dough on a hot baking sheet. Consequently, the butter will melt instantly.
- Check Leavening Agents: Expired baking soda can alter the chemical reaction. Ensure your ingredients are fresh.
By mastering these variables, you guarantee a thick, chewy cookie perfect for holding creme.
Dry, crumbly cookies result from overbaking or too much flour. Measure flour carefully and remove cookies when centers still look soft. They firm up during cooling on the baking sheet.
Fixing Filling Problems
Achieving the Perfect Filling Consistency
When your cookie filling feels too loose or liquidy, the solution lies in adjusting your powdered sugar ratio. A runny mixture won’t stay put between cookie layers. Furthermore, it can seep out the sides and create a messy appearance. The powdered sugar acts as a structural agent in your filling. It absorbs excess moisture and provides the necessary body. Source ## The Gradual Addition Method
Start by incorporating one tablespoon of powdered sugar at a time into your mixture. Additionally, mix thoroughly between each addition to assess the texture. This measured approach prevents you from over-thickening the filling accidentally. For example, adding too much sugar at once can make the filling stiff and difficult to work with. Therefore, patience during this process yields better results.
Testing for Proper Texture
The ideal filling consistency should resemble thick frosting or soft butter. Moreover, it needs to hold a peak when you lift your spoon or spatula. Try piping a small amount onto parchment paper as a test. Consequently, if it spreads or flattens immediately, continue adding more powdered sugar. However, if it maintains its shape and shows defined edges, you’ve achieved the right balance. The filling should spread smoothly without being runny. Meanwhile, it must stay contained between the cookie halves without oozing out during assembly or storage.
Grainy filling occurs when butter wasn’t softened properly or sugar wasn’t sifted. Always sift powdered sugar before adding it to butter. Beat filling longer to dissolve any remaining sugar crystals.
Making Cookies Ahead for Gatherings
Preparing components separately streamlines cookie assembly later. Bake cookies up to 2 days in advance and store them unfilled. Make filling the day before and refrigerate it in an airtight container.
Perfect Timing for Cookie Assembly
The secret to impressive creme filled cookies lies in strategic timing. Assembling your treats approximately three to four hours before guests arrive creates the ideal balance. During this window, the filling softens just enough to bond with the cookies. Meanwhile, the cookies maintain their signature crunch. This timeframe represents the sweet spot between preparation and presentation.
Early assembly risks disappointment. Cookies assembled the night before often turn unpleasantly soft by serving time. The moisture from the filling migrates into the cookie layers. Consequently, you lose that satisfying textural contrast everyone loves. However, last-minute assembly presents different challenges. The filling needs time to settle and reach room temperature for optimal flavor.
Avoiding Common Texture Problems
Furthermore, proper timing prevents the dreaded soggy cookie syndrome. Moisture is the enemy of crispy cookies. When filling sits too long against cookie surfaces, it breaks down their structure. The result? Limp, disappointing treats that lack appeal. Therefore, the three-hour window protects against moisture damage while maximizing freshness.
Additionally, this timing keeps your cream filling at its best consistency. Freshly piped filling often feels too firm and cold. It needs time to soften and become creamy. Moreover, flavors develop and meld during this resting period. Your cookies will taste more cohesive and professional.
Creating the Illusion of Effort
Your guests will never suspect your efficient approach. The cookies appear freshly made and artisanal. In reality, you’ve simply mastered smart timing. As a result, you can enjoy your event instead of stressing in the kitchen. This simple trick delivers bakery-quality results with minimal effort.
Bring refrigerated filling to room temperature before using. Cold filling is difficult to spread and may crack cookies. Let it sit out for 20-30 minutes and stir before piping.
The Joy of Homemade Treats
Creating bakery-style cream-filled cookies at home brings immense satisfaction. The process connects you with traditional baking while allowing creative expression. Moreover, homemade cookies taste fresher and more flavorful than commercial versions.
Sharing these cookies with family and friends creates memorable moments. The soft, spiced cookies paired with sweet, creamy filling delight people of all ages. Each bite delivers comfort and nostalgia wrapped in homemade goodness.
Experiment with different filling types and flavor combinations to find your favorite. The basic recipe provides an excellent foundation for countless variations. Most importantly, enjoy the process of creating something delicious from scratch that brings joy to those who taste it.
*As an Amazon Associate, I earn from qualifying purchases.
Sugar Free Cream Filling for Cookies
There are plenty of reasons you might want to swap out traditional powdered sugar in your filling. Whether you’re managing diabetes, following a keto lifestyle, or simply trying to cut back on refined sugar, making a sugar free cream filling for cookies is a lot easier than you might think. The good news is that you don’t have to sacrifice that classic sweet, creamy center to meet your dietary goals. With the right substitutes, you can still enjoy a filling that tastes indulgent and satisfying.
The simplest approach is to use monk fruit sweetener or erythritol in place of powdered sugar at a 1:1 ratio. Both options dissolve reasonably well into softened butter and shortening, giving you a filling that holds its shape between the cookies. Because these sweeteners lack the same depth of flavor that cane sugar provides, it helps to bump up your vanilla extract slightly — try adding an extra half teaspoon beyond what the original recipe calls for. A small pinch of fine sea salt also goes a long way toward rounding out the sweetness and making this sugar free cream filling for cookies taste more balanced and complete.
Texture can be the trickiest part when working without traditional powdered sugar. Erythritol, in particular, can sometimes leave a slightly gritty or cooling sensation on the palate. To minimize this, make sure to beat your filling for a full three to four minutes on medium-high speed so the sweetener has time to fully incorporate into the fat. You can also try blending your erythritol in a high-powered blender or food processor before using it to achieve a finer, more powdery consistency that mimics traditional confectioners’ sugar. If your filling seems too stiff, add heavy cream one teaspoon at a time until you reach a smooth, spreadable consistency.
Once you’ve nailed the technique, you’ll find that this sugar free cream filling for cookies works beautifully not just in these oatmeal sandwich cookies, but in just about any filled cookie recipe you love. Store any leftover filling in an airtight container in the refrigerator for up to one week, and let it come to room temperature before using it again so it spreads easily. It’s a small adjustment that makes a big difference for anyone who wants to enjoy a classic treat without the sugar spike.
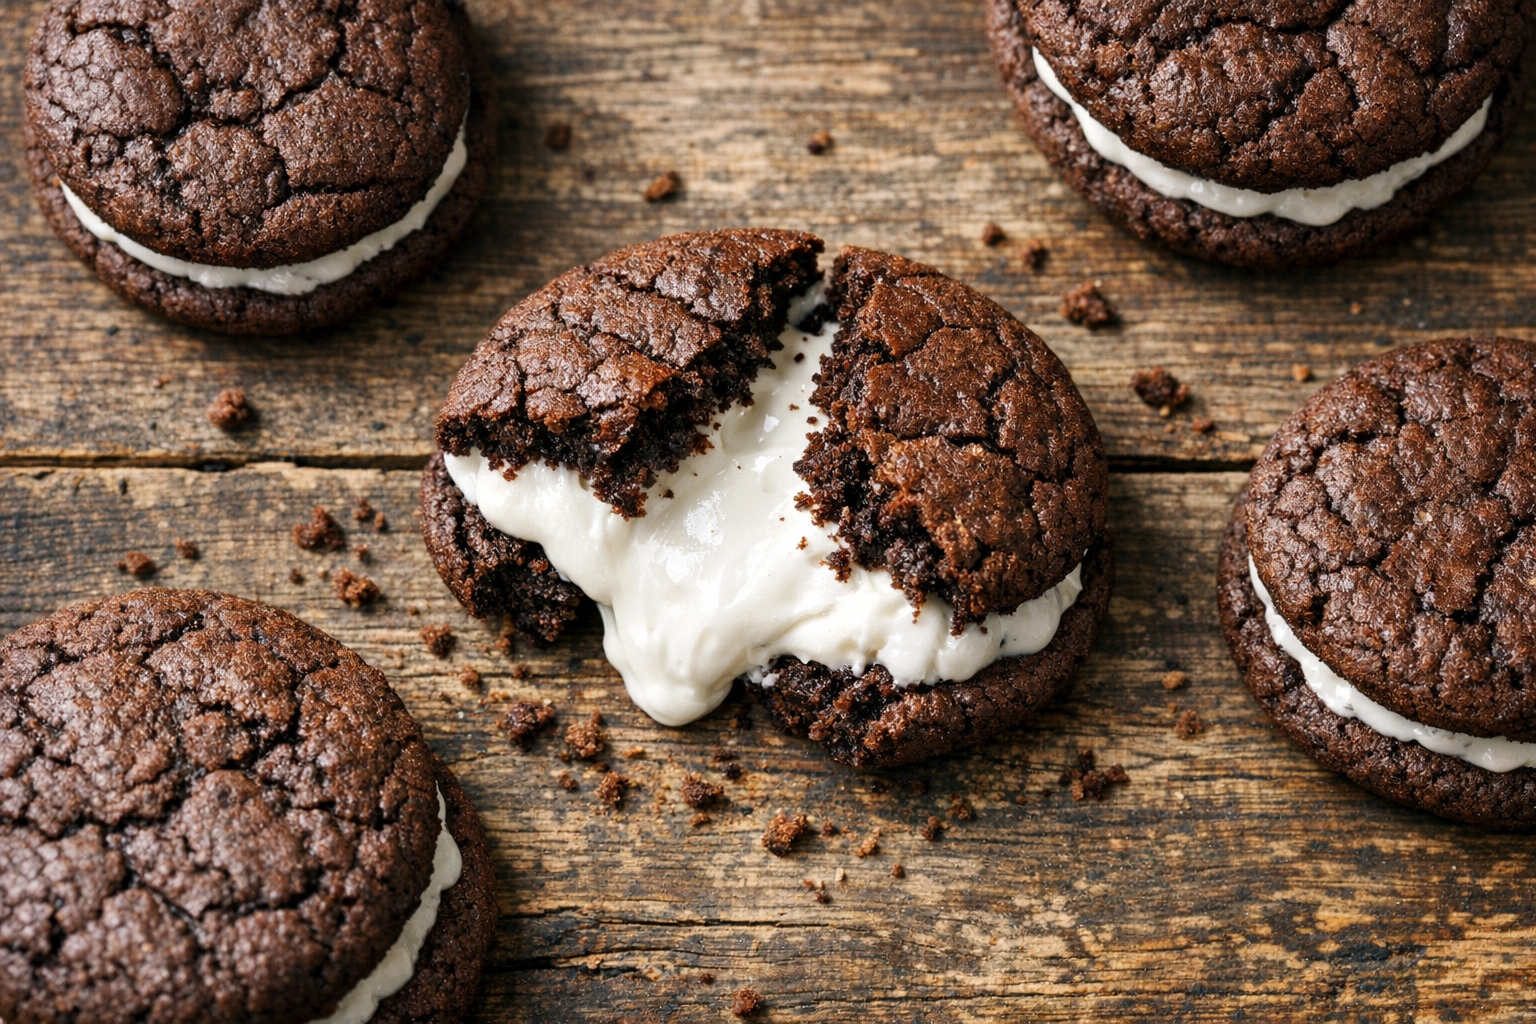
Cream-Filled Chocolate Cookies Variation
If you’re a chocolate lover, you’re going to want to try this variation immediately. To turn the oatmeal cookie base into cream-filled chocolate cookies, simply add one-third cup of unsweetened cocoa powder to your dry ingredients and reduce the all-purpose flour by two tablespoons to compensate for the extra bulk. This keeps the cookie dough at the right consistency without making it too dense or dry. The cocoa works beautifully with the hearty, chewy texture of the oats, giving you a rich, fudgy cookie base that still has all the wholesome character of the original recipe.
When it comes to the filling, the chocolate base opens up some really exciting flavor combinations. A classic vanilla cream filling becomes even more striking sandwiched between two deep, dark chocolate oatmeal cookies — the contrast in both color and flavor is genuinely stunning. For something a little more adventurous, a mint-flavored cream filling pairs extraordinarily well with the cocoa cookie base, creating cream-filled chocolate cookies that taste like a homemade version of a beloved candy. To make the mint variation, simply replace half the vanilla extract in your filling with pure peppermint extract and add a drop or two of green food coloring if you want that signature look.
These cream-filled chocolate cookies also freeze exceptionally well, making them a great option for preparing ahead of time for parties, holidays, or just keeping a sweet treat on hand throughout the week. Layer them between sheets of parchment paper in a freezer-safe container and freeze for up to two months. Let them thaw at room temperature for about fifteen minutes before serving, and they’ll taste just as fresh and delicious as the day you made them. Whether you stick with the classic vanilla filling or venture into mint territory, this chocolate variation is guaranteed to earn a permanent spot in your cookie rotation.