
The Ultimate Texture Experience
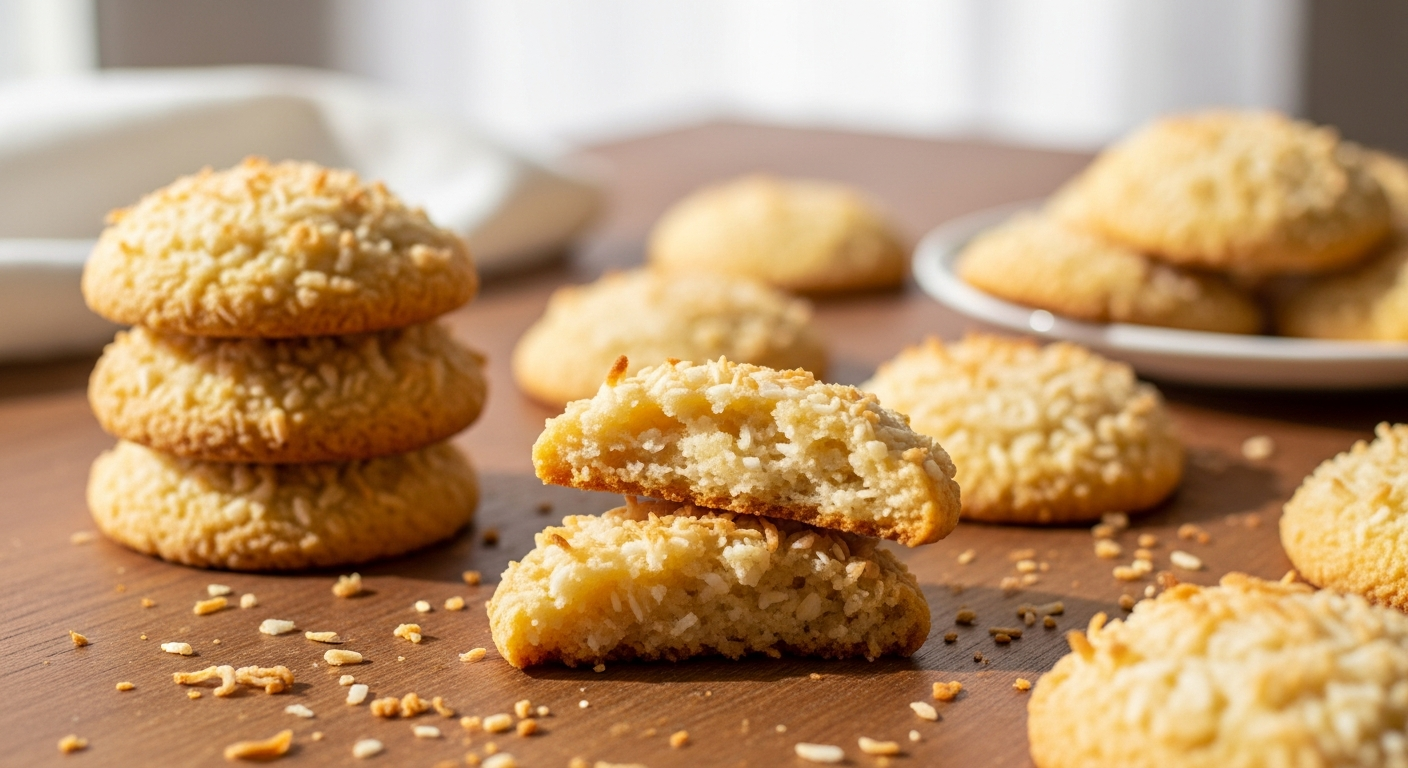
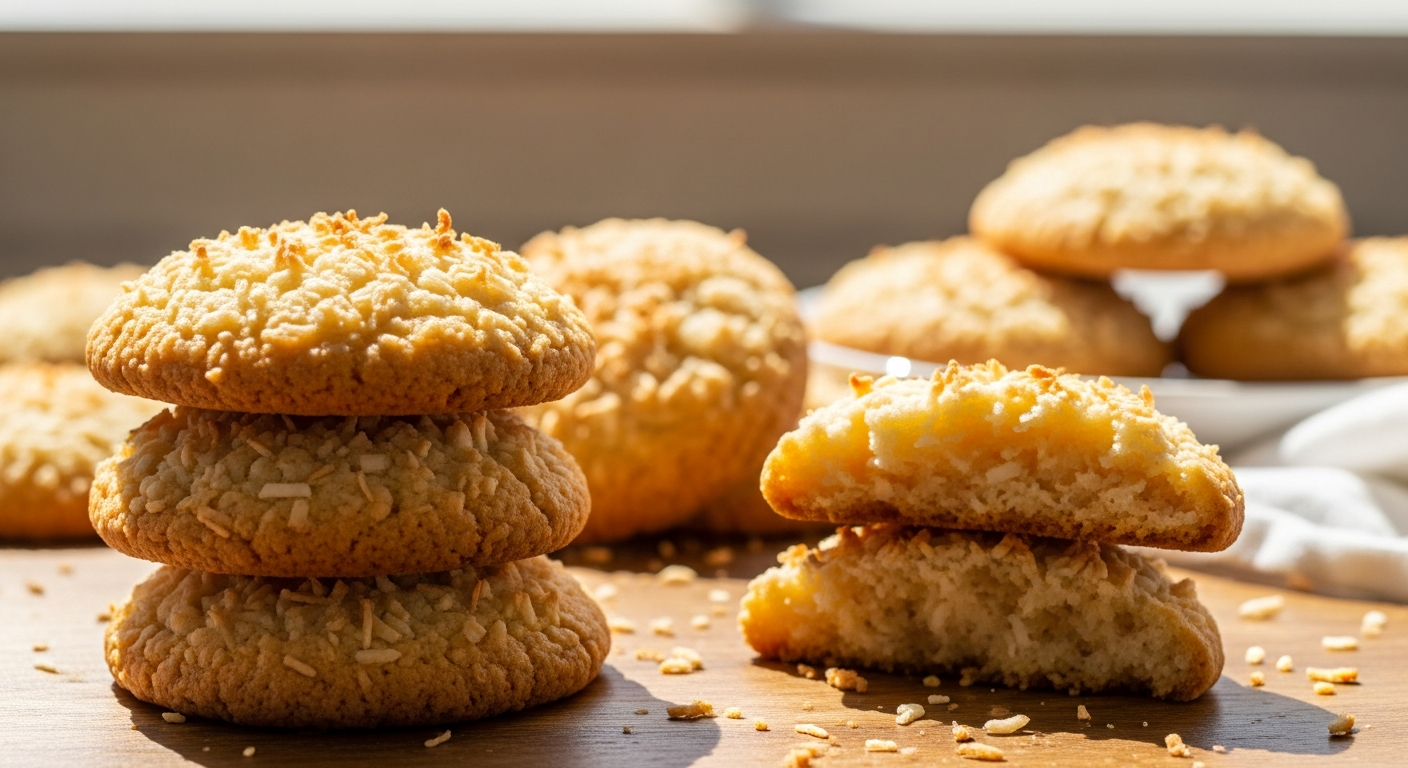
Achieving the ideal consistency in baking is often difficult. However, this recipe masters the art effortlessly. The edges bake into a golden, crispy ring that provides a satisfying snap. Meanwhile, the center remains wonderfully soft and tender. This specific contrast creates a complex mouthfeel. Consequently, you enjoy the crunch of a biscuit and the chewiness of a macaroon simultaneously.
What I Recommend
Having a reliable set of baking sheets and pans makes all the difference when you’re churning out batch after batch of coconut cookies. The NutriChef 8-Piece Stackable Bakeware Set is a fantastic investment — you get everything you need in one go, and the stackable design keeps your cabinets from turning into a chaotic avalanche of pans. Consistent, even baking starts with good equipment, and this set delivers.
Getting uniform cookies isn’t just about looks — it means every single one bakes at the same rate, so nothing comes out underdone or overdone. I love using a cookie scoop set for exactly this reason, especially with coconut cookies where you want that perfectly rounded, chewy center. Having multiple sizes on hand also lets you decide whether you’re going for a dainty little bite or a big, bakery-style treat.
Once your coconut cookies come out of the oven, you need a good place to let them cool without getting soggy on the bottom. A sturdy set of cooling racks lets air circulate all the way around each cookie, which keeps the edges crisp while the centers stay perfectly chewy. Trust me, skipping this step and leaving them on the pan is a rookie mistake you’ll only make once.
Whether you’re measuring out your flour, whisking together your wet ingredients, or tossing your shredded coconut with sugar, having the right bowls within reach makes baking so much smoother. These mixing bowls with airtight lids are a kitchen workhorse — the lids mean you can also press leftover dough into a bowl, seal it up, and pop it straight in the fridge for tomorrow’s batch. Fewer dishes, less fuss, more cookies.
If you’re not already lining your baking sheets with silicone baking mats, your coconut cookies are missing out — these mats promote even browning on the bottom and prevent any toasted coconut from sticking or scorching. They’re reusable, easy to clean, and save you a fortune on parchment paper over time. Once you try them, you won’t go back.
Keeping your finished coconut cookies fresh is just as important as baking them right in the first place. These cookie storage containers are airtight and roomy enough to stack cookies in layers without crushing them, so your batch stays soft and chewy for days. They’re also great for gifting — just fill one up and you’ve got an instant present anyone would love.
Quality shredded coconut is the star of the show in these cookies, and it’s worth using something you can count on. I like keeping a bag of shredded coconut stocked in my pantry so I’m always ready to bake — it’s versatile enough to use in macaroons, granola, and toppings too. Look for unsweetened if you want more control over the sweetness in your recipe.
Never underestimate the role that a great vanilla extract plays in a coconut cookie — it rounds out the sweetness and adds that warm, bakery-style depth that makes people ask for your recipe. This pure vanilla extract is the real deal, with none of the artificial aftertaste that cheaper imitation versions can leave behind. A small splash goes a long way, and the difference in flavor is genuinely noticeable.
An ice cream scoop might seem like an unusual baking tool, but it’s my secret weapon for making extra-large, bakery-style coconut cookies with that gorgeous domed top. The sturdy lever mechanism releases dough cleanly every time, and the larger size gives you that thick, chewy cookie that holds onto all those beautiful coconut flakes. It doubles as an actual ice cream scoop for serving alongside a warm cookie — obviously.
Furthermore, the physical structure of the cookie is distinct. The shredded coconut binds the dough in a unique way. As a result, the cookies hold their shape perfectly while baking. They do not spread too thin on the pan. Therefore, you get a substantial, hearty treat every time.
A Tropical Flavor Profile
The flavor profile here is equally impressive. High-quality butter provides a rich, savory base. Additionally, the sweetness is calibrated to perfection. It never overpowers the natural nuttiness of the coconut. Thus, the taste is sophisticated rather than cloying. Hints of vanilla extract can also elevate the dough. This combination makes them truly unforgettable.
Sweetened shredded coconut is the undisputed star ingredient. It caramelizes slightly during the baking process. As a result, you get a deeper, toasty flavor. The strands also provide a delightful texture. They add a pleasant chewiness that standard sugar cookies lack. Moreover, this tropical addition transports you to a sunny paradise. It is truly a vacation for your taste buds.
Perfect Pairings and Serving Tips
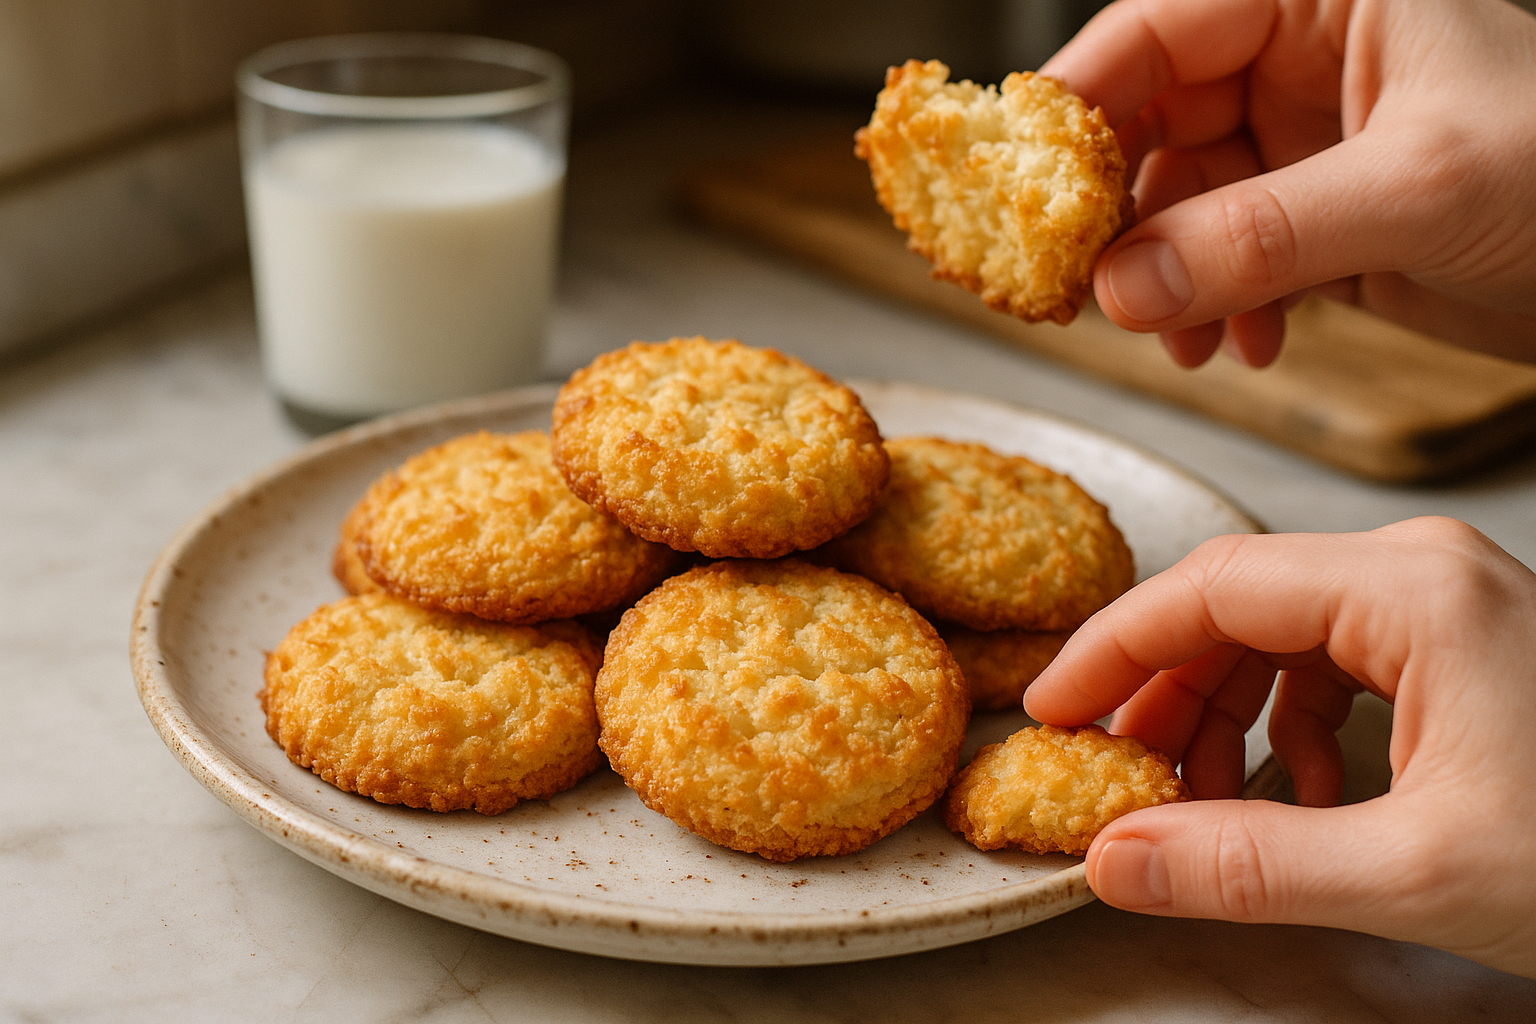
These treats are incredibly versatile for any occasion. For instance, they pair beautifully with a hot cup of dark roast coffee. The bitterness of the coffee cuts through the cookie’s sweetness. Alternatively, try them with a cold glass of milk. This classic combination highlights the buttery notes.
You can also get creative with how you serve them. Consider these delicious options:
- Ice Cream Sandwich: Press a scoop of vanilla bean ice cream between two cooled cookies.
- Chocolate Dipped: Dip half the cookie in melted dark chocolate for a decadent finish.
- Crumble Topping: Crush them over yogurt for a tropical breakfast parfait.
Finally, these cookies store surprisingly well. In fact, the coconut helps retain moisture over time. Therefore, they taste just as fresh on the third day. However, they rarely last that long in any household. They are simply too addictive to ignore.
Baking these treats requires simple pantry staples. Therefore, you likely have everything you need right now. We designed this recipe to rival the best bakery offerings available. Specifically, we focused on achieving that coveted soft center. Whether you are a novice baker or a pro, this guide ensures success.
Why You Will Adore This Recipe
Mastering the Crispy Edge
Achieving the ultimate cookie texture requires precise baking science. Specifically, the outer rim transforms dramatically during the baking process. Heat causes the sugars and butter to caramelize rapidly. Consequently, this reaction creates a golden-brown ring that snaps upon impact. It provides a sturdy, delicious frame for the rest of the treat.
Furthermore, this initial crunch wakes up the palate immediately. It signals that the cookie is fresh and well-baked. Without this crispy border, the eating experience feels flat and one-dimensional. Therefore, getting the oven temperature right is absolutely essential for success. A hotter oven sets the edges before the middle dries out.
The Secret to a Chewy Center
In contrast, the middle of the cookie offers a softer embrace. This area cooks much more slowly than the exposed edges. As a result, it retains vital moisture from the butter and eggs. The shredded coconut also plays a pivotal role here. Unlike flour, coconut fibers hold their structure without becoming tough.
Moreover, these shreds add a pleasant, fibrous resistance to every bite. This ensures the cookie bends gently rather than breaking apart. Ultimately, this chewy interior creates a satisfying mouthfeel that lingers. It prevents the dessert from feeling like a dry biscuit. This duality is the hallmark of a bakery-quality item.
Balancing Tropical Flavor Notes
Flavor harmony is just as important as physical texture. You want the coconut to be the undisputed star. However, it should never completely overwhelm the rich, buttery base. The goal is a seamless blend of tropical and savory notes. To achieve this delicate balance, consider the following factors:
- Butter Quality: High-fat butter provides a necessary savory backdrop.
- Coconut Type: Unsweetened flakes offer a pure, nutty taste.
- Extract Usage: A drop of vanilla enhances the coconut’s natural sweetness.
Additionally, the salt content matters significantly in this recipe. A pinch of sea salt cuts through the sugar effectively. Thus, it elevates the toasted coconut aroma to new heights. This careful calibration keeps you reaching for another cookie.
Simplicity is another key benefit here. You do not need fancy equipment or hard-to-find ingredients. In fact, the process takes less than 30 minutes of active time. Consequently, these make an excellent choice for last-minute gatherings. Children also love helping with the mixing process.
Finally, these cookies store beautifully. They maintain their moisture for days when kept properly. Thus, you can bake a batch on Sunday and enjoy them throughout the week. You can even freeze the dough for later cravings.
Essential Ingredients for Success
Quality ingredients make a significant difference in simple recipes. First, you need unsalted butter. Using unsalted butter allows you to control the sodium level. Make sure you soften it to room temperature before starting. This ensures it creams properly with the sugar.
Next, select sweetened shredded coconut. This ingredient provides the signature chew and sweetness. Unsweetened coconut tends to be too dry for this specific style. If you only have unsweetened flakes, the texture will change significantly.
The Foundation: Choosing the Right Flour
Selecting the correct flour is crucial for cookie texture. Specifically, standard all-purpose flour strikes the perfect balance. It offers a moderate protein content between cake and bread flour. Consequently, it creates a crumb that is tender yet sturdy. This structural integrity is vital for coconut cookies.
Without enough structure, the heavy coconut flakes might cause spreading. As a result, you could end up with flat, greasy puddles. Conversely, a higher protein flour would make the cookies too tough. Therefore, sticking to all-purpose flour ensures a chewy, satisfying bite. It supports the mix-ins while maintaining a soft interior.
Measuring for Success
How you measure your dry ingredients matters significantly. In fact, adding too much flour is a common baking mistake. This error often leads to dry, crumbly cookies. To avoid this, we suggest the spoon-and-level method.
Follow these simple steps for accuracy:
- Fluff the flour inside the bag or canister.
- Spoon it gently into your measuring cup without packing it down.
- Level the top using a straight edge, like a knife.
Furthermore, using a kitchen scale is even more precise. This attention to detail guarantees the dough hydrates properly.
Elevating Flavor with Vanilla
While flour provides structure, extracts provide the soul. Therefore, vanilla extract is an essential component of this recipe. It does more than just add a vanilla taste. Actually, it acts as a flavor enhancer for the entire cookie. It rounds out the sweetness of the sugar.
Additionally, vanilla bridges the gap between the butter and coconut. It adds a warm, floral background note. Without this ingredient, the cookies might taste flat or one-dimensional. Thus, it is just as important as salt in sweet recipes.
Pure vs. Imitation Vanilla
You might be tempted to save money on flavorings. However, the quality of your vanilla makes a noticeable difference. We strongly advocate for using pure vanilla extract. Imitation versions usually rely on synthetic vanillin. Unfortunately, these often leave a harsh, chemical aftertaste.
In contrast, pure extract is made from real vanilla beans. It offers a complex, rich flavor profile. This complexity complements the tropical taste of toasted coconut perfectly. Ultimately, premium ingredients yield a bakery-quality result. Your taste buds will certainly thank you for the upgrade.
Pro Tips for the Perfect Batch
Measuring flour correctly determines the outcome of your baking. Source Many home bakers accidentally pack too much flour into the cup. . Instead, fluff the flour with a spoon and sprinkle it into your measuring cup. Then, level it off with a knife.
The Science of Ingredient Temperature
Baking is essentially a chemistry experiment. Therefore, precision is vital for the perfect coconut cookie. The temperature of your ingredients dictates the final structure. Room temperature acts as the “Goldilocks” zone. It is neither too hot nor too cold. In this state, ingredients bond together seamlessly. Consequently, they form a stable emulsion.
This emulsion is critical for texture. When fats and liquids mix properly, they trap air. This trapped air creates a light, tender crumb. Without this aeration, your coconut cookies may feel heavy. Additionally, a smooth batter ensures even flavor distribution. Every bite should have the perfect balance of coconut and sweetness.
Why Butter Consistency is Critical
Butter consistency is the single most important variable. Using cold butter creates significant mechanical problems. It refuses to blend smoothly with sugar. As a result, you end up with hard, unincorporated chunks. These lumps create uneven pockets of fat. Furthermore, the sugar crystals cannot cut into the fat to create lift.
On the other hand, melted butter is equally damaging. It cannot hold air bubbles during the creaming process. Thus, the structure collapses quickly in the heat of the oven. Your cookies will spread rapidly into flat, greasy puddles. They will lack that signature soft, chewy center. Instead, you get a brittle, oily crisp.
The Shock of Cold Eggs
Similarly, your egg temperature plays a massive role. A cold egg acts as a shock to the system. If you add it to soft butter, the fat reacts instantly. The butter will seize up and harden again. Consequently, the batter takes on a curdled, grainy appearance.
A curdled batter rarely produces a uniform texture. The coconut flakes may not distribute evenly. Moreover, the cookies might bake unevenly. Therefore, you must temper your eggs. This ensures the emulsion remains smooth and creamy throughout the mixing process.
Quick Tips for Room Temperature Ingredients
Sometimes, we forget to take ingredients out of the fridge. However, you can speed up the process safely. Try these simple hacks to save time:
- Cube the butter: Cut cold butter into small, 1-inch cubes. This increases surface area. Consequently, it softens much faster than a whole stick.
- Warm water bath: Place cold eggs in a bowl of warm (not hot) water. Let them sit for about five minutes.
- Microwave caution: Avoid microwaving butter if possible. It often melts the inside while leaving the outside cold.
- Plate method: Place a warm glass bowl over your stick of butter. The radiant heat softens it gently.
Understanding the Mixing Process
The moment you incorporate flour into your coconut cookie dough marks a critical turning point. Gluten formation begins immediately when flour meets moisture. Therefore, your mixing technique directly impacts the final texture. Professional bakers understand this principle well. They treat flour addition as the final, delicate stage of preparation.
Watch your dough carefully during this phase. The white flour streaks will gradually disappear as you mix. However, you should stop before achieving complete uniformity. A few tiny streaks remaining is actually preferable to overmixing. Furthermore, the residual flour will incorporate during the resting period.
The Science Behind Gluten Development
Gluten proteins naturally exist in wheat flour. Additionally, these proteins activate when exposed to liquid and agitation. As a result, they form elastic networks throughout your dough. This elasticity works wonderfully for bread and pizza. In contrast, cookies require a tender, crumbly structure. Consequently, minimal gluten development is essential for coconut cookies.
Each rotation of your mixer strengthens these protein bonds. Moreover, extended mixing creates increasingly tough textures. Your cookies will emerge dense and chewy rather than delicate. Therefore, restraint during mixing produces superior results.
Practical Mixing Techniques
Consider these mixing strategies for perfect coconut cookies:
- Use a wooden spoon instead of electric mixers for better control
- Fold ingredients gently with a spatula for minimal agitation
- Mix in short 5-second bursts if using electric equipment
- Stop immediately when 90% of flour streaks disappear
Meanwhile, visual cues help determine the right stopping point. The dough should appear slightly shaggy and uneven. Furthermore, small pockets of unmixed flour are acceptable at this stage.
Timing Your Mixer Shutdown
Most home bakers mix approximately 15-30 seconds too long. However, this brief window dramatically affects texture. Set a timer for accountability if needed. Additionally, step away from the mixer between intervals. This pause allows you to assess the dough objectively.
Classic Coconut Cookies
Ingredients:
- 1 1/4 cups all-purpose flour
- 1/2 tsp baking soda
- 1/4 tsp salt
- 1/2 cup unsalted butter, softened
- 1/2 cup granulated sugar
- 1/2 cup light brown sugar, packed
- 1 large egg, room temperature
- 1 tsp vanilla extract
- 1 1/2 cups sweetened shredded coconut
Instructions:
- Preheat your oven to 350°F (175°C). Line two large baking sheets with parchment paper or silicone baking mats.
- Whisk the flour, baking soda, and salt together in a medium bowl. Set this dry mixture aside for later use.
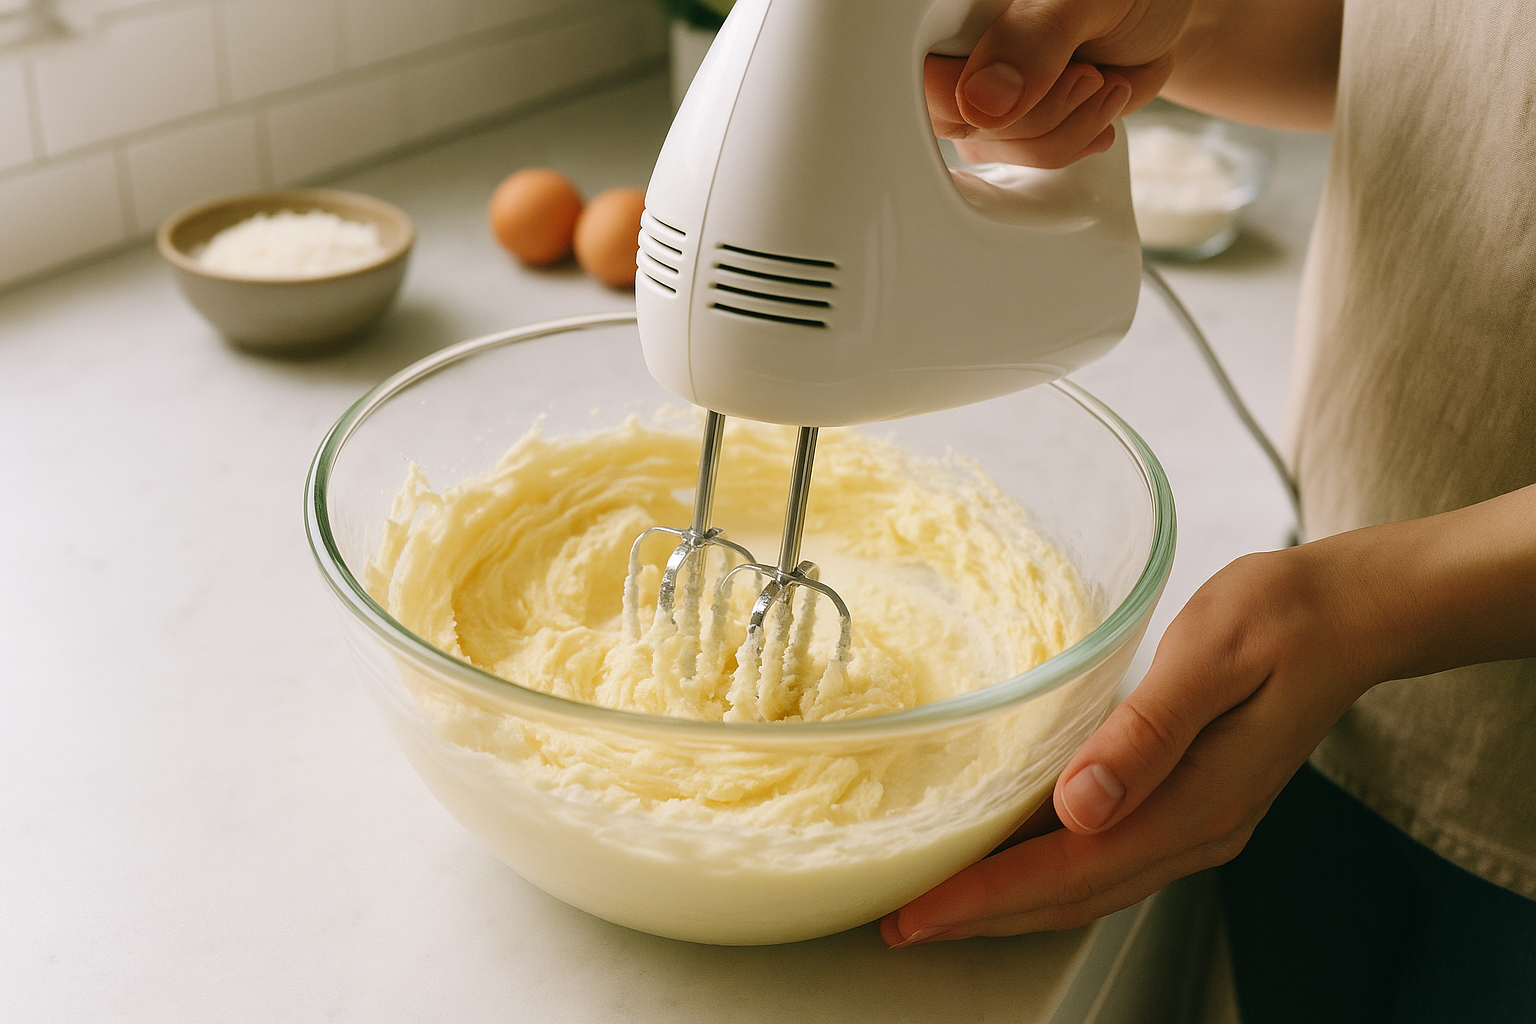
- Beat the softened butter, granulated sugar, and brown sugar in a large bowl. Use a hand mixer or stand mixer on medium speed. Continue beating for about 2-3 minutes until the mixture looks light and fluffy.
- Add the egg and vanilla extract to the butter mixture. Beat these ingredients until they fully combine and the batter looks smooth.
- Reduce the mixer speed to low. Gradually add the flour mixture to the wet ingredients. Mix only until you see no more dry flour streaks.
- Fold in the sweetened shredded coconut using a spatula. Stir gently to distribute the coconut evenly throughout the dough.
- Scoop the dough into balls using a tablespoon or cookie scoop. Place them on the prepared baking sheets, spacing them about 2 inches apart.
- Bake the cookies for 10-12 minutes. Look for golden brown edges, even if the centers still appear slightly soft.
- Remove the baking sheet from the oven. Let the cookies cool on the sheet for 5 minutes to set. Then, transfer them to a wire rack to cool completely.
Customizing Your Cookies
You can easily tweak this recipe to suit your preferences. For chocolate lovers, add a half cup of semi-sweet chocolate chips. The chocolate pairs wonderfully with the coconut. Alternatively, white chocolate chunks add a creamy sweetness.
The Power of Citrus in Baking
Coconut cookies are naturally rich and buttery. However, this density can sometimes feel heavy on the palate. Adding citrus cuts through this richness effectively. The acidity provides a necessary balance to the sweet dough. Consequently, the flavor profile becomes much more complex and vibrant. Without this acidic contrast, the coconut flavor might seem one-dimensional. Therefore, incorporating fruit zest is a simple way to elevate your recipe.
Mastering the Sugar-Rubbing Technique
You should not simply dump zest into the batter. Instead, use a specific technique to maximize aroma. Place your fresh zest directly into the granulated sugar. Then, use your fingertips to rub the two ingredients together.
Why this works:
- Friction: The abrasive sugar crystals break down the zest cells.
- Oil Release: This process forces out potent essential oils.
- Infusion: The sugar absorbs the oil, distributing flavor evenly.
As a result, your sugar will become fragrant and slightly colored. This creates a more intense flavor than adding zest at the end.
Choosing Your Flavor Combinations
While lime creates a tropical vibe, other fruits work beautifully. For instance, lemon zest offers a bright, sunny twist. It pairs perfectly with white chocolate chips or vanilla glaze. Alternatively, orange zest brings a warm, floral note to the cookie. This specific citrus pairs exceptionally well with dark chocolate chunks.
Furthermore, grapefruit zest provides a sophisticated, slightly bitter edge. This option appeals to adults who prefer less sweet desserts. Ultimately, the choice depends on the mood you want to create.
Zesting Best Practices:
- Wash thoroughly: Always scrub the fruit’s skin before zesting.
- Avoid the pith: Only grate the colorful outer layer. The white pith underneath is bitter.
- Use a microplane: This tool creates a fine texture that melts into the dough.
By following these steps, you ensure a smooth texture in every bite. Moreover, you avoid unpleasant, chewy chunks of peel.
Nuts also provide a great texture contrast. Chopped macadamia nuts or pecans work exceptionally well here. Toast the nuts beforehand to enhance their flavor. Then, fold them in alongside the coconut.
Storage and Freezing Guide
Mastering the Cooling Process
First, you must allow your coconut cookies to cool completely before packing them away. If you skip this critical step, residual heat will get trapped inside the container. Consequently, this trapped heat creates condensation. This unwanted moisture destroys the cookie’s texture, turning a crisp edge into a soggy mess.
Therefore, patience is key for the best results. Place your baked goods on a wire cooling rack immediately after baking. This allows air to circulate around the entire cookie. Furthermore, wait until they feel cool to the touch before moving them.
Choosing the Right Container
Once cooled, the storage vessel matters significantly. You should always use a high-quality airtight container to preserve freshness. For example, plastic containers with locking lids or glass jars with rubber gaskets work perfectly. These barriers effectively prevent air exposure.
As a result, the coconut flakes remain chewy rather than becoming hard or stale. Additionally, you should layer the cookies carefully to prevent breakage.
Follow these layering steps:
- Place a single layer of cookies at the bottom.
- Cover that layer with a sheet of parchment paper.
- Stack the next layer on top gently.
- Repeat until the container is full.
The White Bread Secret
To keep soft cookies tender, you can use a classic baker’s trick. Simply place a slice of fresh white bread inside the container with your treats. Surprisingly, the sugar in the cookies acts as a magnet for moisture.
Therefore, the cookies draw humidity from the bread slice. Over time, the bread becomes rock hard, but your coconut cookies stay perfectly soft. This method is incredibly effective for maintaining a chewy texture. However, ensure you replace the bread slice every two days to prevent mold growth.
Freezing for Longevity
Sometimes, you may need to store your batch for longer than five days. In this case, your freezer is the best option. Coconut cookies freeze exceptionally well when prepped correctly.
Freezing instructions:
- Wrap cookies individually in plastic wrap for grab-and-go snacks.
- Alternatively, stack them in a freezer-safe bag with parchment paper between layers.
- Squeeze as much air out of the bag as possible before sealing.
Consequently, your cookies can last for up to three months without losing flavor. Finally, simply thaw them on the counter for an hour before serving.
Preparing Cookie Dough for Freezing
Freezing coconut cookie dough is a game-changer for busy bakers. This method allows you to prepare batches in advance. You can then bake fresh cookies whenever cravings strike. Moreover, the process requires minimal effort upfront. Simply use a cookie scoop to portion the dough into uniform balls. This ensures even baking later on.
Arrange the dough balls on a parchment-lined baking sheet. Make sure they don’t touch each other during freezing. Otherwise, they’ll stick together and become difficult to separate. Additionally, spacing them properly allows air to circulate around each portion. This promotes faster, more even freezing throughout.
The Flash-Freezing Technique
Place the baking sheet in your freezer for approximately two to three hours. However, you can also leave them overnight for convenience. The dough balls should feel rock-hard when properly frozen. Furthermore, this initial freezing step prevents them from clumping together later. Bakers call this technique “flash-freezing,” and it works wonderfully for cookie dough.
Once the coconut dough balls achieve a solid state, act quickly. Transfer them into a labeled zip-top freezer bag or airtight container. Consequently, this protects them from freezer burn and absorbing unwanted odors. For example, strong-smelling foods like onions can affect the cookie flavor. Therefore, proper storage is essential for maintaining quality.
Storage Tips and Benefits
Write the baking date and temperature on the bag with a permanent marker. This information proves invaluable weeks later when you’re ready to bake. Additionally, note any special instructions, such as adjusting bake time. Frozen dough typically requires an extra two to three minutes in the oven.
These prepared dough balls stay fresh for up to three months. As a result, you’ll always have homemade cookies within reach. No more emergency store runs for dessert.
You can bake the dough directly from the freezer. Simply add one or two extra minutes to the baking time. Consequently, you can enjoy fresh warm cookies whenever a craving strikes. This method works perfectly for unexpected guests.
Conclusion
These coconut cookies offer a delightful escape with every bite. The combination of buttery dough and sweet coconut proves irresistible. By following our tips on measuring and mixing, you ensure perfect results every time. Therefore, gather your ingredients and preheat your oven today. Your kitchen will smell amazing, and your family will thank you.
*As an Amazon Associate, I earn from qualifying purchases.