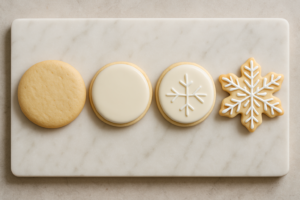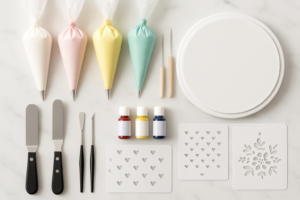

The first batch of royal icing cookies I ever made looked like something a toddler had decorated during an earthquake. I had spent three hours cutting out perfect little snowflake shapes, only to watch my icing slide right off the edges, pool into sad little puddles, and dry with giant air bubbles cracking across the surface. My kitchen counter was a disaster zone of food coloring stains, and I sat on the floor next to the trash can — where most of those cookies ended up — and genuinely cried. If you’re just starting out with royal icing cookie decorating as a beginner, I want you to know two things: first, that moment on the floor is practically a rite of passage, and second, it does not have to take you six months to figure out what went wrong.
Why Royal Icing Broke My Heart Before It Won It
Let me back up to Christmas two years ago. My daughter Emma, who was seven at the time, had been begging me to make decorated sugar cookies “like the ones at the fancy bakery.” I said yes with way too much confidence, watched approximately four YouTube videos, and declared myself ready. I was not ready. What followed was six months of obsessive trial and error — failed batches, wasted bags of powdered sugar, and more than a few heated debates with myself about icing consistency. But here’s the thing: every single failure taught me something, and I’m handing all of those lessons to you right now, for free, before you waste a single egg white.
The Royal Icing Basics Every Beginner Needs to Know
Consistency Is Everything — Literally Everything
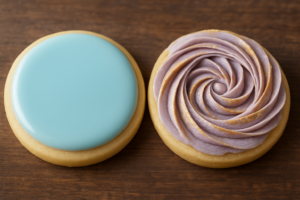
The number one mistake I made for months was not understanding that royal icing has different consistencies for different jobs, and using the wrong one is why your cookies look like a melting wax museum. Here’s the breakdown that finally clicked for me:
- Stiff consistency (think toothpaste) is for piping outlines, writing, and any detail work that needs to hold its shape.
- Medium consistency is your workhorse for borders and rosettes.
- Flood consistency (think syrup — the 10-second rule, where a ribbon of icing disappears into the bowl in about ten seconds) is for filling in the centers of your cookies smoothly.
The easiest way to adjust consistency? Add water one teaspoon at a time to thin it, or sifted powdered sugar one tablespoon at a time to thicken it. Patience here is non-negotiable.
Air Bubbles Are Not Your Destiny
Those craters I was getting on my dried cookies? Air bubbles. You can pop them within the first minute or two of flooding with a scribe tool or even a toothpick. You can also lightly bang the cookie on the counter right after flooding to help air rise to the surface. And mix your icing on low speed — high speed whips in air like crazy, which is exactly what you don’t want for flooding icing.
Drying Time Is Sacred, Don’t Rush It
Your flooded cookies need a minimum of six to eight hours to dry before you add a second layer of detail. Overnight is better. I know, I know — it feels like forever. But I have destroyed more cookies by rushing this step than by any other mistake combined. If you live somewhere humid, a food dehydrator on the lowest setting or even a fan blowing gently across your cookies can speed up drying without cracking.
The Royal Icing Recipe That Changed Everything
Once I stopped winging it and actually measured things properly, I understood why my first attempts had been such disasters. This is the exact base recipe I use now — the one that finally made my icing behave like icing instead of a science experiment gone wrong. The beauty of this recipe is that you start with one basic formula and then adjust it to whatever consistency you need using the techniques I mentioned above.
What You’ll Need
- 1/4 cup meringue powder (43 grams)
- 3/4 cup cool water (170 grams)
- 1/4 teaspoon table salt
- 3 to 4 cups sifted confectioners’ sugar (powdered sugar) — start with 3 cups (340 grams) and add more as needed
- Food coloring (optional — gel food coloring works best and won’t thin your icing like liquid colors do)
How I Make It, Step by Step
- Combine the meringue powder, cool water, and salt in a medium bowl. Whisk these together until the meringue powder is fully dissolved and you don’t see any lumps — this usually takes a minute or two of steady whisking.
- Sift your powdered sugar to remove any lumps that would create graininess in your final icing. (Yes, sifting matters more than you think.)
- Gradually add the sifted powdered sugar to the meringue mixture, starting with 3 cups. Mix on low speed with an electric mixer so you don’t whip in a ton of air bubbles.
- Once the sugar is incorporated, you’ll have a very thick, stiff mixture. This is your base — from here, you adjust. If you want flood consistency for filling, add a teaspoon of water at a time and mix on low until you reach that 10-second ribbon stage. If you want it stiffer for piping details, add a tablespoon of powdered sugar at a time.
- If you’re using food coloring, add it now — just a tiny drop of gel coloring at a time, mixing on low speed until it’s fully incorporated and the color is even throughout.
- Use your icing right away, or cover it tightly with plastic wrap until you’re ready. Royal icing can dry out quickly, so covering it is non-negotiable if you’re decorating over several hours.
This recipe makes enough icing to decorate roughly two dozen cookies with a mix of outline, flood, and detail work. If you’re doing a smaller batch, you can halve the recipe easily — just remember to keep your ratios consistent. The magic isn’t in some secret ingredient; it’s in understanding your starting point and then having the confidence to adjust from there.
My Baking Essentials for Royal Icing Cookie Decorating
Once I stopped fighting royal icing and started giving it the right tools and ingredients, everything changed. Here’s what I actually use and genuinely love:
The Meringue Powder That Finally Stopped My Royal Icing From Sliding Off the Cookie
For months, I couldn’t figure out why my icing wouldn’t set properly — it would either stay too runny or crack into a thousand pieces as it dried. I learned the hard way that inconsistent meringue powder was the culprit, and switching to a reliable, quality powder changed everything about how my decorated cookies turned out.
What works
- The icing actually holds its piped edges instead of slowly melting down the sides of the cookie — I can decorate with confidence now instead of watching it happen in real time.
- It dries with a smooth, glossy finish when I use the right consistency, no more cracked, chalky surface that looks like it’s been through a drought.
- The powder mixes smoothly without any weird graininess or foam issues that would throw off my whole batch ratio.
What doesn’t
- It’s pricier than some of the generic brands I used to buy, which stung when I was already throwing out failed batches left and right.
- The gluten-free version still requires you to dial in the perfect liquid-to-powder ratio — there’s no magic shortcut, and adding even a teaspoon too much water will send you right back to icing puddles.
I was genuinely skeptical that swapping powders would make that big a difference — I almost convinced myself the problem was my technique, not my ingredients. But once I tried Judee’s Gluten Free Complete Meringue Powder Mix, I finally understood what properly constructed royal icing was supposed to feel like.