Why Easter Cookies Make Spring Special
Easter cookies bring families together in the kitchen during spring’s most colorful season. These treats combine festive decorating with delicious flavors that kids and adults love. Moreover, baking cookies creates lasting memories while filling your home with wonderful aromas.
Spring baking offers the perfect opportunity to try new recipes and techniques. You can experiment with pastel colors, fun shapes, and creative decorations. Additionally, homemade cookies make thoughtful gifts for neighbors, teachers, and friends during the Easter season.

Essential Tools for Easter Cookie Baking
Gathering the right tools makes cookie baking easier and more enjoyable. You need basic equipment that helps create professional-looking results without frustration. Furthermore, having proper tools ensures your cookies turn out perfectly every time.
Start with quality cookie cutters in Easter shapes like bunnies, eggs, and chicks. Rolling pins with thickness guides help maintain consistent dough depth. Silicone baking mats prevent sticking and make cleanup simple. Additionally, invest in piping bags and decorating tips for detailed icing work.
The Recipes: Five Easter Cookies I Bake Every Spring
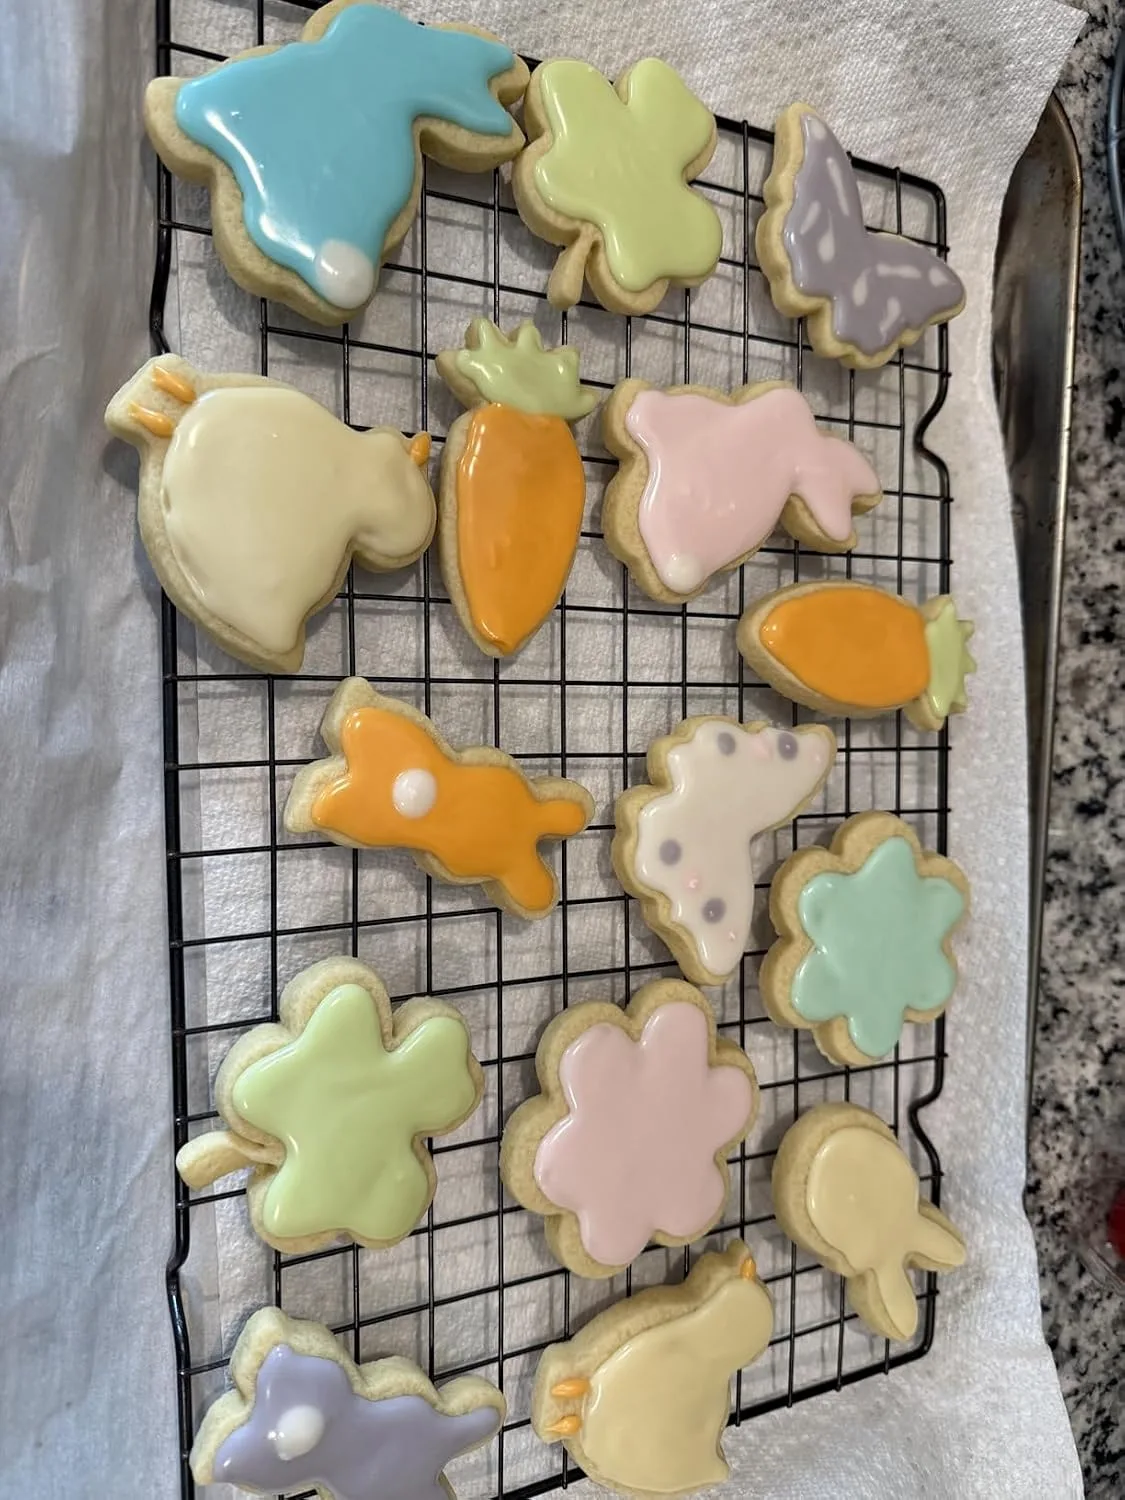
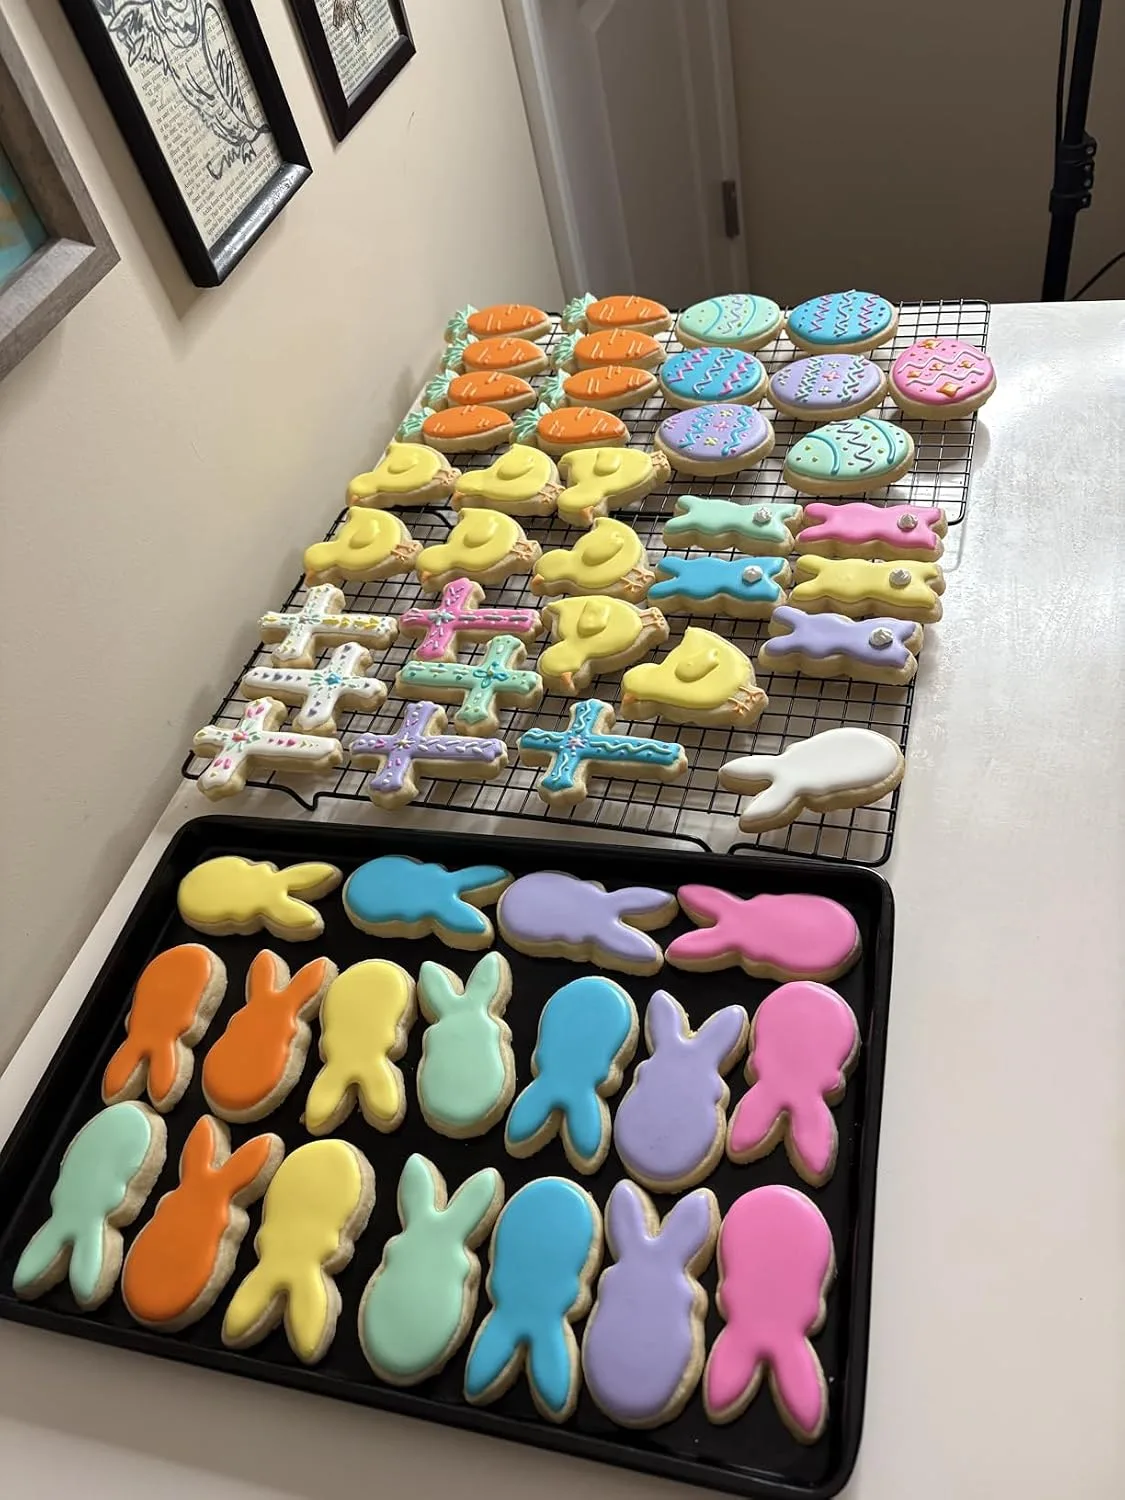
Now for the part you actually came for. These are the five recipes in my spring rotation, starting with the cut-out sugar cookies that all those bunny and chick cutters were made for. Every measurement here is exactly what I use in my own kitchen, so you can bake right alongside me.
1. Classic Cut-Out Sugar Cookies (The Bunnies, Eggs, and Chicks)
This is my workhorse dough: soft centers, edges crisp enough to hold a sharp bunny ear, and no spreading if you chill it properly. It makes about 24 three-inch cookies. Plan on 20 minutes of mixing, 1 to 2 hours of chilling, and 12 to 13 minutes in the oven per tray.
What You’ll Need
- 2 1/4 cups (281g) all-purpose flour, spooned and leveled
- 3/4 teaspoon baking powder
- 1/4 teaspoon salt
- 3/4 cup (170g) unsalted butter, softened
- 3/4 cup (150g) granulated sugar
- 1 large egg, room temperature
- 2 teaspoons pure vanilla extract
- 1/4 teaspoon almond extract (optional, but it tastes like a bakery)
How I Make Them, Step by Step
- Whisk the flour, baking powder, and salt together in a medium bowl and set it aside.
- Beat the butter and sugar together on high speed for about 2 minutes, until light and creamy. Add the egg, vanilla, and almond extract and beat until combined, scraping the bowl as needed.
- Add the dry ingredients on low speed and mix just until the dough comes together. It will be slightly sticky — that’s right.
- Divide the dough in half and roll each half out to 1/4-inch thickness between two sheets of parchment paper. Stack the rolled-out sheets on a baking sheet and chill for at least 1 hour (or up to 2 days).
- Preheat the oven to 350°F (177°C) and line two baking sheets with parchment or silicone mats.
- Cut shapes from the cold dough and arrange them 2 inches apart on the sheets. Re-roll and chill the scraps between rounds — warm dough is exactly what tears those bunny ears.
- Bake for 12 to 13 minutes, until the edges are just barely golden. Cool on the pan for 5 minutes, then move to a wire rack and cool completely before icing.
2. Easy Royal Icing for Pastel Decorating
This icing dries with that smooth, glossy finish you see on bakery cookies, and one batch comfortably covers all 24 cut-outs above with color to spare. It comes together in about 5 minutes.
What You’ll Need
- 4 cups (480g) confectioners’ sugar, sifted
- 3 tablespoons meringue powder
- 9 to 10 tablespoons room-temperature water
- 1 teaspoon clear vanilla extract (optional)
- Gel food coloring in soft pinks, mint green, lavender, and yellow
How I Make It
- Beat the confectioners’ sugar, meringue powder, and 9 tablespoons of water on high speed for 1 1/2 to 2 minutes, until glossy with soft peaks. Add the vanilla if using.
- Check the consistency: icing drizzled off the whisk should smooth back into the bowl within 5 to 10 seconds. Too thick, add water 1 teaspoon at a time; too thin, add a spoonful more sugar.
- Divide into small bowls, tint each a pastel shade with a toothpick-dab of gel color, and transfer to piping bags. Keep any waiting icing covered with a damp towel — it crusts fast.
- Outline each cookie, flood the middle, and nudge the icing into corners with a toothpick. Let decorated cookies dry uncovered for at least 2 hours (overnight before stacking or gifting).
3. Lemon Crinkle Cookies
When I want something bright and spring-flavored that needs zero decorating, these are it — sunny, crackly-topped, and gone within a day at my house. Makes about 24 cookies: 15 minutes of prep, 30 minutes of chilling, and 9 to 11 minutes of baking per tray.
What You’ll Need
- 1/2 cup (113g) unsalted butter, softened
- 1 cup (200g) granulated sugar
- 1 large egg
- 1/2 teaspoon vanilla extract
- 1 tablespoon fresh lemon zest (about 1 large lemon)
- 1 tablespoon fresh lemon juice
- 1 1/2 cups (188g) all-purpose flour
- 1/4 teaspoon baking powder
- 1/8 teaspoon baking soda
- 1/4 teaspoon salt
- 1/2 cup (60g) confectioners’ sugar, for rolling
How I Make Them
- Cream the butter and granulated sugar for 2 to 3 minutes, then beat in the egg, vanilla, lemon zest, and lemon juice.
- Stir in the flour, baking powder, baking soda, and salt just until no dry streaks remain, then chill the dough for 30 minutes.
- Preheat the oven to 350°F (177°C). Roll the dough into 1 1/2-inch balls (about 23g each) and roll each generously in the confectioners’ sugar.
- Space the balls 2 inches apart on lined baking sheets and bake for 9 to 11 minutes, until the tops crackle and the bottoms are barely golden. Cool on the pan for 5 minutes before moving to a rack.
4. Coconut Macaroon Nests
These chewy little nests filled with candy eggs are the cookie my neighbors specifically request every April. Makes about 12 nests: 10 minutes of prep and 18 to 20 minutes in the oven.
What You’ll Need
- 3 cups (255g) sweetened shredded coconut
- 3/4 cup sweetened condensed milk
- 1 teaspoon vanilla extract
- 2 large egg whites
- 1/4 teaspoon salt
- 36 candy-coated chocolate eggs, for filling
How I Make Them
- Preheat the oven to 325°F (163°C) and line a baking sheet with parchment. Stir the coconut, condensed milk, and vanilla together in a large bowl.
- In a separate bowl, beat the egg whites and salt to stiff peaks, then gently fold them into the coconut mixture.
- Scoop 12 mounds (about 2 tablespoons each) onto the sheet and press a well into the center of each with your thumb or the back of a teaspoon.
- Bake for 18 to 20 minutes, until the edges turn golden. Re-press the wells while warm, cool completely, then tuck 3 candy eggs into each nest.
5. No-Bake Bird’s Nest Cookies (The Kid-Helper Recipe)
No oven, four ingredients, and small hands can do almost every step — this is the one I hand off to the kids while the sugar cookies chill. Makes 12 nests in about 15 minutes plus setting time.
- 1 cup (170g) butterscotch chips
- 1 cup (170g) semi-sweet chocolate chips
- 4 cups crunchy chow mein noodles
- 36 candy-coated chocolate eggs
- Melt the butterscotch and chocolate chips together in the microwave in 30-second bursts, stirring between each, until smooth.
- Fold in the chow mein noodles until every strand is coated.
- Drop 12 mounds (about 2 heaping tablespoons each) onto a parchment-lined sheet and shape each into a nest with a dent in the middle.
- Press 3 candy eggs into each nest and let them set on the counter for 30 to 60 minutes, or 10 to 15 minutes in the refrigerator.
Every cut-out cookie above lives or dies by a clean stamp, which brings me to the cutters themselves.
The Easter Cookie Cutters That Finally Stopped Sticking to My Dough
Easter shapes like bunnies, eggs, and chicks are iconic, but poorly designed cutters that stick, drag, or crumble your dough can turn festive decorating into frustrating cleanup. After years of wrestling with dull cutters and dough-clinging edges, I realized the right set makes the difference between clean impressions and ragged disaster.
What works
- The sharp edges slice through chilled dough cleanly on the first push—no wiggling, twisting, or re-cutting needed, which means less toughening of the edges.
- The shapes release instantly without sticking, even on soft dough, because the metal is slick enough that a light tap pops them right out.
- Having a full set of festive Easter shapes means I’m not hunting through drawers or improvising—bunnies, eggs, chicks, and baskets are all there when I need them.
What doesn’t
- The smallest details (like bunny ears) can still tear if your dough is even slightly warm, so you really do need to keep it chilled between cuts.
- Handwashing is required—the dishwasher can dull the edges over time, which defeats the whole point of investing in sharp cutters.
I’ll admit I was skeptical that spending more on a cutter set would actually save me time in the kitchen, but the first batch proved me wrong—no more scraps from torn edges, no more frustration. Grab this festive Easter cookie cutter set and you’ll see what I mean.
This post contains affiliate links. As an Amazon Associate, I earn from qualifying purchases at no extra cost to you.